Want to make an iPhone ringtone with your own music? Just follow the step-by-step instructions below. Make sure to start out with songs that are mp3s or are otherwise DRM-free. *Updated for iTunes 11*
How to Make an iPhone Ringtone in iTunes:
1. Open iTunes.
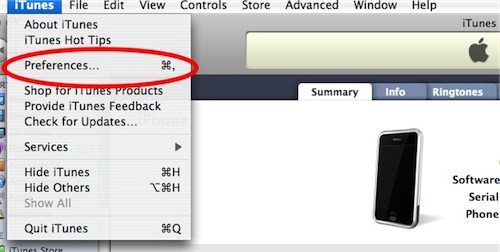
2. Open Preferences in the iTunes menu at the top (it may be under Edit for Windows users):
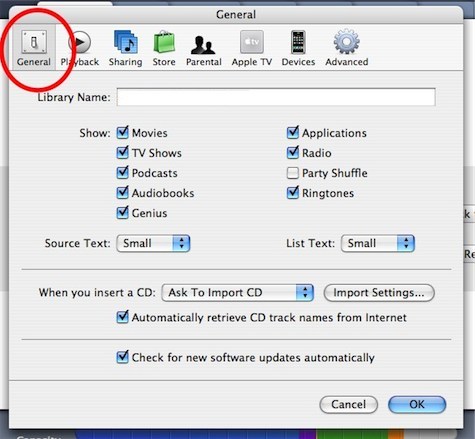
3. Select the General tab:
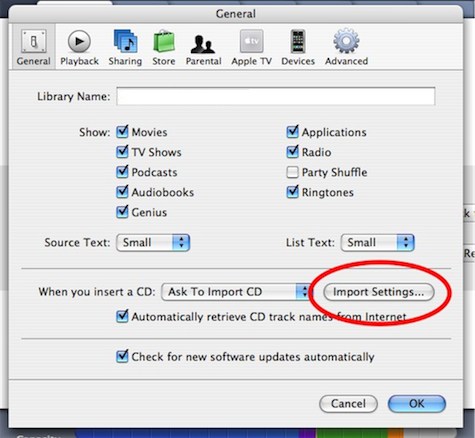
4. Select Import Settings:
5. Click on the dropdown list after Importing Using:
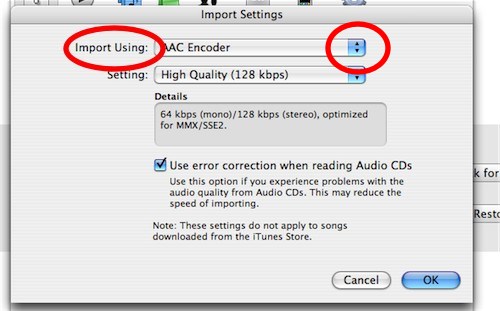
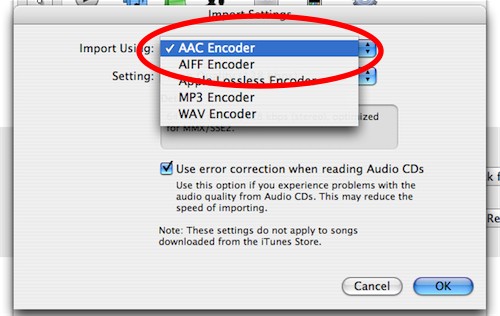
6. Select AAC Encoder (it may already be the default):
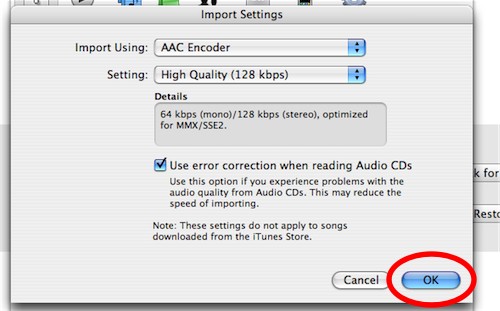
7. Select OK to go back to the Preferences, then select OK again.
8. Select Music in the left iTunes sidebar and find a song you want to make into a ringtone:
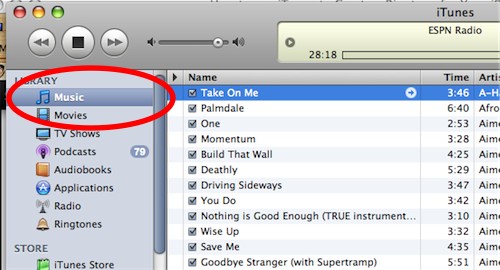
9. You’ll need to find a 40 second or less section of the song to turn into a ringtone. Note (or write down) the starting and stopping point of the section of the song. You can see the time of the song in the play window at the top of iTunes:

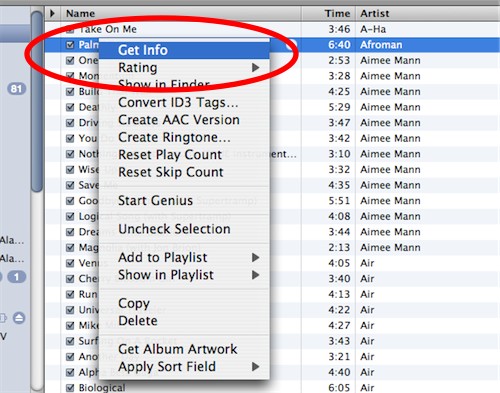
10. Right click on the song, and select Get Info:
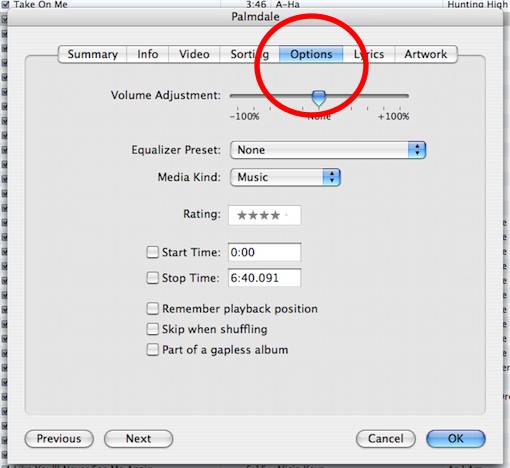
11. Select the Options tab at the top:
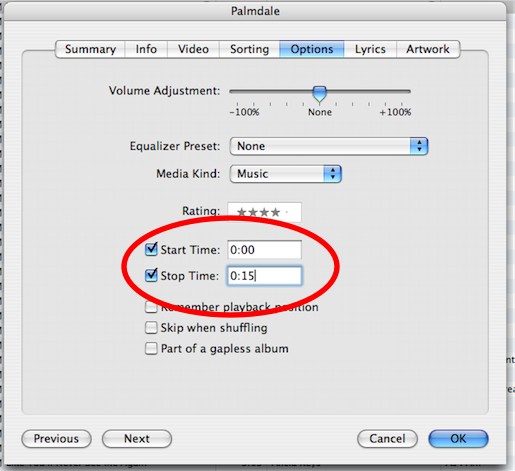
12. Enter the start and stop time of the clip in the corresponding boxes and make sure the checkboxes are checked when you are finished:
13. Click OK in the bottom right.
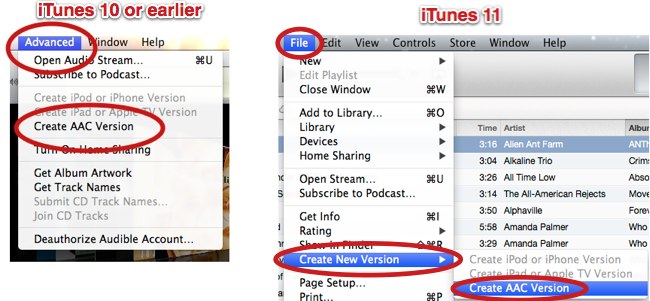
14. In the iTunes menu at the top, click Advanced, then Create AAC Version from the drop-down menu (in iTunes 11, it’s File –> Create New Version –> Create AAC Version):
15. You should see a second version of the song appear in iTunes, only with the shorter play time. Click to play to make sure it sounds how you’ll want the ringtone to sound.

16. We aren’t quite finished yet! Now we have to change the file format so that it will appear as a ringtone in iTunes.
17. Navigate to the folder where the new clip is stored on your computer (it will be in the same folder as the original version of the song). To find it in Windows, right-click the clip in iTunes, then choose Show in Explorer. For Mac, right-click and select Show In Finder.
18. Copy the song (press Control and C for Windows, Command and C for Mac), and paste the song in the same folder (Control and V or Command and V) so that a third version appears.

19. Now, change the file extension of the third version from .m4a to .m4r.
Troubleshooting: Don’t see the file extension? Windows 7: click the Start button, Control Panel–>Appearance and Personalization–>Folder Options–>View tab–>and uncheck Hide Extensions for known file types. For Windows XP: in the Explorer window, go to Tools –> Folder Options –> View and uncheck Hide extensions for known file types. For Vista: Organize –> Folder and Search Options and uncheck Hide extension for known file types.

20. Rename the file, if you want (for example, CoolRingtone.m4r). Note: If there are symbols such as underscores or hyphens in the name, you must remove them.
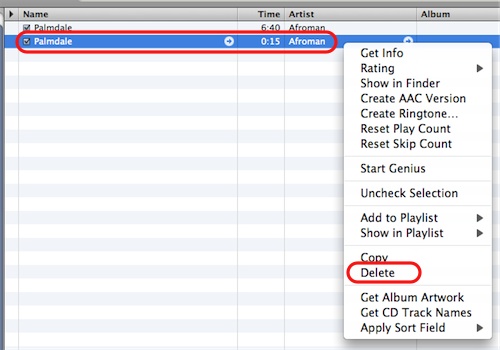
21. Important: In iTunes, delete the first AAC clip you made by right-clicking on the clip and selecting delete (if you don’t do this, iTunes might not accept the new ringtone):
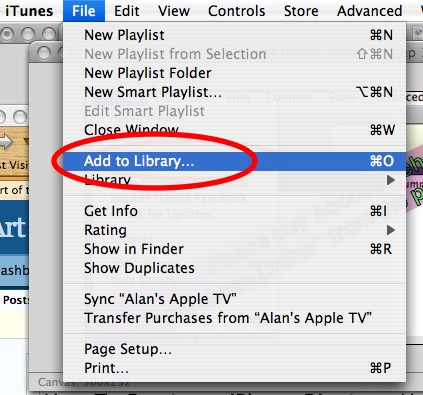
22. Go back to the folder with the new ringtone file (.m4r file). Drag and drop the file into iTunes. Or import it by opening iTunes, select File, and select: Windows XP/Vista: Add File to Library, Mac: Add to Library.
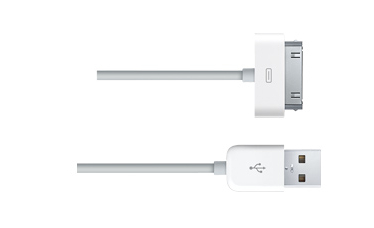
23. Now we need to sync the ringtone to your iPhone. Connect the iPhone to the computer.
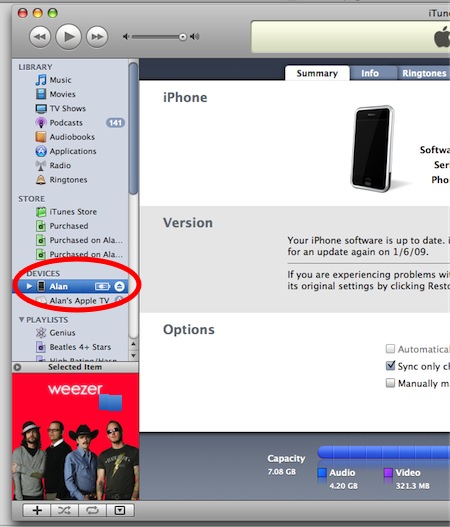
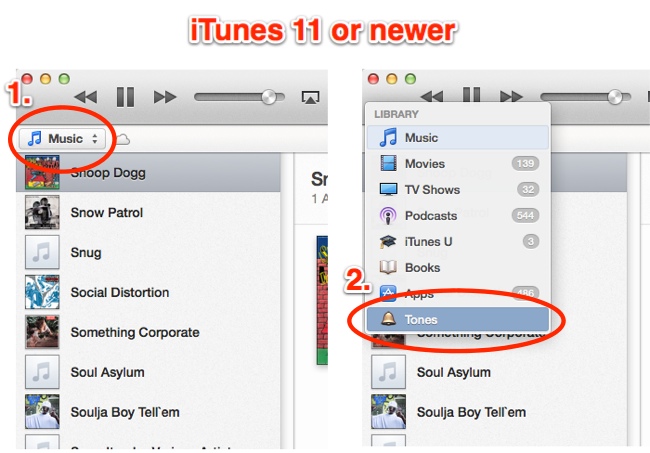
24. Click on your iPhone in the left sidebar in iTunes (Note: for iTunes 11, your iPhone can be found under Devices at the top right):
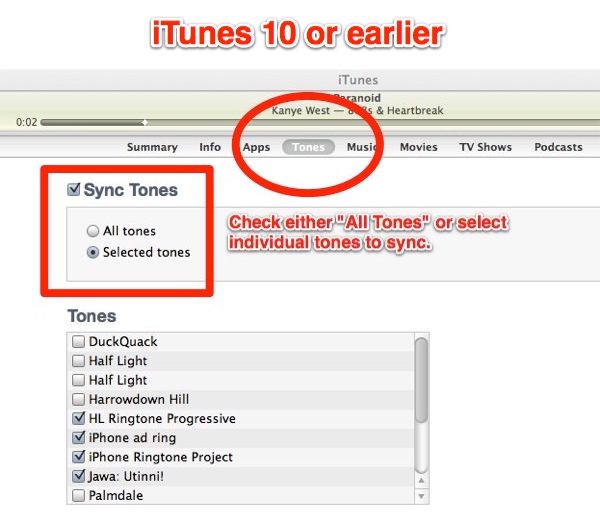
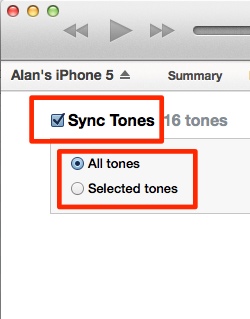
25. Click on the Tones tab, check the Sync tones checkbox, then check either All tones or Selected tones. If you choose Selected ringtones, make sure your new ringtone is also checked so it will sync:
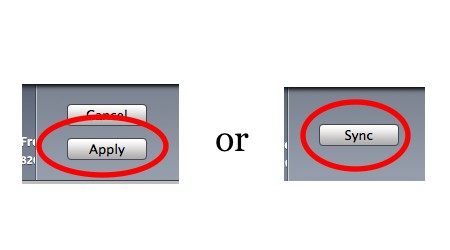
26. Now click the Apply button in the bottom right (it may also say Sync. Click Sync if it does).
And that’s it. You’ve done it! The ringtone is now on the iPhone. Got to Settings on your iPhone, tap Sounds, and you can change to your new ringtone. If the ringtone doesn’t show up on the iPhone, follow the Troubleshooting steps below, else go to the Clean Up section for one important last step.
Troubleshooting
Did the ringtone not appear on your iPhone? Follow these steps.
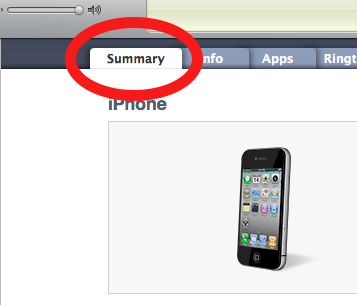
1. Click on the Summary tab for your iPhone in iTunes:
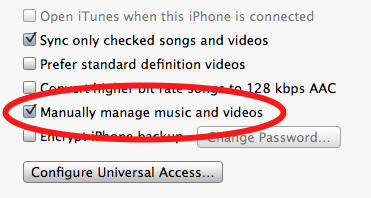
2. See if the checkbox labeled Manually manage music and video is checked. If not, check it.
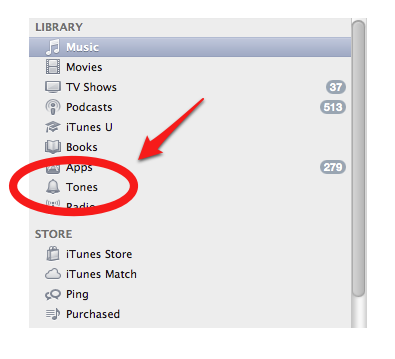
3. Click on Tones in the left sidebar (older versions of iTunes may say Ringtones instead) and find the ringtone:
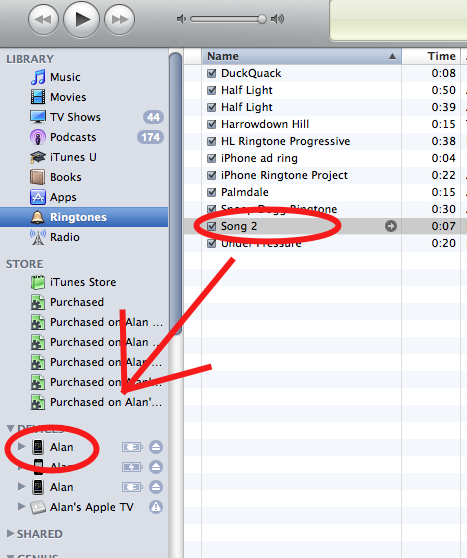
4. Drag and drop the ringtone onto your iPhone in the left sidebar. The iPhone should begin synching immediately, and the ringtone will appear shortly on your iPhone:
More Troubleshooting
Problem: I don’t see Tones or Ringtones in the iTunes Sidebar.
Go into Preferences–>General, and under Show make sure the Tones checkbox is checked.
Problem: You get a scary message “All existing songs, movies and TV shows on the iPhone will be removed.”
You likely received this message because you’ve never synced your iPhone with iTunes before and therefore don’t have a back-up of your iPhone data. Cancel the current sync. Unplug your iPhone and plug it back in again. Right click on your iPhone in the left sidebar and select Back Up:
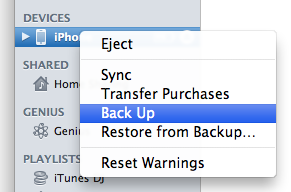
Now that iTunes has an image of your current iPhone to work from, right click on it again in the left sidebar and select Sync.
Clean Up
You made the ringtone, but there’s one clean-up task to do. We need to fix the Start/Stop time of the original song. Otherwise, the next time you play the song, it won’t play the whole thing. In iTunes, right click the original song, select Get Info –> Options and reset the Start/Stop time by deleting the numbers and leaving the fields blank. All done!


