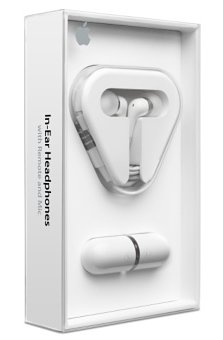
Before they even shipped, the new Apple In-Ear Headphones ($79.00) stood out on paper thanks to their dual sound drivers, a feature usually found in headphones that cost $200 or more. But do they sound as good as their more expensive competitors? For the most part, yes. We’ve found the sound performance to be full, detailed, and well rounded—although lovers of over-the-top bass will be disappointed. They are impressive for their price point, making them a good value. If you’re looking to upgrade your iPhone headphones, the Apple In-Ear Headphones are a big step up from the default iPhone headphones and outclass similarly priced third-party competitors.
Fit and Comfort
Apple includes three sizes of silicone ear-tips: small, medium, and large. Because everyone’s ears are different, it’s tough to judge the quality of fit other than on a person-by-person basis. In my initial tests, none of the ear-tips formed a good seal. But trying again, I discovered a little wiggling was required to place the tips properly. This caused a dramatic improvement in not only the snugness of the headphones, but thanks to a good seal, also in the overall sound quality.

I tested the earphone during a 20-minute jogging session on a treadmill, and they stayed stuck in my ear throughout. The ear-tips are comfortable to wear during long listening sessions: I had a two-hour podcast-listening marathon, and the earphones did not leave any soreness or irritation in my ear. (*Update* It’s not recommended you use Apple headphones while working out, as they are, from my experience, easily water damaged.)
Sound
Thanks to the dual sound drivers, the Apple In-Ear Headphones deliver detailed, balanced sound. The drivers work much like a tweeter and woofer in a floor speaker–separating the highs and lows allows each to be heard more distinctly, as opposed to the muddled sound produced when all frequencies come from a single speaker.

The Apple In-Ears deliver a good amount of bass–I could feel the physical thump that’s telltale of good bass–but it’s obvious that Apple’s goal is to deliver clear, well-rounded sound. Those looking for headphones with bass-heavy sound should look to another brand like V-Moda or the Shure E2Cs. However, these bass-heavy headphones sacrifice nuance to deliver the full low end. For those who listen to a wide range of genres (like me), it’s just as important hear the acoustic guitar as the bass drum.
Overall, the sound of the Apple In-Ears is much superior to that of the default iPod and iPhone headphones. Music sounds more full-bodied, with both highs and lows strong and distinct. The In-Ear’s eartips go deep into the ear, delivering a closer, more intimate sound. The sound isolation not only keeps ambient sounds out, but keeps the sound from the headphones in your ear and not dissipating outward.
Noise Isolation
The Apple In-Ears tend to muffle sound rather than deliever pure sound isolation. While listening to music, all but the loudest ambient noises disappear. But with the gaps in the music or podcasts, people talking nearby can be faintly heard as a muffled, indistinguishable conversation.
Compatibility With the iPhone
Apple does not officially list the In-Ears as iPhone-compatible, but every feature of the headphones works with the iPhone but the volume controls. The Play/Pause/Answer button works just like the button on the default headphones. The quality of sound from the microphone was on par with that of the default headphones.

Durability
The durability of the In-Ears is their most worrisome aspect. As a heavy user, I’ve been through two pairs of default iPhone headphones, and it appears the In-Ears are made from the same material. The cord, in particular, tends to get frayed, exposing bare wires. And speaking from personal experience, in the past, the headphone plug has not been strong enough to endure repeated accidental yankings from the headphone jack. If you are a rough, heavy user of your headphones, expect to pay for replacements in the future. My pace seems to be around every 8 months or so.
Conclusion
The default iPhone headphones are adequate for the casual listener, but many iPhone owners turn to third-party headphones for superior sound quality and sound isolation features, sometimes at a big hit to their wallet. The dual drivers of the Apple In-Ear Headphones deliver that superior sound quality, and they do it at an affordable price. The combination of quality with a low price point make the In-Ears a true bargain, one that will most likely force other companies to decrease their prices on premium headphones as well. We can highly recommend the Apple In-Ear Headphones.

Tech Specs
- Frequency response: 5Hz to 21kHz
- Impedance (100Hz): 23 ohms
- Sensitivity (100Hz): 109 dB SPL/mW
- Weight: 0.4 ounce (10.2 grams)
- Four-conductor 3.5-mm audio jack
Questions and Answers:
How long is the cable?
54.9 inches, about an inch shorter than the default headphones.
Does the Button and Microphone Work With Apple Laptops?
Yes, you can use the button to play and pause tracks on the current generation Macbooks (the generation released in late 2008). The volume button and microphone work as well. The button and volume controls don’t work on previous generations of Macbooks.
Links:
Official website for Apple In-Ear Headphones