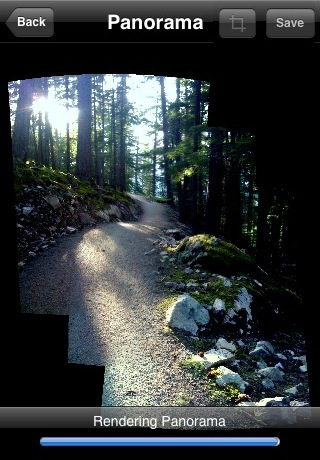
Category: iPhone Camera

Review: iStabilizer, an Inexpensive Way to Use Your iPhone With Standard Camera Tripods


Review Summary


Price: $15

Art of the iPhone’s Rating: ★★★★★
(5 stars out of 5)

Review Summary: The iStabilizer is a handy tool that provides a quick and hassle free way to attach the iPhone to a tripod. Highly recommended for its ease of use and versatility. It works with any 1/4″ x 20 tripod screw (which is standard).

The iStabilizer ($15) is an inexpensive solution for attaching your iPhone to a tripod, and you can do so without removing your iPhone case or using any special equipment other than the iStabilizer itself. The iStabilizer is a simple clamp-like tool that can screw into any standard tripod and hold any current or past version of the iPhone in its pinchers, as well as a bunch of other small devices (iPods, small cameras, etc). It’s a great idea because the iPhone’s camera is capable of taking high quality photos and videos. But does the iStabilizer perform well in the field? Read on to find out.

In a nutshell, the iStabilizer works great. I tested it with my iPhone 5 and my camera tripod (which I bought for $25 from Amazon and which I can recommend if you’re looking for a cheap tripod). The iStabilizer’s best characteristic is how quickly and easily the iPhone can be taken in and out of its clamps. In fact, I wish most cameras could be attached/detached from tripods so easily.
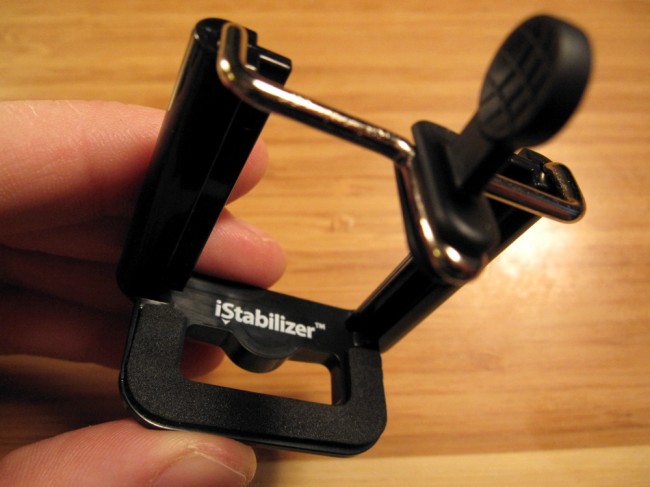
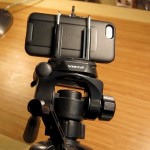
iStabilizer iPhone camera tripod mount

How It Works. The iStabilizer will work with any 1/4″ x 20 tripod screw (the standard for modern tripods). You simply screw the iStabilizer onto the tripod and its ready for the iPhone to be inserted.

To place the iPhone inside the iStabilizer, you pull up on a tab, raising one of the iStabilizer’s clamps enough to slide the iPhone inside, then you let go and the iStabilizer clamps down on the iPhone with a firm grip. The grip is tight enough that you can move the tripod around and not have any fears the iPhone will slip out. You can even hold it horizontal or upside down, and the iPhone stays in it (view examples of this in my video review).
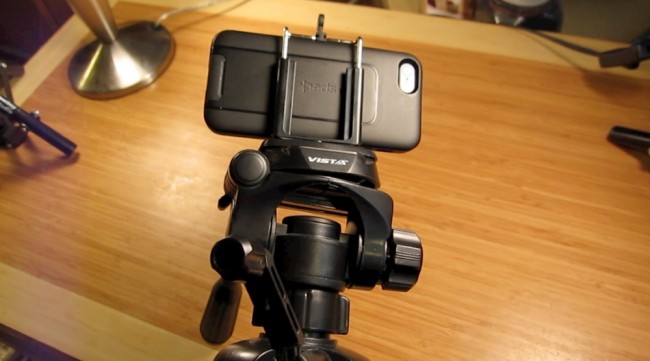
iStabilizer with iPhone in case inside

In a nice design touch, the clamps are padded with rubber so that they won’t damage the iPhone, in case you aren’t using a case. Which leads me to another nice element of the iStabilizer: it will work with just about any iPhone case, no matter how thick.

The iStabilizer pinchers can stretch to hold objects with a 2.75″ width or less. The iPhone 5 has a width of 2.31 inches, so that leaves an extra 0.44 inches, which is plenty for an iPhone case. The extra room also means the iStabilizer can work with other devices as well, like iPods, other smartphones, or even small cameras (it worked with my Canon PowerShot SD960 camera). There is also a iStabilizer Mount XL for larger smartphones, and they’re working on an iPad version.

Another nice aspect of the iStabilizer is that it leaves the iPhone’s screen unobstructed, meaning you can still tap and swipe the screen to utilize the features of whatever camera/video app you’re using to film.

Conclusion

The iStabilizer ($15) is a great, inexpensive solution for attaching your iPhone and other small devices to a tripod. It holds fast to any device in its grasp and won’t damage the device thanks to protective padding on its pinchers. My favorite feature was how quickly and easily the iPhone can be removed from the tripod, which is nice because the multitasking iPhone is more than just a camera, and even while taking photos I’ll need access to it for other functions as well.

iPhone Basics: How to Take a Panorama Photo Using the Camera App

iPhone Camera app Panorama feature

The new panorama function in the iPhone’s Camera app is an incredibly useful feature that allows you to easily capture beautiful wide-shot vistas and landscapes. It’s a welcome addition to the Camera app, as previous to iOS 6, iPhone users had to rely on third-party apps to create panoramas. But no longer. Below are instructions for how to take panoramas using the iPhone’s Camera app. Also see the end of this article for extra panorama tips. Please note that panorama is only available on the iPhone 4S or newer iPhones.

Quick Instructions:

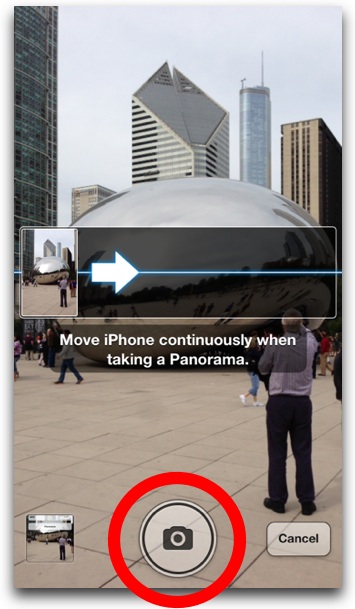
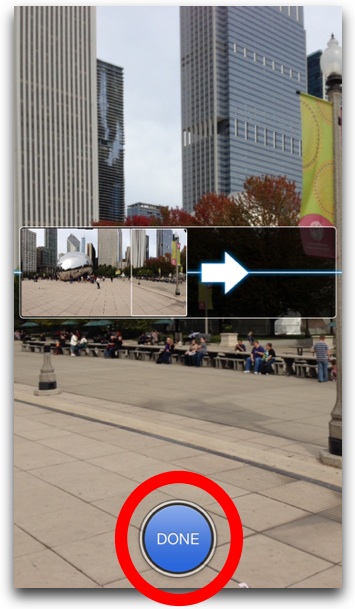
In the Camera app, tap Options > Panorama, then tap the camera icon to begin creating the panorama. Tap Done to stop at any point. To reverse the panning direction, tap the arrow.

Step-by-Step Visual Instructions:

1. Open the Camera app:


iPhone Camera icon

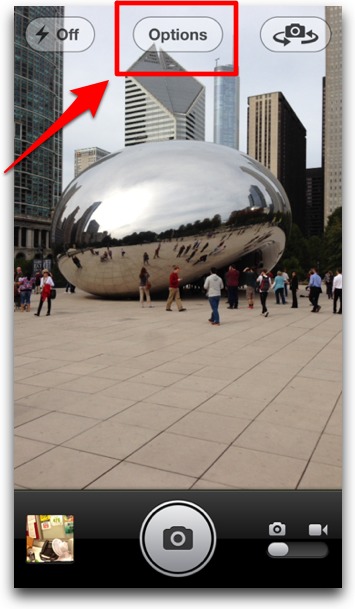
2. Tap Options:

Tap Options Button in iPhone Camera App

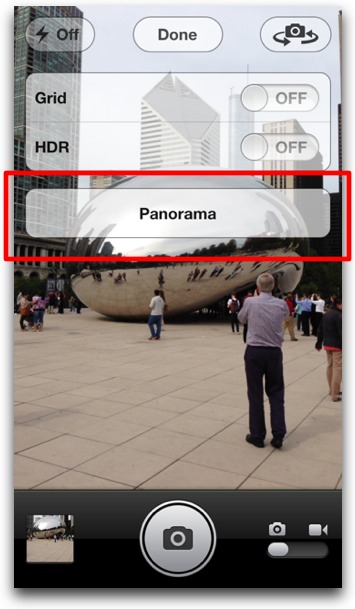
3. Tap Panorama:

Tap Panorama in iPhone camera app

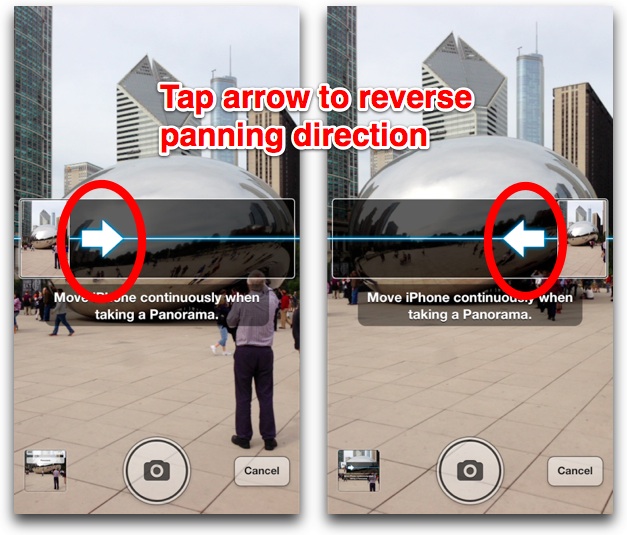
4. If you’d like, tap the arrow to reverse the panning direction (right to left, or left to right):

Tap arrow to reverse panning direction

5. Tap the camera icon at the bottom of the screen to begin:

Tap Camera button to start

6. Tap Done at any point to finish the photo:

Tap Done in iPhone Camera app

And that’s it, you’ve created a panorama photo. Read on for some extra tips.

Extra tips:

  • You don’t have to fill the entire panorama box on the screen—you can stop at anytime during the panorama process by tapping Done. This, in effect, gives the iPhone a wide lens of any size you want.
  • If you hold the iPhone in landscape orientation and move it up or down, you can use panorama to shoot very tall buildings.
  • If your resulting panorama photos has rough edges, you can square them off using the crop tool right in the Camera app. To access the crop tool, tap the photo thumbnail in the bottom left corner. This will open the Photo Stream. When viewing the panorama in the Photo Stream, tap Edit in the top right corner, then tap the crop tool (it’s on the far right). Drag the cropping box to fine tune your edges, then tap Crop.

Here’s a Cool iPhone Camera Concept. So Why Not an iCamera?

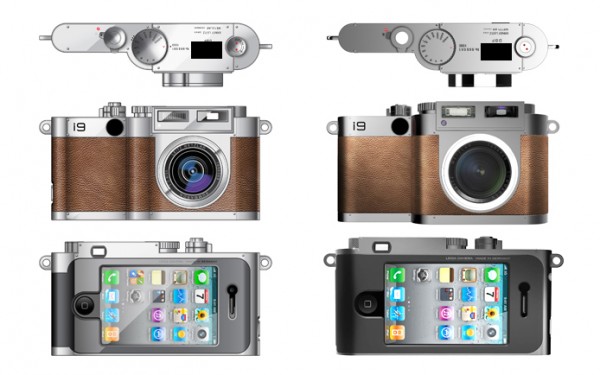
Apple already sells the world’s most popular camera in the form of the iPhone 4 (based on the number of images posted to Flickr). But what if you wanted something a bit more traditional, with a wider lens, dedicated shutter button, etc, yet still be able to take advantage of the iPhone’s photography apps? Black Design came up with this sweet concept of a camera that is powered by an iPhone.

I’ve always thought Apple selling a camera would be a natural fit for the company—even more so now that they seem dedicated to improving the iPhone’s camera software and hardware. Make no mistake, the iPhone 4 has an awesome camera. But why not put all that newfound knowledge into a dedicated product?

It’s clear that Apple is making iOS flexible enough to run on different types of hardware.
What is the AppleTV if not a similar concept? It runs iOS and even uses much as the same internal hardware as the iPhone and iPad.

Apple’s stated mission for new products is that they have to be class defining and offer something no one currently does. It’s the huge number of camera and image-editing apps available for the iPhone that would allow Apple to offer a best-in-class camera experience—developers wouldn’t have to do much to their apps for an iOS-based iCamera, if at all. Just think what apps they’d come up with if given SDK access to the equivalent of a Canon EOS Mark II’s hardware.

Check out the gallery below for all of Black Design’s concept images.

Review: AutoStitch Panorama (Best of iPhone Apps)

A common problem with the iPhone’s camera is that, due to its small lens, you can’t fit enough of a scene you’re trying to capture into a single photograph. That’s where AutoStitch Panorama ($2.99) comes in. As the name implies, the app stitches together multiple photographs to create panorama photographs. But panorama means more than just those long, rectangular landscape photos you’d normally associate with the word. It also means capturing tall buildings or any scenes too wide and tall for the iPhone’s lens. Essentially, AutoStitch is the wide-angle lens for the iPhone that lets you capture these scenes, and overall, it’s an indispensable tool for anyone who takes photos with the iPhone.

What I found most impressive about AutoStitch is how simple it is to use. The only real work you do is selecting the photos to stitch together, everything else is automated by the app. After taking the photos (which you must do outside of the app), you simply launch AutoStitch and select the photos you took. Then tap the Stitch button. The photos don’t have to be selected in any order. You can even make a mistake by including a wrong photo, and AutoStitch will ignore it.

A panorama I made of Old San Juan, Puerto Rico.

The resulting photographs are usually detailed and blemish free—the app does a great job of blending photographs seamlessly. It helps if you use proper technique for a panorama, which is to keep the iPhone in one place but rotate it as if on a pivot for each photo.

After stitching, the resulting photos are often oddly shaped, with curving corners and bulging sides. AutoStitch includes a nice auto-cropping feature that can automatically cut the picture into a perfect rectangle suitable for framing. If you’re not satisified with results, you can take over the cropping and cut as you please.
Continue reading…