Category: Notifications

iPhone Tip: How to Receive Notifications for Emails From VIP Contacts Only

Want to get a notification for only when a specific contact sends you an email? It’s now possible thanks to the VIP contacts feature in the Mail app. It’s easy to set up, just follow the step-by-step instructions below.

1. Open the Mail app:

iPhone Mail app icon

2. Tap the buttons in the top left corner to navigate to Mailboxes view:
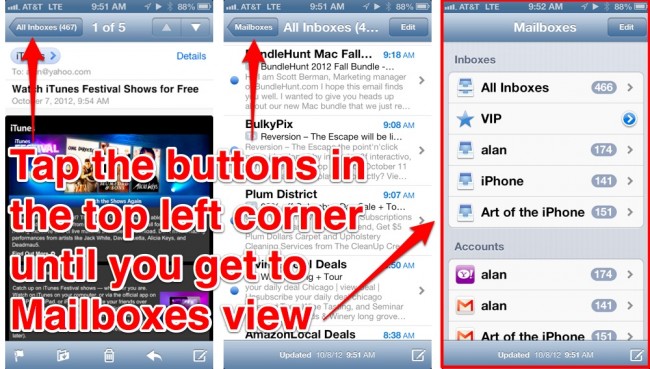
Navigating to Mailboxes view

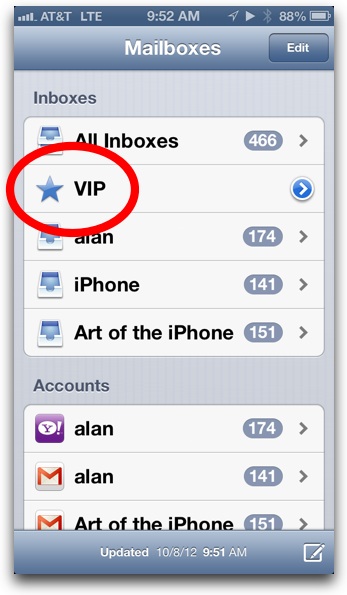
3. Tap VIP:

Tap VIP in iPhone Mail app

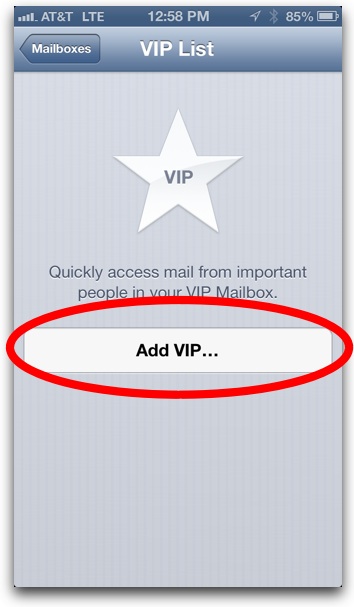
4. Tap Add VIP…:

Tap Add VIP in iPhone Mail app

5. Tap a contact to add it to your VIP list (see note below if you aren’t able select a contact):
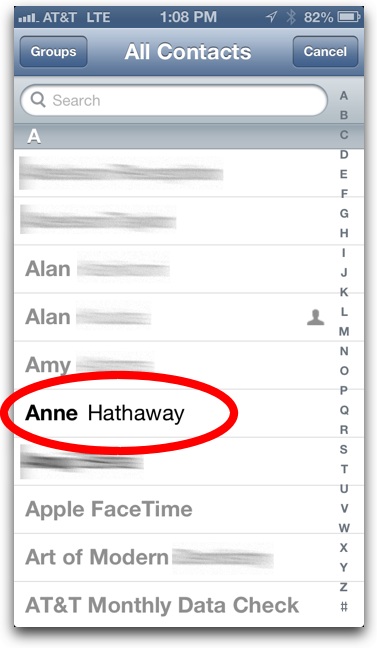
Select a Contact for VIP Notification Treatment

Note: A contact must have an email address assigned to it in order to add it to the VIP list. To add an email to a contact, quit out of Mail, open the Contacts app, tap the contact’s name, tap Edit in the top right corner, and enter an email.

6. To add another, tap Add VIP… again:
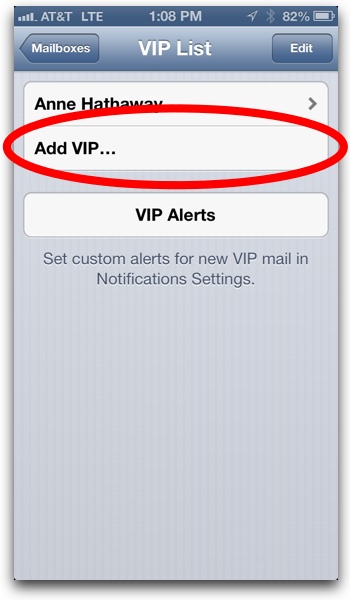
Note: To add more contacts to the VIP list in the future, tap the blue and white arrow button in Mailboxes view:
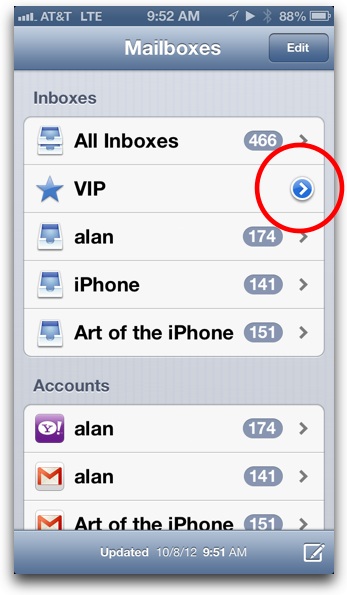
Tap blue and white arrow button

7. When finished adding contacts, next tap VIP Alerts:
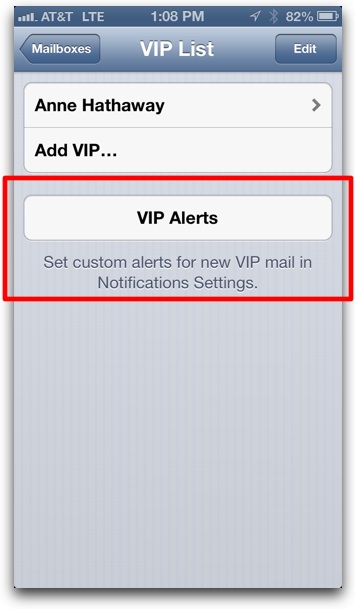
Set VIP Alerts

8. Adjust the various settings to your liking:
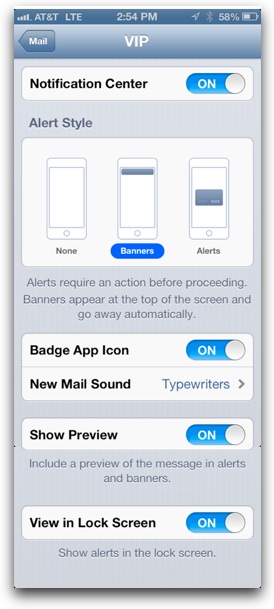
VIP Alerts Settings

And that’s it, you’ve set up VIP email notifications. Also note that VIPs get their own special inbox, so emails from VIPs will appear in the VIP inbox in addition to the original inbox (in other words, your Gmail account, etc).

Be sure to check out more of our iPhone Tips.

Tip: How to Change the Order of Alerts in Notification Center for iPhone/iPad

You don’t have to settle for the default order of alerts in the iPhone and iPad’s Notification Center. You can rearrange them how you like. Below are step-by-step instructions on changing the order that alerts appear in the Notification Center.

1. Open the Settings app:

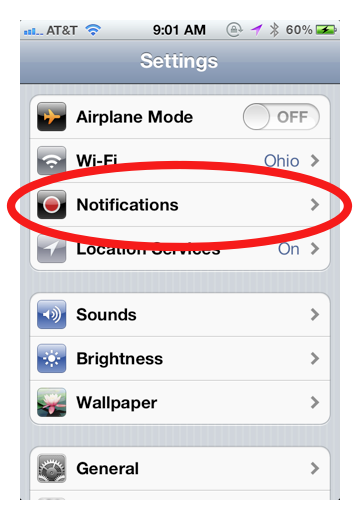
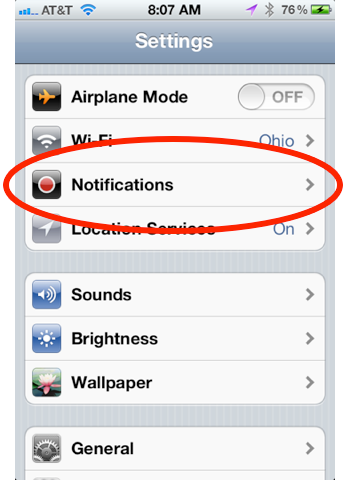
2. Tap Notifications:

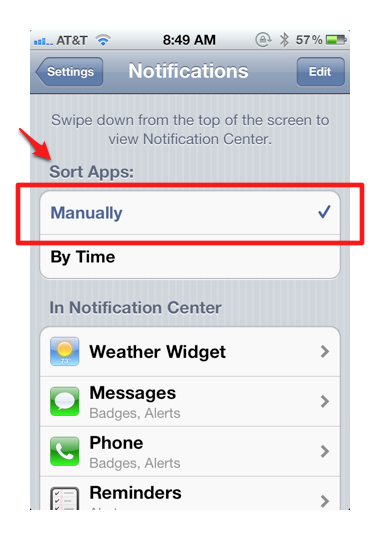
3. Under Sort Apps, tap Manually:

See the Notes section at the bottom of this post for the difference between sorting your alerts Manually and By Time

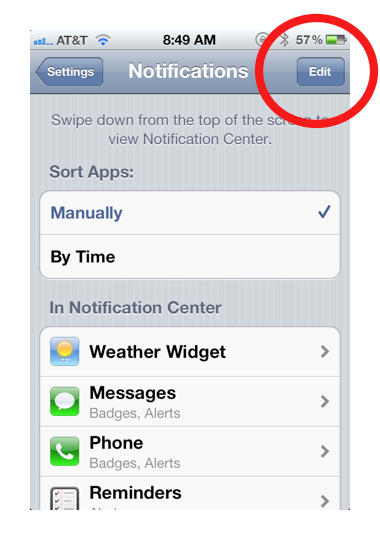
4. Tap Edit in the top right corner:

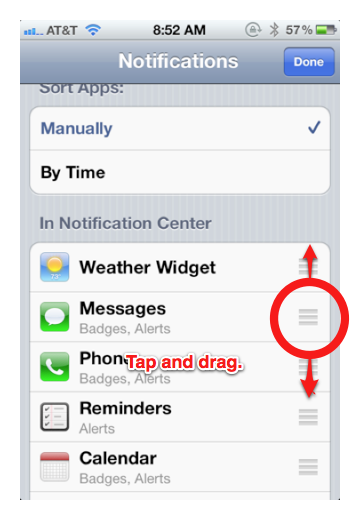
5. Tap and hold the three lines next to each app in the list, then drag it to your desired position:

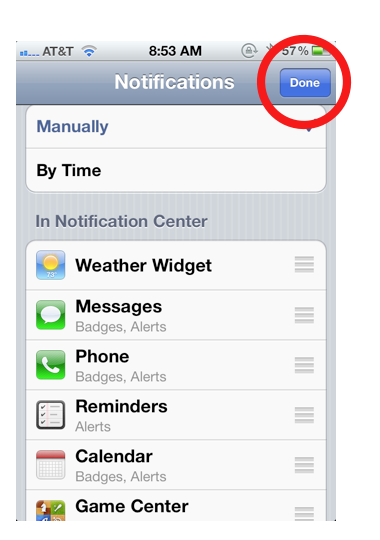
6. Tap Done when finished:

That’s it. You’ve now manually changed the order in which alerts will appear in the Notification Center.

Notes:

  • The Notification Center’s settings give you two options for sorting alerts:
    1. Manually gives you the ability to rearrange the order how you like (see instructions above)
    2. By Time will automatically sort alerts by the time in which they appeared, showing the most recent at the top of Notification Center. However, alerts will display clumped together by app. Meaning, if your most-recent alert was a text-message alert, all of your text-message alerts will show at the top, then all of the alerts from the app with the next most-recent alert.
  • If you choose to sort apps By Time, the stock widget and weather widgets will likely always display first, as they are constantly updated by the iPhone. You can turn them off in the iPhone’s Settings under Notifications.

iPhone Tip: Slide a Notification to Unlock the iPhone and Launch the Corresponding App

Here’s a cool little trick introduced in iOS 5. If you have alerts waiting for you on the iPhone’s lock screen, you can slide your finger across any of those alerts to unlock the iPhone and immediately be taken to the alert’s corresponding app.

Below is a screenshot of a text-message notification on a locked iPhone in mid-slide.

If using a passcode, you will have to enter your iPhone’s passcode before it will unlock the phone and launch the app.

The previous version of iOS had a similar feature, but it was much more limited and could be annoying. It used to be, if you happened to catch a notification within several seconds of it first appearing on the iPhone’s lock screen, you could slide to unlock the iPhone (using the iPhone’s default unlock slider, not the notification itself) and be taken to the corresponding app. However, there were times when I didn’t want to launch the app but simply unlock the iPhone and be taken to the home screen or the last app I was using.

Now that the iPhone’s lock screen can display several alerts at once, being able to swipe a specific alert gives you much more control over what app does or doesn’t launch. It can be a big time saver if, say, you want to immediately reply to a text message. Simply slide your finger across the notification and the Messages app will launch. Pretty neat!

How to Prevent Text Messages and Notifications From Appearing on the iPhone’s Lock Screen

Text messages and other notifications appearing on the iPhone’s lock screen could cause privacy problems for some. Such alerts automatically wake up the iPhone’s screen and display the messages for anyone walking by to see. However, there is a way to prevent notifications from appearing on the screen when the iPhone is locked. Check out our instructions below.

1. Open the Settings app:

2. Tap Notifications:

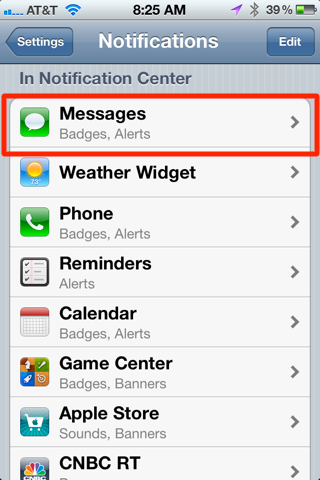
3. Tap the app whose lock-screen notifications you want to turn off:

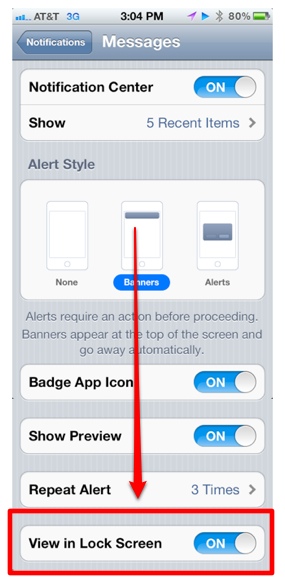
4. Scroll down until you see View in Lock Screen:

5. Slide the tab to Off:

And that’s it. If you want to test it out, lock your iPhone and send yourself a text message from another source other than your iPhone. For example, you can google the terms “Send free text message” and use one of the free website services.

Notes:

For text messages on the iPhone, there is a settings option called Show Preview that will show the text of the message along with the sender’s name on the lock screen. Switching this option to off will no longer show the text of the notification, but the notification and sender’s name (if it’s a text message) will still be visible.