Category: iPad Basics

How to Turn On and Use Guided Access in an App (iPhone & iPad Basics)

Guided Access

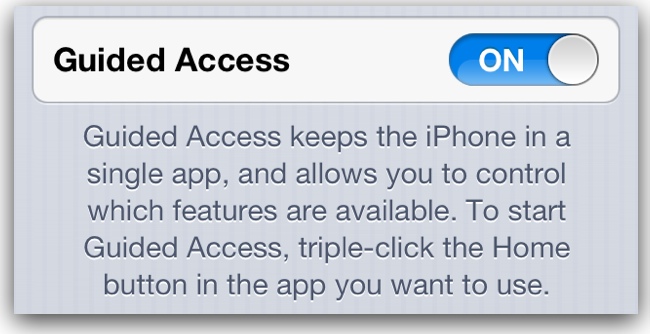
Guided Access is a powerful new feature on the iPhone & iPad that essentially prevents users from quitting out of an app. Guided Access can also block off areas of the screen from registering touches, and prevent users from changing the volume or putting the device to sleep. Check out the video below for instructions on how to activate Guided Access and how to use it in an app. Also check out the Extra Notes section for extra tips.

Video Instructions:

Quick Instructions:

1. Go to Settings > General > Accessibility > Guided Access.

2. Swipe the tab for Guided Access to On.

3. Tap Set Passcode and enter a 4-digit code. This code will be required to quit out of Guided Access once you start it in an app.

How to Use It In an App:

1. Launch an app.

2. Triple click the home button.

3. Circle any areas you want to disable. You can fine tune by dragging the corners of the boxes that appear.

4. Tap Start.

5. To quit out of Guided Access mode, triple click the home button again, enter in the passcode, and tap End.

Extra Notes:

  • In the Settings for Guided Access, you may notice an option: Enable Screen Sleep. When this is set to On, the iPhone’s screen will dim (but not turn off) during periods of inactivity, saving battery. You can also put the iPhone to sleep by pressing the Sleep/Wake button.
  • When you triple click to activate Guided Access in an app, an Options button will appear in the bottom left. There, you can turn off all touches from registering on the screen (this would be perfect for playing a movie on your device in a marketing situation) and another option to lock the screen’s orientation and turn off the device’s accelerometer and gyroscope, preventing the device from registering movement.

iPhone & iPad Basics: How to Use Flagged Emails and the New Flagged Inbox

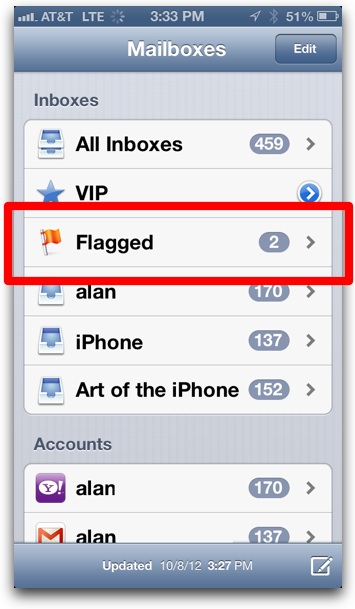
Flagged email inbox in iPhone Mail app

The Flagged inbox is a new feature introduced in the iOS 6 software update that is useful as a way to sort important emails into one central place so you can find them easier. Flagged emails from different accounts all go into the same Flagged inbox.

To send an email into the Flagged inbox, you simply tap the flag icon in the bottom right corner of the individual email, like this:

Tap Flag icon in bottom left

Flagged emails still remain in their original email account’s inbox but also appear in the Flagged inbox. To remove the email from the Flagged inbox, just tap the flag icon again, then tap Unflag from the pop-up menu.

Extra Notes & Tips:

  • Don’t see the Flagged inbox? It doesn’t appear until you flag an email for the first time.
  • You can move a flagged email out of the Flagged inbox into another sub-inbox of the email account it belongs to by tapping the move email button in the Mail app, which is the second button from the left. The email will remain flagged, it just won’t appear in the Flagged inbox. You can move it back into the Flagged inbox via the same “move email” button.

Basics: How to Activate Caps Lock on the iPhone and iPad

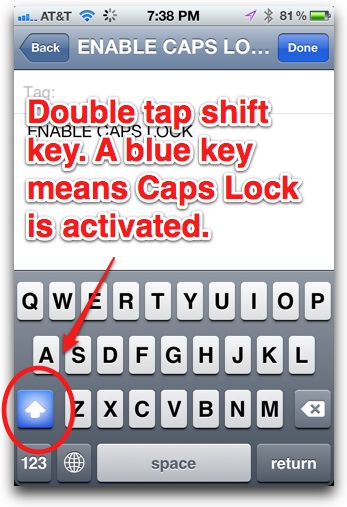
The iPhone’s keyboard has a Caps Lock feature, but you may have to first activate it in the iPhone’s Settings to use it. To test if Caps Lock activated, first try double tapping the shift key (the key with the up arrow, see image above) on the touchscreen keyboard—the key will turn blue to tell you Caps Lock is activated. If it doesn’t turn blue, you’ll need to go into the iPhone’s Settings to enable it. Just follow the step-by-step instructions below.

Video Instructions:

Text:

1. Open Settings:

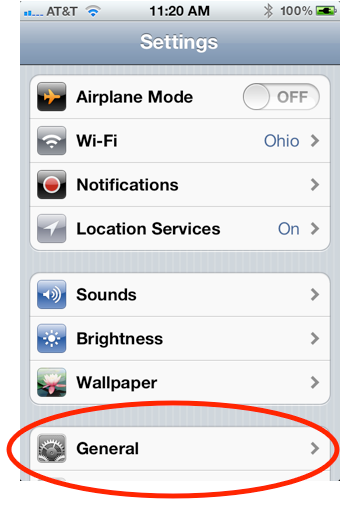
2. Tap General:

General in iPhone Settings

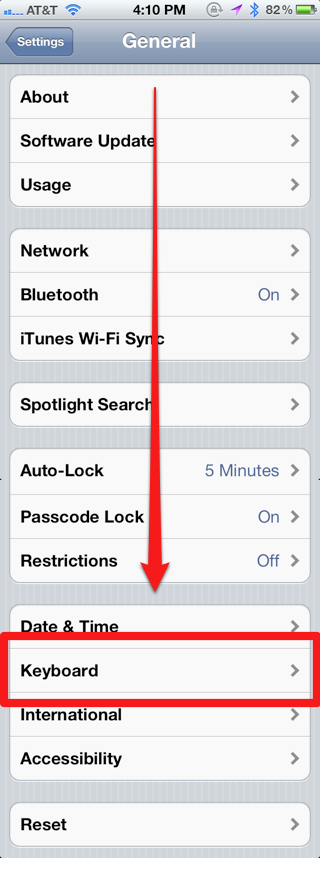
3. Scroll down and tap Keyboard:

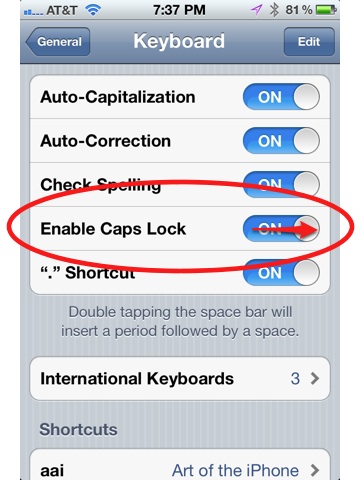
4. Slide the tab for Enable Caps Lock to On:

Now, when you double tap the shift key on the iPhone/iPad’s keyboard (the key with the up arrow), Caps Lock will be activated. To turn off Caps Lock, tap the key again.

iPad Basics: Multitasking Gestures Using Four or Five Fingers

Multitasking gestures are a relatively new iOS feature (introduced in iOS 4.3) that currently work only on the iPad due to its larger screen. Once activated, multitasking gestures allow you to use four- or five-finger swipes to quickly switch between apps and thus improve your multitasking performance on the iPad.

Note that these gestures will not work on the first-gen iPad, only the iPad 2, iPad 3, and newer.

How to Turn on Multitasking Gestures

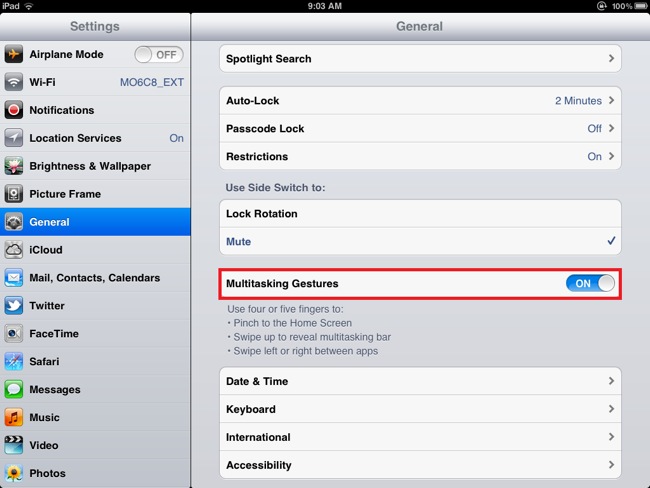
To activate multitasking gestures, go into the iPad’s Settings–>General and slide the Multitasking Gestures to On.

The Four-Finger Swipe

Swipe Left. While in an app, swipe to the left with four fingers and the entire screen will slide over, switching to the second most recently used app. Keep swiping to the left, and you’ll cycle through your most recently used apps.

Then Swipe Right. After four-finger swiping to the left, you can then swipe to the right and you’ll cycle the other way through your apps.

One thing to note is that once you switch to another app using a four-finger swipe and use that app, you can once again swipe left or right again; however, if you switch to another app without using multitasking gestures, you’ll no longer be able to four-finger swipe to the right until your first swipe left—in other words, the recently-used-app-order resets itself with your current app at the front of the line.

Swipe Up. Swipe up with four fingers and you’ll bring up the task bar, just like double-clicking the home button.

Swipe Down. After swiping up to bring up the task bar, you can swipe down to close. Easy peasy.

The Four-Finger Pinch

Pinch. While in an app, if you pinch the screen with four or five fingers, you’ll “close” the app and be taken to the home screen. A four-finger pinch has the same effect as a single-click of the home button.

Basics: How to Save Pictures From the Web on the iPhone (and iPad)

If you see a picture you like while browsing the Internet on your iPhone, you can easily save those photos to your iPhone’s Camera Roll. Here’s how.

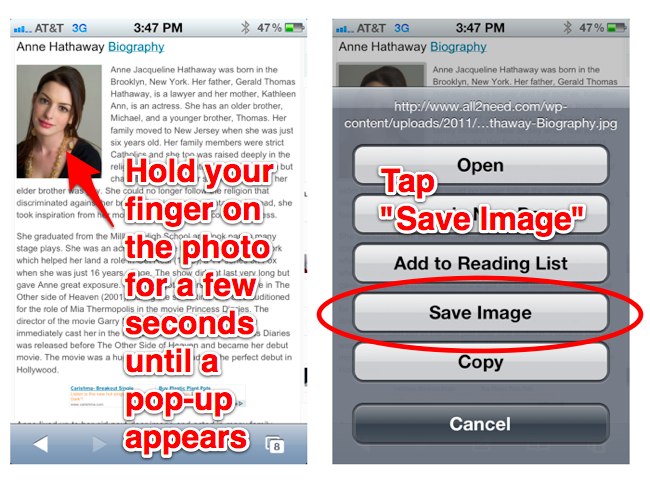
While using the iPhone’s web browser, you can save a photo simply by holding your finger on the photo for a few seconds. A pop-up box will appear with a few options, one of which will read Save Image, as seen below:

To save the photo, tap Save Image. It will be saved to the iPhone’s Camera Roll alongside your other photos.

Endnotes:

  • Note that you can also tap Copy. You can then paste the photo into any app that will allow you to insert photos, like in an email (in the Mail app) or in Pages (Apple’s word processor). To paste, simply hold your finger down on the insertion point, then from the pop-up menu that appears, tap Paste.
  • If a website prevents you from saving the photo, just take a screenshot instead by pressing the sleep and home buttons at the same time.

iPad Basics: How to Always Display the Bookmarks Bar in the Browser

A seldom noticed feature of the iPad’s browser is the Bookmarks Bar—a bar that appears beneath the address bar and makes navigating to your favorite sites one tap away. It is seldom noticed because, by default, it only appears when you open a new tab, then disappears when you go to a website. It does this, presumably, in order to save screen space. But you can change the settings so that it will always appear. Here’s how:

1. Tap the iPad’s Settings:

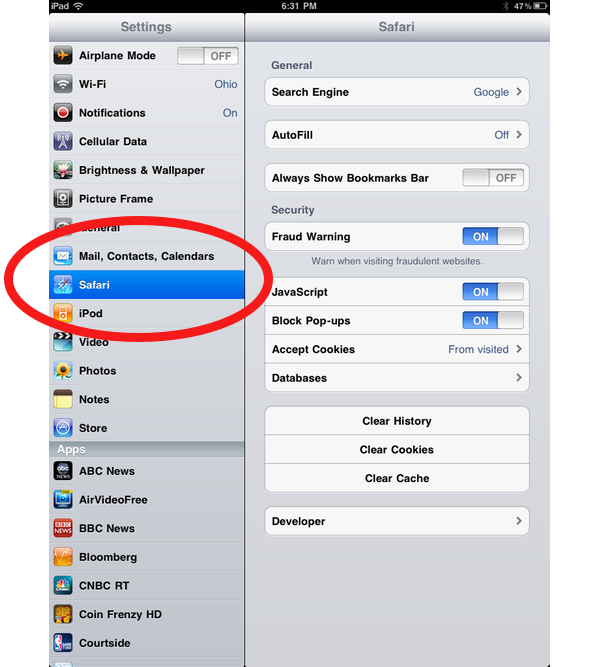
2. Tap Safari:

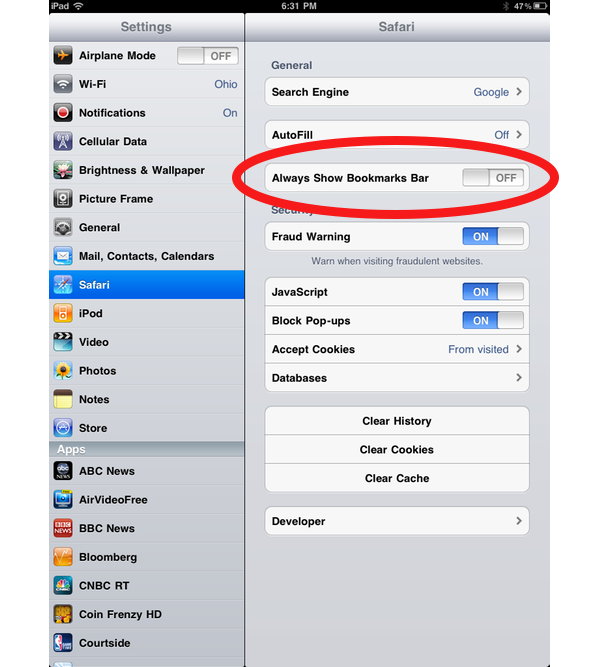
3. Swipe the Always Show Bookmarks Bar tab to On:

And that’s it. Now the Bookmarks Bar will always show. To add bookmaks to this bar, tap the + symbol at the top of Safari, tap Add Bookmark, then tap Add to Bookmarks Bar.

Tip: Moving iPhone App Icons Across Multiple Pages

With all the great new apps for the iPhone, you may find yourself with multiple pages of bookmarks and app icons. Here’s how to rearrange those icons and move them quickly across multiple pages. Check out the following Art of the iPhone video tip, or follow the instructions below.

  • Hold down your finger on an icon until the screen starts wiggling and jiggling.
  • Drag the icon to the side of the screen until a new page appears.
  • Without lifting your finger, move the icon back toward the center of the screen.
  • Move the icon to the side of the screen again.
  • Drop the icon on the section of the page you want it to rest at.

For more Art of the iPhone tips, click here.