Category: iPad Tips

Tip: How to Change the Order of Alerts in Notification Center for iPhone/iPad

You don’t have to settle for the default order of alerts in the iPhone and iPad’s Notification Center. You can rearrange them how you like. Below are step-by-step instructions on changing the order that alerts appear in the Notification Center.

1. Open the Settings app:

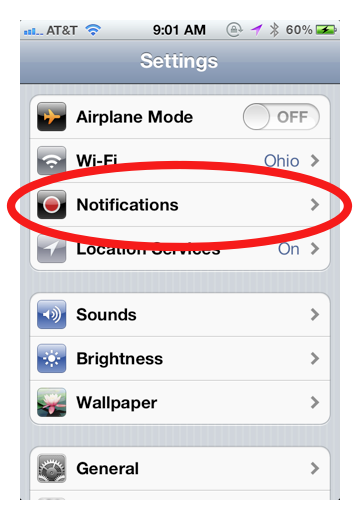
2. Tap Notifications:
3. Under Sort Apps, tap Manually:
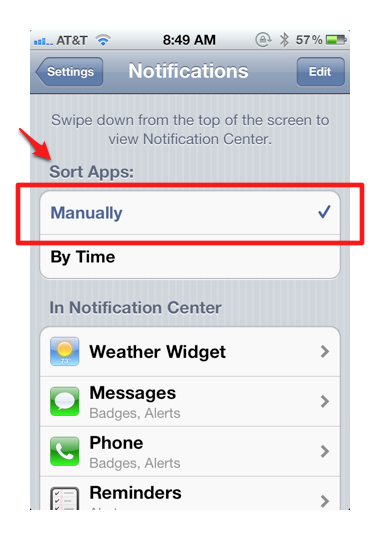
See the Notes section at the bottom of this post for the difference between sorting your alerts Manually and By Time

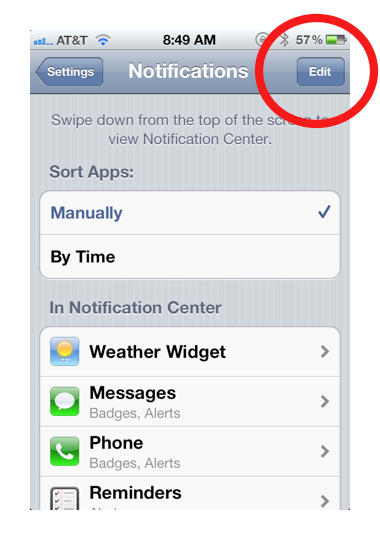
4. Tap Edit in the top right corner:
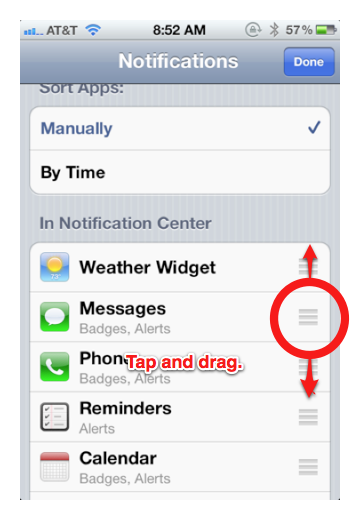
5. Tap and hold the three lines next to each app in the list, then drag it to your desired position:
6. Tap Done when finished:
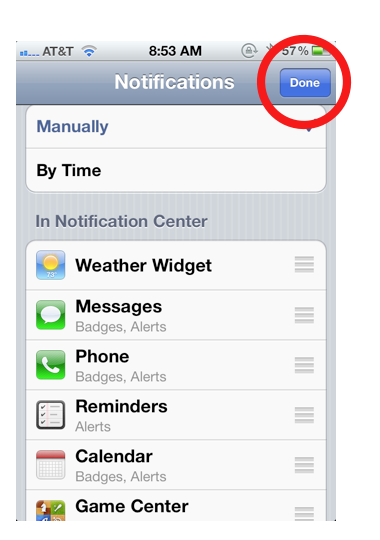
That’s it. You’ve now manually changed the order in which alerts will appear in the Notification Center.

Notes:

  • The Notification Center’s settings give you two options for sorting alerts:
    1. Manually gives you the ability to rearrange the order how you like (see instructions above)
    2. By Time will automatically sort alerts by the time in which they appeared, showing the most recent at the top of Notification Center. However, alerts will display clumped together by app. Meaning, if your most-recent alert was a text-message alert, all of your text-message alerts will show at the top, then all of the alerts from the app with the next most-recent alert.
  • If you choose to sort apps By Time, the stock widget and weather widgets will likely always display first, as they are constantly updated by the iPhone. You can turn them off in the iPhone’s Settings under Notifications.

Tip: Wi-Fi Syncing Taking Too Long? You Can Switch to the USB Cable Without Pausing Your Sync

The new Wi-Fi syncing capability for the iPhone and iPad is convenient, but it also can be much slower than using the USB cable to sync. If you have begun the syncing process over Wi-Fi and discover it’s taking too long, you can speed things up a bit by plugging your iPhone/iPad into the computer without stopping the sync. That’s right, there’s no need to stop the syncing process, just plug in your device and the sync will continue to chug along without starting over.

However, please note that the reverse is not true, meaning, you can’t start a sync using the USB cable, unplug the iPhone in mid sync, and continue over Wi-Fi. Doing so will end the sync.

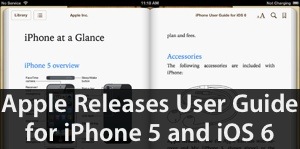
Download the iPhone User Guide & iPad User Guide as PDF or as an iBook

Apple has made available for download their user guides for the iPhone and iPad as iBooks and in the traditional PDF format (links below). They are free downloads. They may take a while to download as they are each around 18MB in size. Check’em out below.

If you are new to the iPhone/iPad, these user guides can be indispensable. Even for advanced users, there are plenty of “I forgot the iPhone could do that” moments buried inside. And every year, the guide grows bigger and is quite the tome now.

Automatic Wi-Fi Syncing for iPhone or iPad Not Working? Here’s an Alternative Solution to Fix It

Having problems getting the new automatic Wi-Fi syncing to work, even after following instructions on how to activate it and going through Apple’s own official troubleshooting guide? I did too, but here’s how I fixed it. The problem lies with an old setting buried in the iTunes preferences that prevents automatic syncing. Just follow the step-by-step instructions below:

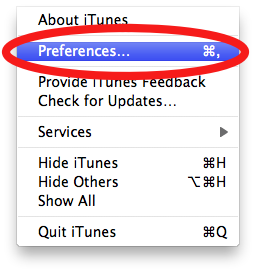
1. In the iTunes, select Preferences:

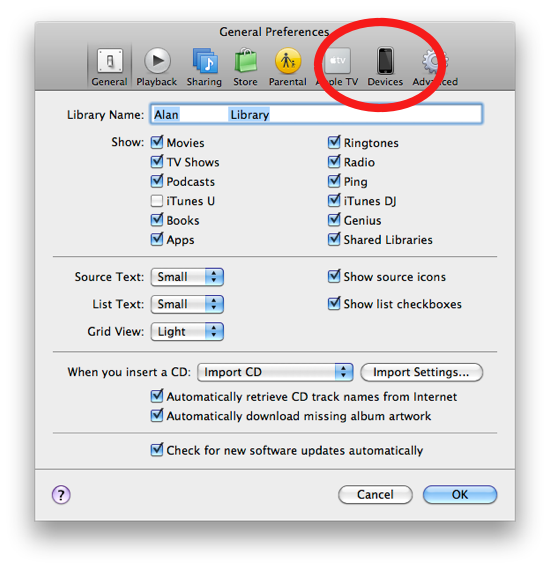
2. Select Devices:

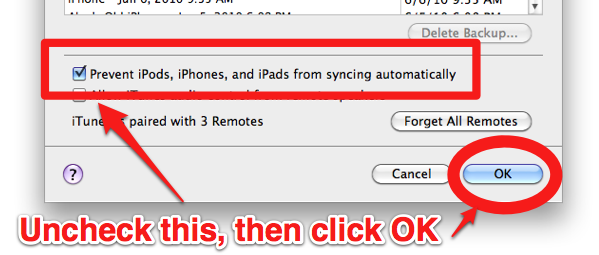
3. Uncheck the checkbox for “Prevent iPods, iPhones, and iPads from syncing automatically” and click OK:

4. Shut down and restart iTunes

5. Shut down and restart the iPhone/iPad

Now plug in your iPhone into a power source and wait for several seconds, the iPhone should now automatically sync. This is what fixed the issue for me.

How to Check Out and Read a Book From Your Local Library, on the iPad (with Video)

Love to read? It’s time to renew your library card because Amazon just introduced a sweet new feature for your iPad’s Kindle App. You can now check out ebooks from over 11,000 public libraries across the US and sync them to your iPad via the free Kindle app. Here’s a brief tutorial on how on how to check out the books and sync them onto your iPad.

Things You’ll Need:

1. An active library account (you’ll need your library card)
2. An Amazon.com account (and free Kindle account)
3. The Kindle iPad/iPhone app
4. A WiFi or 3G connection

How to Check Out a Kindle Ebook From the Public Library’s Website and Sync It to the iPad:

1. Go to Amazon.com and log in.

2. Open up a new tab in your browser and go to your local library’s website or use Google and search for a service called Overdrive on the library’s site. This will give you access to the Kindle ebooks as well as audiobooks, movies, and even music. I use the Chicago public library so the address I go to is overdrive.chipublib.org. Log in to your library account. You’ll most likely use your library-card number and your zip code.

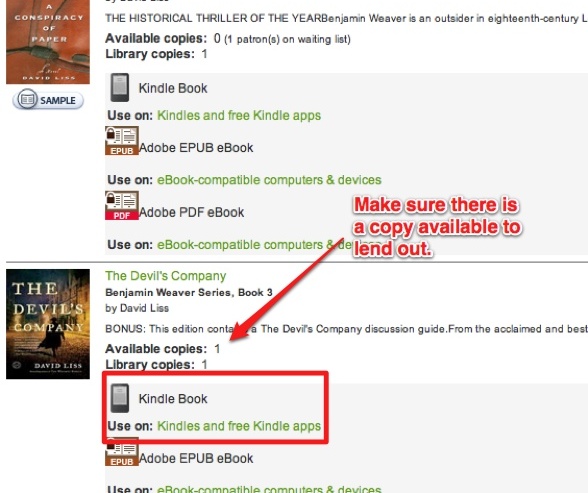
3. Find an ebook to check out and make sure it is not already checked out:

4. Click Add to My Cart then Proceed to checkout.

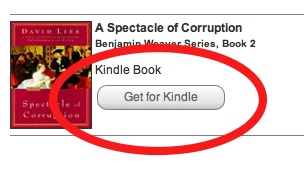
5. Once the ebook is checked out, click Get for Kindle:

6. This should launch the Amazon.com website and show you the Kindle book in your Amazon.com account. Click on the orange Get Library Book button on the right side of the screen, then choose which device to send it to in the drop-down menu (ex. Alan’s iPad for my iPad). If you’ve never used the Kindle app before, you may have to register your device with Amazon first. Simply log on to Amazon inside the app.

7. Grab your iPad, make sure it’s connected to the Internet, and open up the Kindle app.

8. If you haven’t already, log on to your Amazon.com account inside the Kindle app. Tap the Sync button. If your don’t see your book after the sync, it’s waiting for you in the app’s Archived Items. Tap on Archived Items, then tap on the book’s cover to download it.

That’s it, you’ve checked out a free ebook from your local library and synced it onto your iPad, for free! Easy peasy. Good reading.

iPad Basics: How to Always Display the Bookmarks Bar in the Browser

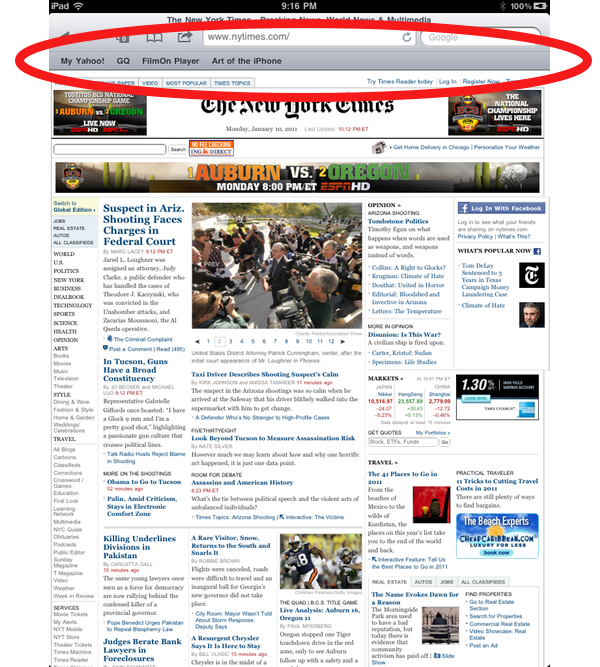
A seldom noticed feature of the iPad’s browser is the Bookmarks Bar—a bar that appears beneath the address bar and makes navigating to your favorite sites one tap away. It is seldom noticed because, by default, it only appears when you open a new tab, then disappears when you go to a website. It does this, presumably, in order to save screen space. But you can change the settings so that it will always appear. Here’s how:

1. Tap the iPad’s Settings:

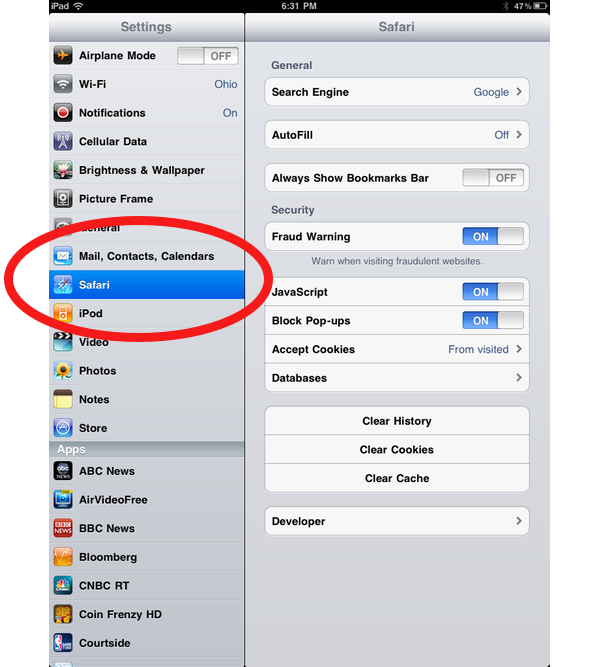
2. Tap Safari:

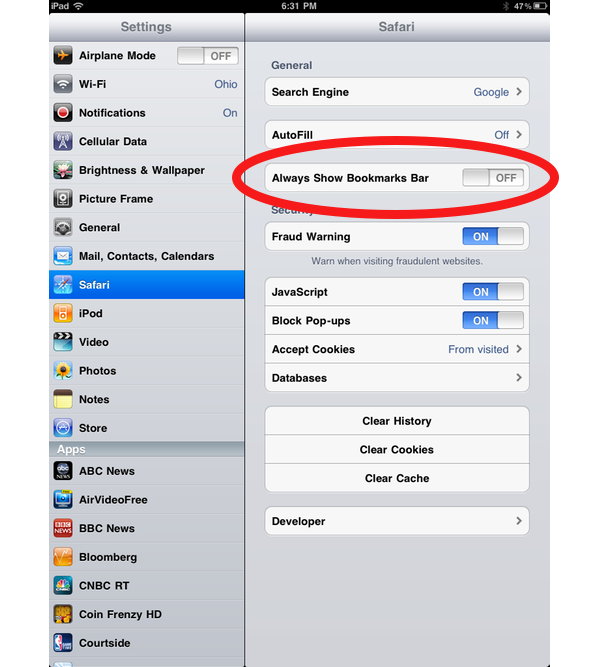
3. Swipe the Always Show Bookmarks Bar tab to On:

And that’s it. Now the Bookmarks Bar will always show. To add bookmaks to this bar, tap the + symbol at the top of Safari, tap Add Bookmark, then tap Add to Bookmarks Bar.

How to Search for Text Within a Web Page on the iPhone & iPad

The ability to search for a specific bit of text within a web page has long been a sorely missing feature on the iPhone and iPad. Thankfully, Apple added the feature in the iOS 4.2 update. Too bad the iOS browser gives no indication on how to use the feature. But we’ve got you covered:

How to Search for Text Within a Web Page

1. On the webpage you want to search, tap the “Google” Search Bar in the top right corner:

2. Enter the text you want to search for, but do not tap the Search button:

3. Look below the drop-down list, you’ll see text that reads On This Page (X matches):

4. Quickly swipe upwards on the screen:

5. At the bottom of the list that appears on the screen, tap the text Find “Your Text”:

6. Any text that matches your phrase will be highlighted in yellow:

7. Tap Next to travel to matching text. Tap Done when finished:

And that’s it! Not too obvious, huh? Be sure to check out more of our posts on iPhone Basics.

Troubleshooting: iPad Shuts Itself Off and Won’t Turn On

This has happened to me several times: I’ll pick up my iPad to discover it has shut itself off, or at least has a black screen and won’t respond. Not because of overheating, and not because there’s no battery left. And it just won’t turn back on. At least at first. And sometimes not for quite a while. It’s pretty scary.

A little research shows that others are having this problem, sometimes even with an iPhone. The cause is unknown, but the best theory is that it’s some type of kernel panic. The quickest solution? Hold down both the home and sleep buttons for about 10 seconds to do a forced shutdown. The iPad should start again with no problems.

How to Convert PDFs to ePub for Apple’s iBooks

Apple’s iBooks app can read both PDF and ePub documents, but there are times when you’ll want to convert your PDFs to ePub. Why? Because the ePub format is easier to read on smaller mobile devices, as the text is flowable, you can increase/decrease the font size, and you can highlight text and write notes.

To convert from PDF to ePub, you’ll need to download the free application called Calibre (available for Windows, Mac, and Linux).

How to Convert PDF to ePub using Calibre:

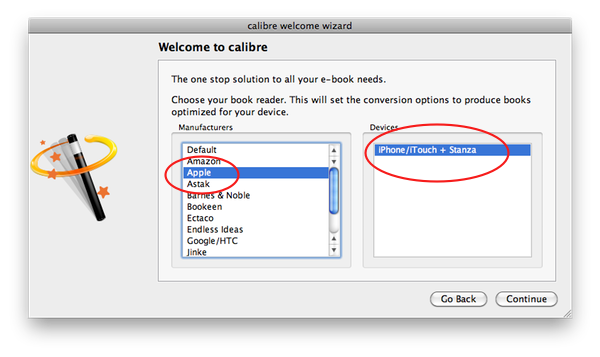
1. Open Calibre. During the initial setup, you’ll be asked for the type of device you’ll be using. Choose Apple, then iPhone/iTouch + Stanza (don’t worry, you won’t have to use Stanza to read the ePub docs):


Continue reading…