Category: iPad Tips

Tip: Quickly Insert Emoji Using iPhone Text Shortcuts

Everyone loves emoji, the cute little icons most commonly used in text messages. But inserting them can be a lumbering, multistep process. Here’s a much quicker way to insert emoji using the new text shortcuts feature on the iPhone. Just follow the step-by-step instructions below for a one-time setup. Then you’ll be able to instantly insert emoji by typing just a few characters.

1. Make sure you have emoji activated. They are not turned on by default (you only have to activate them once). Follow our instructions on activating them.

2. Once emoji are activated, open the iPhone’s Settings and tap General:

General in iPhone Settings

3. Scroll down and tap Keyboard:

4. Scroll down and tap: Add New Shortcut…:

5. In the field labeled Phrase, insert the emoji. (You can access the emoji keyboard by tapping the globe icon on the keyboard):

6. Now, in the shortcut field, type in a combination of characters that will turn into the emoji. Pick an uncommon combination of characters to help prevent accidental auto-correction from occuring, but also pick something that will help you remember the shortcut. For example, for a shortcut for the heart emoji, you may want to use the letters hht, as it’s not a common combination of letters and the two H’s will allow you to quickly type the characters.

7. To finish, tap Save:

And that’s it. To test your new emoji shortcut, type in your shortcut anywhere you can enter text on the iPhone, tap spacebar, and your cute little emoji will appear!

Notes:

  • Emoji first gained popularity in Japan, but thanks to the iPhone, they are growing in use in the US. Even Gmail now supports them.
  • Did you know that you can use emoji in the names of your app folders? For example, you could use the hamburger emoji to label a folder of restaurant apps.

How to Add Words to the iPhone’s Dictionary

You can add words to the iPhone’s spelling dictionary to prevent the iPhone’s auto-correct feature from automatically fixing them. To do this, however, you must add the words to a very unobvious place on the iPhone: in the iPhone’s “text shortcuts.” Below are step-by-step instructions on how to add words to the iPhone’s dictionary.

1. Open Settings:

2. Tap General:

General in iPhone Settings

3. Scroll down and tap Keyboard:

4. Scroll down and tap: Add New Shortcut…:

5. In the field labeled Phrase, type in the word. Do not type in anything in the Shortcut field.

6. Tap Save:

And that’s it, you’ve added a word to the iPhone’s spelling dictionary. Now the word will no longer trigger autocorrect.

Notes:

  • The feature that automatically fixes the spelling of words is called Auto-Correction. You can turn the feature off in Settings–>General–>Keyboard, then swipe the Auto-Correction tab to Off.
  • You can find tons of funny (and embarrasing) auto-correct mistakes at the Damn You Auto-Correct blog.

Cool Tip: How to Add Icon Shortcuts to iPhone Settings Without Jailbreaking

*Update 3/9/2012* This tip no longer works if you update your iPhone to iOS 5.1.

Here’s an awesome tip. One of my major annoyances with iOS is having to navigate deep into the settings every time I want to turn Bluetooth on or off. But here’s a neat little trick that will let you create an icon you can tap to take you directly to your Bluetooth, Wi-Fi, or other settings, and it doesn’t involve hacking, jailbreaking, or doing anything else untoward. It’s a two-part tip.

The first part relies on a set of commands (entire list below) you can type into the iPhone’s Safari browser to launch directly into a specific setting on the iPhone. You can try it yourself, simply type the following into your browser: prefs:root=WIFI to launch the WiFi settings on the iPhone.

Cool, huh? But who wants to type that in every time? Here’s where the second part of this tip comes in. You’ll need an app called Icon Project ($0.99) that lets you design webapp icons and add them to your homescreen (for iPhone beginners, webapps are essentially web bookmarks you can save to your iPhone’s home screen. Apple also calls them web clips).

Icon Project not only lets you design the icon’s graphics, colors, text, etc, you can also add links to websites. When you tap the icon, the website will launch. And that’s where the list of commands below comes in. Using the Icon Project app, where you’d normally enter a web address simply type in any of the commands below. Then, when you tap the icon, you’ll to be taken directly to that iPhone setting. Sweet trick.

*Update* For a free version of this tip (without the need for the $0.99 app), point your iPhone or iPad’s browser to this page at iPhoneZa and scroll down. Choose among the various links to easily add icons with shortcuts to iPhone settings. The only disadvantage for using the website is that you can’t use your own graphics for the icons.

Note that some users who haven’t upgraded to iOS 5 have been having some trouble with this tip.

List of Shortcuts:

About –> prefs:root=General&path=About
Accessibility –> prefs:root=General&path=ACCESSIBILITY
Airplane Mode On –> prefs:root=AIRPLANE_MODE
Auto-Lock –> prefs:root=General&path=AUTOLOCK
Brightness –> prefs:root=Brightness
Bluetooth –> prefs:root=General&path=Bluetooth
Date & Time –> prefs:root=General&path=DATE_AND_TIME
FaceTime –> prefs:root=FACETIME
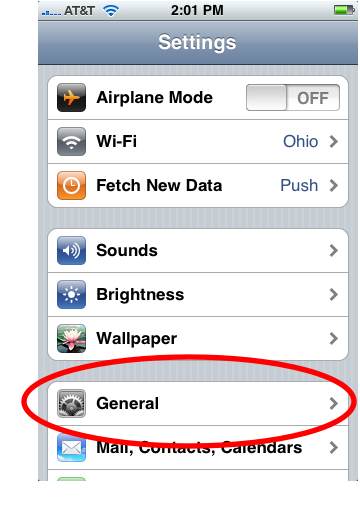
General –> prefs:root=General
Keyboard –> prefs:root=General&path=Keyboard
iCloud –> prefs:root=CASTLE
iCloud Storage & Backup –> prefs:root=CASTLE&path=STORAGE_AND_BACKUP
International –> prefs:root=General&path=INTERNATIONAL
Location Services –> prefs:root=LOCATION_SERVICES
Music –> prefs:root=MUSIC
Music Equalizer –> prefs:root=MUSIC&path=EQ
Music Volume Limit –> prefs:root=MUSIC&path=VolumeLimit
Network –> prefs:root=General&path=Network
Nike + iPod –> prefs:root=NIKE_PLUS_IPOD
Notes –> prefs:root=NOTES
Notification –> prefs:root=NOTIFICATIONS_ID
Phone –> prefs:root=Phone
Photos –> prefs:root=Photos
Profile –> prefs:root=General&path=ManagedConfigurationList
Reset –> prefs:root=General&path=Reset
Safari –> prefs:root=Safari
Siri –> prefs:root=General&path=Assistant
Sounds –> prefs:root=Sounds
Software Update -> prefs:root=General&path=SOFTWARE_UPDATE_LINK
Store –> prefs:root=STORE
Twitter –> prefs:root=TWITTER
Usage –> prefs:root=General&path=USAGE
VPN –> prefs:root=General&path=Network/VPN
Wallpaper –> prefs:root=Wallpaper
Wi-Fi –> prefs:root=WIFI

With the app, you can also make icons for calling or texting (or iMessaging) your favorite contacts. You can use any image on your iPhone for the icon. For example, you could create an icon with the face of your sweetheart that, with one tap, allows you to dial their number.

How to Add Text Shortcuts on the iPhone and iPad

A text shortcut is a new time-saving feature on the iPhone that allows you to type just a few characters and turn them into much larger words and phrases. By default, Apple has provided one default shortcut: omw, which expands into on my way. To view it, simply type omw anywhere you can type text on the iPhone, then tap the spacebar. Shortcuts can be useful for quickly inserting email signatures, unusual words not found in the iPhone’s dictionary, or common long phrases you use, like “Love you Snookums Snookums.”

You can easily add your own text shortcuts. Below are step-by-step instructions on how.

1. Open Settings:

2. Tap General:

General in iPhone Settings

3. Scroll down and tap Keyboard:

4. Scroll down and tap: Add New Shortcut…:

5. Type in the phrase and its corresponding shortcut:

6. Tap Save:

Notes and Tips:

  • Shortcuts work system wide on the iPhone, so anywhere you can type in text, you can use shortcuts.
  • Unfortunately, there are no line breaks for text shortcuts. The text can only expand into one continuous line.
  • For your shortcuts, try to use unusual combinations of letters, like aaz, to prevent accidental use of shortcuts. But also try to create shortcuts that will help you remember them. For example, if you wanted a shortcut for John Smith Jr. III, you might create the acronym jsj, which uses the first letter of each word.
  • Entering in a phrase without a shortcut is a way to add words to the iPhone’s dictionary. This is actually Apple’s official method for adding words to the iPhone’s dictionary. You’ll note, when creating a shortcut, the word Optional appears in faint gray text in the Shortcut field.
  • You can use emoji with shortcuts too.

Tip: How to Force an App to Quit on the iPhone/iPad

If an iPhone/iPad app freezes or becomes stuck, you can force that app to quit with two steps:

1. Press and hold down the iPhone sleep button until Slide to Power Off appears:

2. Press and hold the home button until the app quits:

This method will completely shutdown the app and clear the app’s saved state from the iPhone’s memory. When the app quits, you should be taken back to the iPhone’s home screen.

Notes:

  • If you double-click to bring up the iPhone’s app switcher bar, you’ll note that the forced-quit app’s icon still appears in the list of apps (it will appear first in the list). However, if you tap the app to launch, it will launch a fresh version of the app—in other words, it won’t launch the app from its previously saved state.
  • If you want to close the app in the app switcher bar too, simply hold your finger on the icon until it starts wiggling, then tap the red circle with the white minus sign in it.

Tip: How to Rename Your iPhone or iPad

Your iPhone has a name. You’ll see it in iTunes in the left sidebar when the iPhone/iPad is connected. You may not remember, but you gave it that name when you originally set up your iPhone/iPad. You’re not stuck with it though, it can be changed right on the iPhone itself or in iTunes. The following are step-by-step instructions on changing your iPhone’s name, both on the iPhone and in iTunes.

How to Change Your Device’s Name on the iPhone/iPad:

1. Open Settings:

2. Tap General:

3. Tap About:

4. Tap Name and enter in a new one:

How to Change Your Device’s Name in iTunes:

Changing your iPhone/iPad’s name in iTunes is even easier. Here’s how.

1. Connect the iPhone/iPad to iTunes either by the USB cable or through Wi-Fi Synching:

2. Double click on your device’s name in the left sidebar and enter in a new name:

Notes:

  • Make sure to give your device a unique name. The more iPhones, iPads, iPods, and AppleTVs you connect to your computer’s iTunes, the more confusing your sidebar could get. I like to include the type and generation of the device in its name, ie, Alan’s iPhone 4, to help avoid confusion.

How to Quickly Add All U.S. Holidays to the iPhone or iPad’s Calendar

There’s no need to enter holidays into the iPhone’s calendar one by one. There’s a much easier way. In fact, if you’re reading this on an iPhone or iPad, simply tap this link to add all US Holidays to your calendar. If you’d rather do it manually, below are step-by-step instructions on adding US Holidays to your iPhone calendar. Also see the Notes section at the end of this post for more useful calendars.

1. Open Settings:

2. Scroll down and tap Mail, Contacts, Calendars:

3. Tap Add Account:

4. Scroll down and tap Other:

5. Tap Add Subscribed Calendar:

6. Next to Server, type in files.apple.com/calendars/US32Holidays.ics:

7. Tap Next:

8. Tap Save:

That’s it. Now launch the Calendar app and flip through it to see the US Holidays.

Notes:

  • You can find and add more calendars to your iPhone at icalshare.com.
  • Subscribed calendars are read only—you can’t edit the events or add new ones.
  • Many Internet companies have compatible calendar-subscription services, including Google and Yahoo.

Tip: How to Turn On Private Browsing Mode on the iPhone & iPad

Need to browse to some websites without leaving tracks on your iPhone? Do you want the iPhone to not remember your sites visited, searches, and the information you entered into fill-in forms? That’s what the new Private Browsing Mode is for. I mean, does my wife need to know I spent 20 minutes looking at Anne Hathaway pictures last night? No she doesn’t. Here’s how to turn on Private Browsing mode.

1. Open Settings:

2. Scroll down and tap Safari:

3. Next to Private Browsing, swipe the tab to On:

4. The following pop-up may appear:

This allows you to either keep all the webpages currently open in the iPhone’s browser or to close them all as you switch to Private Browsing mode. Tap Keep All to keep them open, or Close All to close them.

5. Now open Safari. The border of the app should be black instead of gray:

A black border means Private Browsing mode is on.

Endnotes:

In private browsing mode:

  • Visited sites are not added to the browser’s history.
  • Searches are not added to the search history drop-down for Google (or your choice of search engine).
  • Filling out forms won’t result in have that info being saved to the browser’s autofill feature
  • Cookies are deleted.
  • If you want to completely cover your tracks after you finish browsing, make sure to close all your browser windows.

Tip: Make the iPhone’s Spotlight Search More Useful By Preventing Emails, Contacts, Etc, From Showing Up

Spotlight Search iPhone

If there was one tip I’d give to new iPhone users, it’s to teach themselves to use the iPhone’s Spotlight Search to find and launch apps. It really is the quickest way to launch an app buried somewhere in the various home screens and folders on the iPhone. If you’re new to the iPhone, you can access Spotlight Search by swiping to the right on the iPhone’s first home screen.

The only problem with Spotlight Search is that search results oftentimes can be cluttered. Emails, contacts, music, etc, can show up as well, making it difficult to find what you’re looking for. Thankfully, you can prevent the unwanted clutter. Below are step-by-step instructions on preventing certain types of items from showing up in Spotlight Search:

How to Clean Up Spotlight Search:

1. Open Settings:

2. Tap General:

General in iPhone Settings

3. Tap Spotlight Search:

4. Add or remove items by tapping them (a checkmark indicates it will be included in search results):

I only want apps to appear in my search results, so I’ve only selected Applications (aka, apps).

Notes:

  • If you’ve add a website bookmark to the iPhone’s home screen, it will be considered an app and will show alongside App Store apps in search results.
  • You can also set the order that items show in search results. For example, you can make Apps show first, Contacts second, Emails third, etc. Simply go to Settings–>General–>Spotlight Search, then tap, hold, and drag the three white lines next to an app to reorder the search results.

Tip: How to Turn Off the Unread Badge for the Mail App on iPhone/iPad

One of past annoyances of the iPhone’s Mail app was a little red badge that told you hundreds of unread emails were waiting for you. Well, suffer no longer, as you can now turn off that ugly little red badge. Here’s how:

1. Open the Settings app:

2. Tap Notifications:

3. Scroll down the list of apps until you see the Mail app. Tap it:

4. Slide Badge App Icon to Off:

And that’s it. You’ll never see that annoying red badge again. Note that this also works for turning off badges for any app. You can use this same method to turn off badges for any app, not just the Mail app. Badges? We don’t need no stinkin’ badges.