Category: iPhone Tips

Basics: How to Turn On Find My iPhone

>

Find My iPhone is now a free feature for anyone with an iPhone 4 or newer, and it’s something you’ll want to have turned on, as it can come in extremely handy—not only does Find My iPhone show the location of your iPhone should it be lost or stolen, it can remotely lock the iPhone, wipe its memory, or have the iPhone emit a beeping sound in case it’s lost between couch cushions. To use Find My iPhone, you’ll need to activate it on the iPhone first. Here’s how.

How to Activate Find My iPhone

1. On the iPhone, tap Settings:

2. Tap Mail, Contacts, and Calendars:

3. Tap Add Account:

4. Tap MobileMe:

5. Log in with your Apple account ID and password, which is the same ID you use to buy apps and music in iTunes. Note that your ID needs to be an email address to use Find My iPhone (if it’s not, go here for instructions on updating your ID to an email address). If you don’t have an Apple ID or account, tap Create Free Apple ID:

6. Tap MobileMe (you may need to verify your account first via an email Apple sends you):

7. Slide Find My iPhone to On:

8. Tap Allow:

That’s it. Once turned on, you can now use Find My iPhone’s features on the web, or via an official app on the iPad, iPod, and iPhone.

How to Use Find My iPhone Using a Browser:

1. Go to iCloud.com and log in:

2. Your iPhone’s location will show on Google Maps:

3. To access more features (remote wipe, lock the phone, or make the iPhone beep), click the arrow in the top right corner:

Now you can rest easy always knowing where your iPhone is.

Be sure to check more of our iPhone Tips.

iPhone Tips: How to Permanently Delete an App, From the iPhone and iTunes

When you delete an app on the iPhone, it’s not completely gone from your life. It lives on in your iTunes library. You’ll notice this the next time the developer of the app updates it. iTunes will signal you, often annoyingly, that there is an update available to download. As you collect more and more apps, it becomes quite a chore to download all their updates. Here’s how to permanently delete apps to avoid such hassles:

How to Permanently Delete an iPhone App:

1. In iTunes, select Apps from the left column:

2. Find the app that you want to delete. You can use the search bar in the top right to quickly find the app:

3. Right click the app icon (or name of the app) and select Delete:

4. A pop-up prompt will ask you if you want to delete the app from your library. Click Remove:

5. A second prompt will ask you if you want to move the files to the trash bin. Click Move to Trash:

Empty your computer’s Trash Bin if you want to say goodbye to the app forever. Pfwew! That was a lot of work to simply get rid of an app.

Be sure to check out more of our iPhone Tips.

Cost to Cancel a 2-Year AT&T Wireless iPhone Contract Early

Want to get out of your 2-year AT&T Wireless contract early? It’s going to cost you. How much? A fee high as $325 but probably less than that. The is a fee called an Early Termination Fee. Here’s how to calculate that fee:

1. If your contract was signed on or after June 1, 2010: $325 – ($10 x each full month of contract completed)

2. If your contract was signed before June 1, 2010: $150 – ($4 x each full month of contract completed)

How Do I Find Out When I Signed My 2-Year Contract?

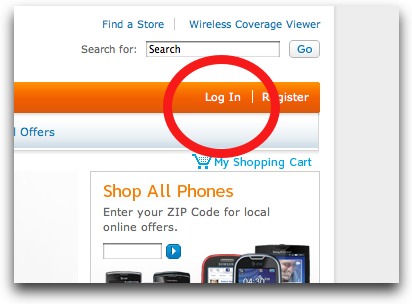
1. Log in to AT&T Wireless at att.com:

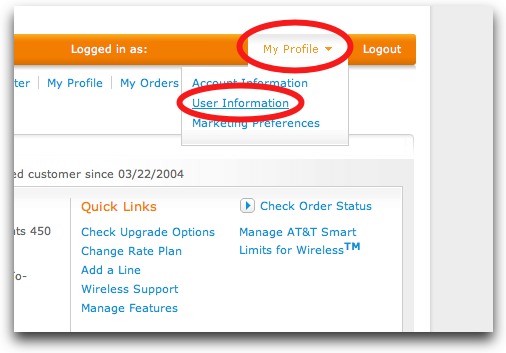
2. Click on My Profile in the top right, then select User Information from the drop-down menu:

Step 2 Checking iPhone Contract Status

3. In the box labeled Contract Information, you’ll see your Contract end date:

Contract End Date for ATT

2 years before that date is when your contract began. To calculate how far along in your contract you are, count the months to that date and subtact that number from 24 (example: 24 months – months until contract end date ).

If you wish to see the terms of your contract, click on Contract (Wireless), which will open a PDF document showing your calling plan, contract activation date, and other important info.

Contract Info on ATT Wireless website

Here is the exact language on Early Termination Fees taken from AT&T.com’s Customer Agreement page:

If your Service Commitment includes the purchase of certain specified Equipment on or after June 1, 2010, the Early Termination Fee will be $325 minus $10 for each full month of your Service Commitment that you complete. (For a complete list of the specified Equipment, check att.com/equipmentETF). Otherwise your Early Termination Fee will be $150 minus $4 for each full month of your Service Commitment that you complete.

How to Search for Text Within a Web Page on the iPhone & iPad

The ability to search for a specific bit of text within a web page has long been a sorely missing feature on the iPhone and iPad. Thankfully, Apple added the feature in the iOS 4.2 update. Too bad the iOS browser gives no indication on how to use the feature. But we’ve got you covered:

How to Search for Text Within a Web Page

1. On the webpage you want to search, tap the “Google” Search Bar in the top right corner:

2. Enter the text you want to search for, but do not tap the Search button:

3. Look below the drop-down list, you’ll see text that reads On This Page (X matches):

4. Quickly swipe upwards on the screen:

5. At the bottom of the list that appears on the screen, tap the text Find “Your Text”:

6. Any text that matches your phrase will be highlighted in yellow:

7. Tap Next to travel to matching text. Tap Done when finished:

And that’s it! Not too obvious, huh? Be sure to check out more of our posts on iPhone Basics.

iPhone Basics: How to Turn On Call Forwarding

The iPhone makes it a snap to activate call forwarding. You simply activate it in the iPhone’s Settings. Just follow these instructions (note that the time you talk on a forwarded call will count against your iPhone’s minutes, even if it’s on another phone):

1. Open Settings:

2. Scroll down and tap Phone:

3. Tap Call Forwarding:

4. Swipe Call Forwarding to On:

5. Tap Forward To:

6. Enter a 10-digit phone number:

7. Tap the Call Forward button in the top left of the screen.

8. And that it’s. You’ll have to wait a second for the iPhone to contact and activate AT&T’s call forwarding services for your account (requires that you have a cell signal). When it’s activated, you will see a special call forwarding icon appear in the iPhone’s top task bar:

Note: You’ll only have to enter in the forwarding phone number once, and from then on, just slide call forwarding on or off to activate it for that number. You can, of course, change the number.

Be sure to check out more of our posts on iPhone Basics.

How to Convert PDFs to ePub for Apple’s iBooks

Apple’s iBooks app can read both PDF and ePub documents, but there are times when you’ll want to convert your PDFs to ePub. Why? Because the ePub format is easier to read on smaller mobile devices, as the text is flowable, you can increase/decrease the font size, and you can highlight text and write notes.

To convert from PDF to ePub, you’ll need to download the free application called Calibre (available for Windows, Mac, and Linux).

How to Convert PDF to ePub using Calibre:

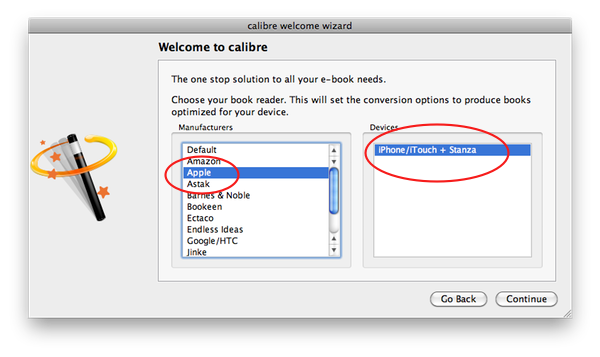
1. Open Calibre. During the initial setup, you’ll be asked for the type of device you’ll be using. Choose Apple, then iPhone/iTouch + Stanza (don’t worry, you won’t have to use Stanza to read the ePub docs):


Continue reading…

iPhone Tip: Label Your Folders With Emoji

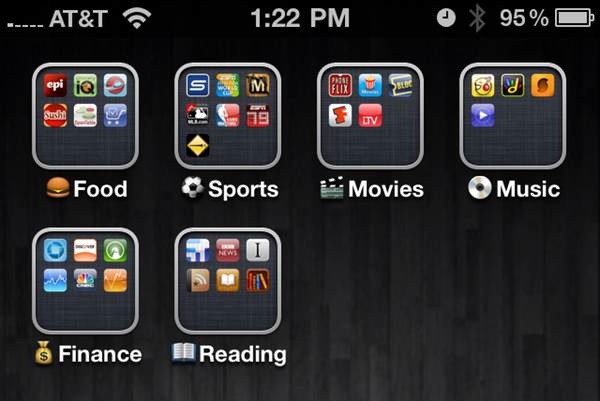
Label Folders With Emoji

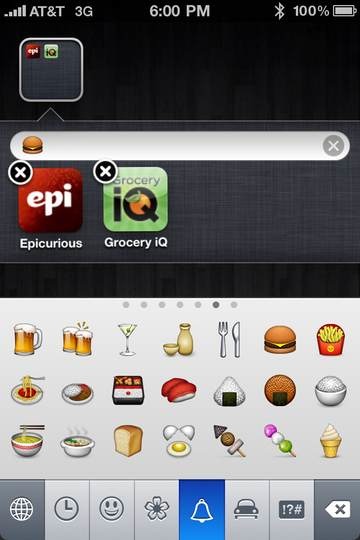
Emoji can be used for more than just text messages. The iPhone lets you use them to label folders. Why not use an image of a hamburger to label a folder of your favorite food apps? It’s easy. Here’s how.

1. Activate emoji on the iPhone. It’s easier than ever (click here for step-by-step instructions).

2. Create a new folder, or hold your finger down on an existing one until it starts wiggling then tap the folder.

3. Tap the text area where the name of the folder goes. When the iPhone’s touchscreen keyboard comes up, switch to the emoji keyboard by tapping the globe icon until it appears. Search for an appropriate emoji and type it in.

This iPhone tip was inspired by a similar one discovered by iPhone J.D.

Folders labeled with emoji

Basics: How to Activate FaceTime on the iPhone

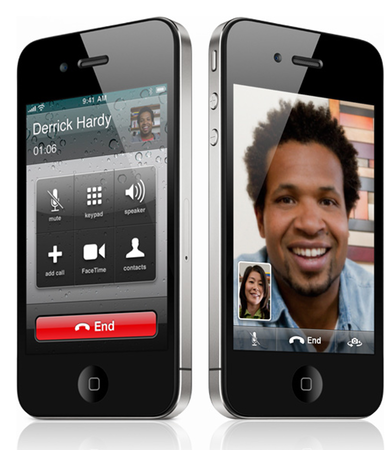
If you’re trying to use the FaceTime feature on your new iPhone 4 and find that there are no on-screen buttons to tap or any way to access it, it’s likely not available because you restored your new iPhone 4 with a backup of your previous iPhone, which for some bizarre reason disables FaceTime. You’ll need to reactivate it in the iPhone’s Settings (new iPhone 4 owners who don’t restore from a backup have FaceTime accessible by default).

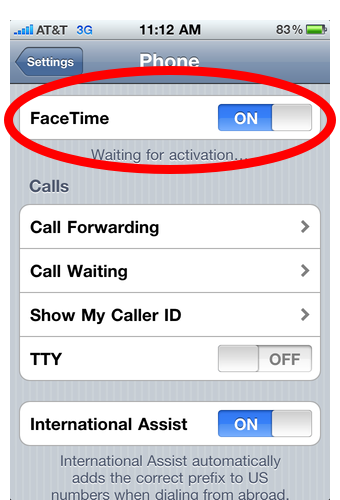
To activate FaceTime, you must go into the iPhone’s Settings, scroll down and tap Phone, then slide the FaceTime slider to On, like thus:

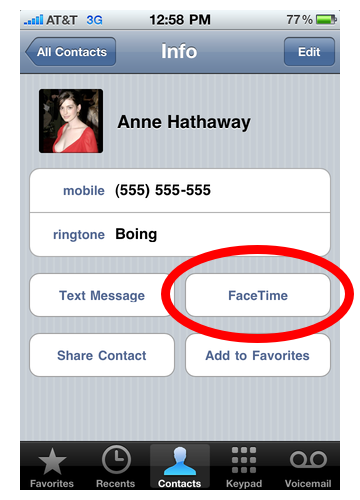
After it’s activated, you can make a FaceTime call by selecting one of your contacts and tapping the FaceTime button (see image below. FaceTime requires the other person to have an iPhone 4 or newer and FaceTime activated, and that you both be on a Wi-Fi network). You can also make a normal phone call, then switch over to FaceTime in the middle of it by tapping the FaceTime button. This might be a better way to instigate a FaceTime call, as you can get the caller’s permission first (not everyone is ready to be on camera at a moment’s notice).

Be sure to check out more of our iPhone Tips.