Do Not Disturb mode is a useful feature of the iPhone and iPad that silences calls, ringtones, notifications, and alerts when turned on. You can turn on Do Not Disturb manually, or you can schedule it to turn on and off automatically during a certain period of the day, say, when you are sleeping or trying to go to sleep. For example, mine is set to turn on at 10 PM and turn off at 5:45 AM. Note that your iPhone’s screen also won’t light up from notifications when Do Not Disturb mode is turned on. Here’s how to schedule Do Not Disturb mode.
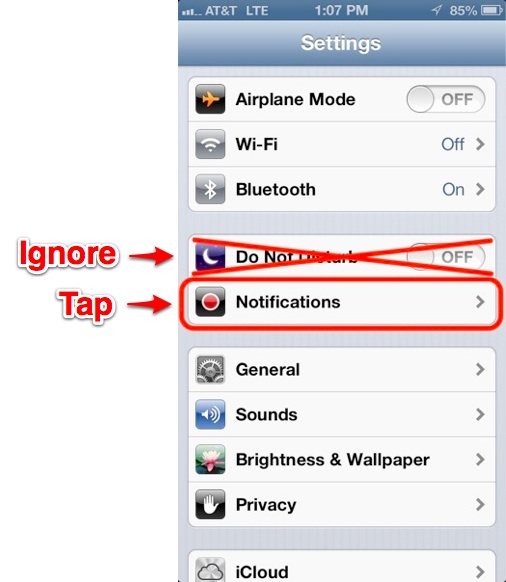
1. Open Settings:

2. Tap Notifications:
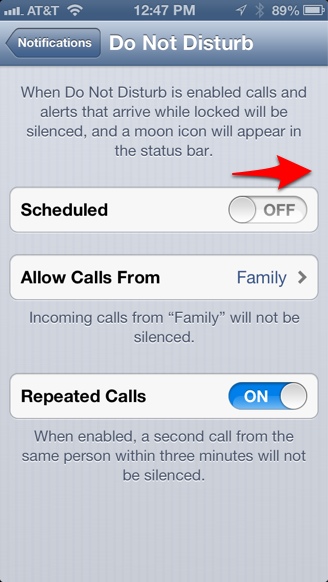
3. Now tap Do Not Disturb:

4. Slide Schedule to On:
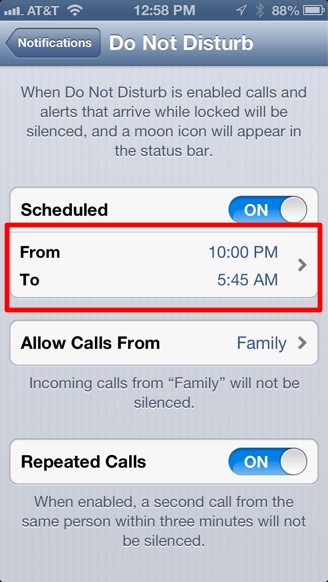
5. Tap the time range below to set a range of time:
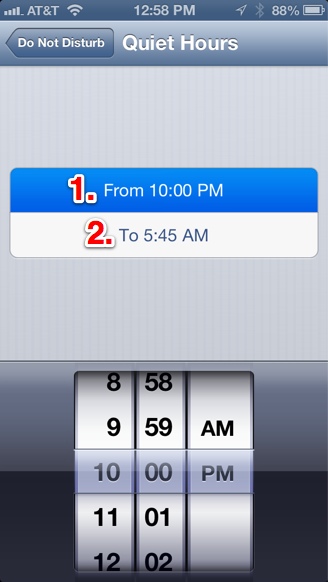
6. Set a range of time by first tapping the From field to create a start time, then tap the To field to create an end time:
And that’s it, Do Not Disturb mode will turn on/off automatically during this period of time. Now, you can do something else kind of neat. You may still want some important people to be able to ring your phone when Do Not Disturb mode is on. After all, who is going to bail Junior out of jail at 3 AM? Check out our instructions for How to Allow VIP Contacts to Call You When Do Not Disturb Mode is On, and also, How to Create Groups of Contacts.


