Tagged: Mail App

iPhone & iPad Basics: How to Use Flagged Emails and the New Flagged Inbox

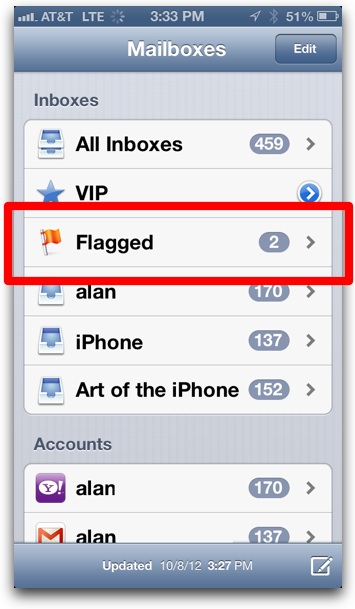
Flagged email inbox in iPhone Mail app

The Flagged inbox is a new feature introduced in the iOS 6 software update that is useful as a way to sort important emails into one central place so you can find them easier. Flagged emails from different accounts all go into the same Flagged inbox.

To send an email into the Flagged inbox, you simply tap the flag icon in the bottom right corner of the individual email, like this:

Tap Flag icon in bottom left

Flagged emails still remain in their original email account’s inbox but also appear in the Flagged inbox. To remove the email from the Flagged inbox, just tap the flag icon again, then tap Unflag from the pop-up menu.

Extra Notes & Tips:

  • Don’t see the Flagged inbox? It doesn’t appear until you flag an email for the first time.
  • You can move a flagged email out of the Flagged inbox into another sub-inbox of the email account it belongs to by tapping the move email button in the Mail app, which is the second button from the left. The email will remain flagged, it just won’t appear in the Flagged inbox. You can move it back into the Flagged inbox via the same “move email” button.

iPhone Tip: How to Receive Notifications for Emails From VIP Contacts Only

Want to get a notification for only when a specific contact sends you an email? It’s now possible thanks to the VIP contacts feature in the Mail app. It’s easy to set up, just follow the step-by-step instructions below.

1. Open the Mail app:

iPhone Mail app icon

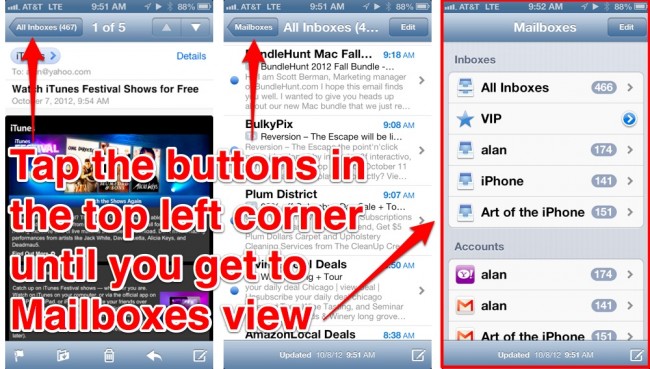
2. Tap the buttons in the top left corner to navigate to Mailboxes view:

Navigating to Mailboxes view

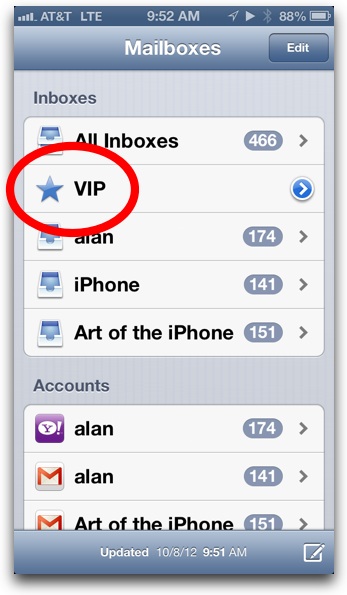
3. Tap VIP:

Tap VIP in iPhone Mail app

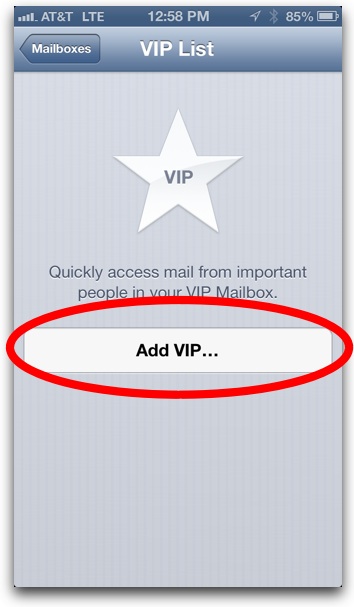
4. Tap Add VIP…:

Tap Add VIP in iPhone Mail app

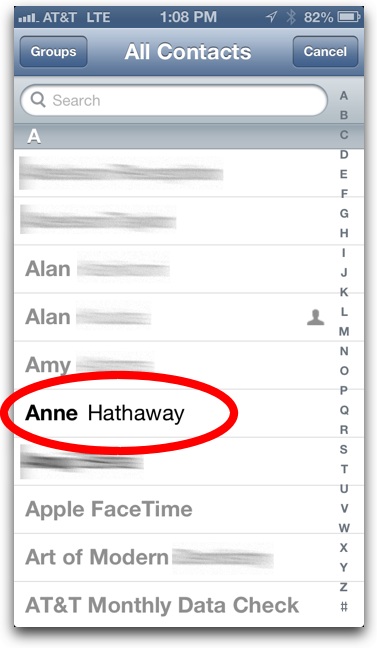
5. Tap a contact to add it to your VIP list (see note below if you aren’t able select a contact):

Select a Contact for VIP Notification Treatment

Note: A contact must have an email address assigned to it in order to add it to the VIP list. To add an email to a contact, quit out of Mail, open the Contacts app, tap the contact’s name, tap Edit in the top right corner, and enter an email.

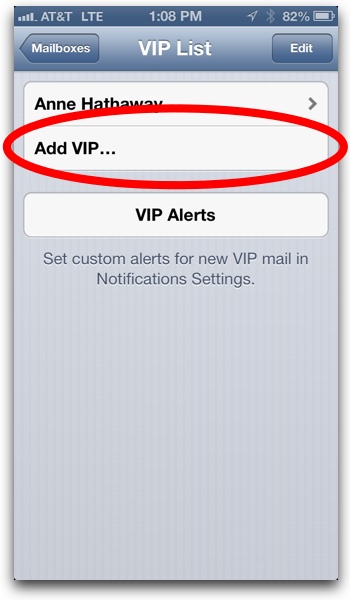
6. To add another, tap Add VIP… again:

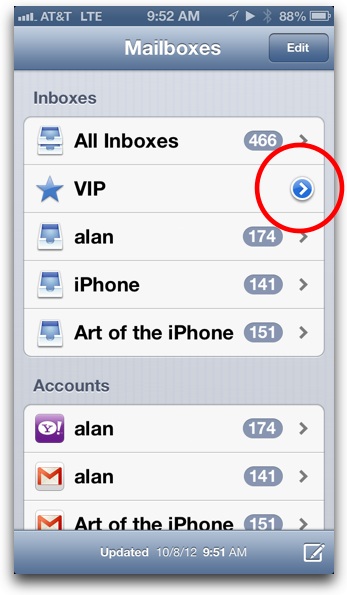
Note: To add more contacts to the VIP list in the future, tap the blue and white arrow button in Mailboxes view:

Tap blue and white arrow button

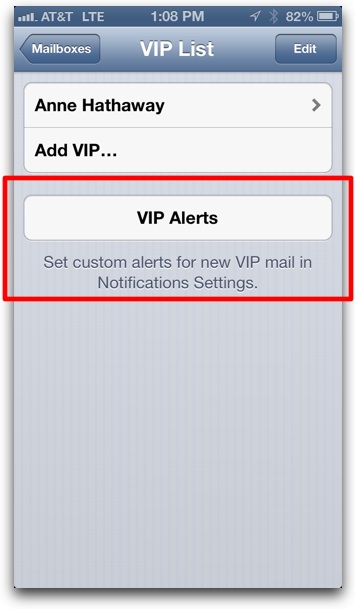
7. When finished adding contacts, next tap VIP Alerts:

Set VIP Alerts

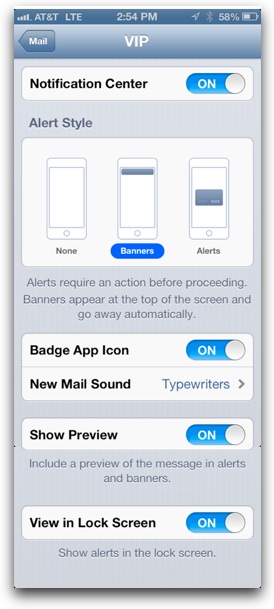
8. Adjust the various settings to your liking:

VIP Alerts Settings

And that’s it, you’ve set up VIP email notifications. Also note that VIPs get their own special inbox, so emails from VIPs will appear in the VIP inbox in addition to the original inbox (in other words, your Gmail account, etc).

Be sure to check out more of our iPhone Tips.