Category: iPhone Basics

Basics: How to Activate FaceTime on the iPhone

If you’re trying to use the FaceTime feature on your new iPhone 4 and find that there are no on-screen buttons to tap or any way to access it, it’s likely not available because you restored your new iPhone 4 with a backup of your previous iPhone, which for some bizarre reason disables FaceTime. You’ll need to reactivate it in the iPhone’s Settings (new iPhone 4 owners who don’t restore from a backup have FaceTime accessible by default).

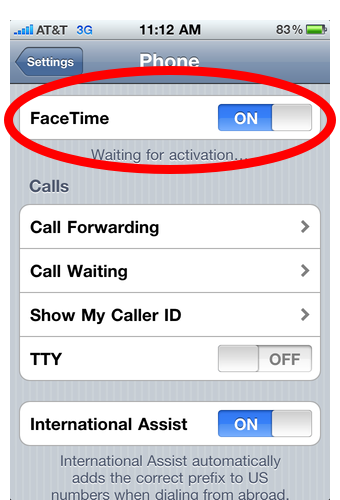
To activate FaceTime, you must go into the iPhone’s Settings, scroll down and tap Phone, then slide the FaceTime slider to On, like thus:

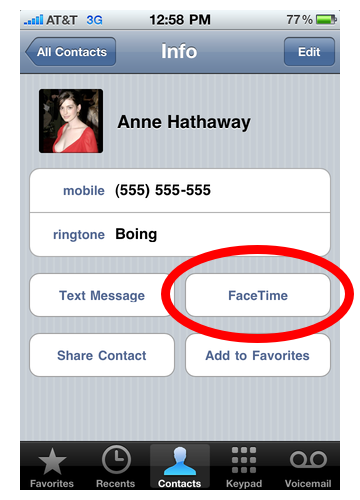
After it’s activated, you can make a FaceTime call by selecting one of your contacts and tapping the FaceTime button (see image below. FaceTime requires the other person to have an iPhone 4 or newer and FaceTime activated, and that you both be on a Wi-Fi network). You can also make a normal phone call, then switch over to FaceTime in the middle of it by tapping the FaceTime button. This might be a better way to instigate a FaceTime call, as you can get the caller’s permission first (not everyone is ready to be on camera at a moment’s notice).

Be sure to check out more of our iPhone Tips.

Basics: How to Give an iPhone Contact Their Own Specific Ringtone

The iPhone comes with a default ringtone that plays anytime a call comes in. You may know you can easily change that ringtone in the iPhone’s settings, but did you know you can also give each person in your iPhone contacts list their own special ringtone? Below are step-by-step instructions on how to do this.

1. Go to your iPhone’s contacts list:

2. Tap a contact:
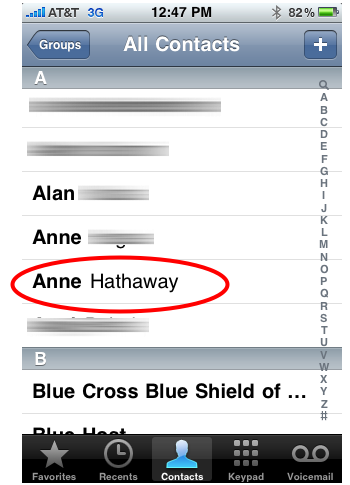
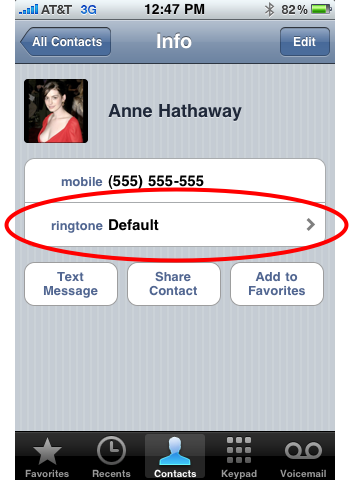
3. Tap Ringtone if you see a Ringtone field, otherwise tap Edit in the top right corner, then scroll down until you see Ringtone and tap it:
4. Scroll through the list of ringtones and tap one to select it (the ringtone will play when you select it):
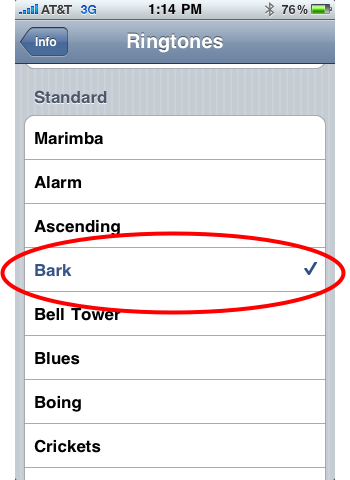
And that’s it. You’ve changed the ringtone. A checkmark will appear next to the ringtone to let you know it’s the assigned ringtone, and the name of the ringtone will appear underneath the contact’s name.

Notes and questions:

What ringtones can I use?

You can use any of the iPhone’s default ringtones, ringtones you buy through iTunes, or even ringtones that you make yourself.

How do I make my own ringtone?

You can make your own ringtone using your own songs and iTunes. Check out our step-by-step instructions for how to do this.

Be sure to check out more of our iPhone Basics.

iPhone Basics: How to Show Battery Percentage on the Home Screen

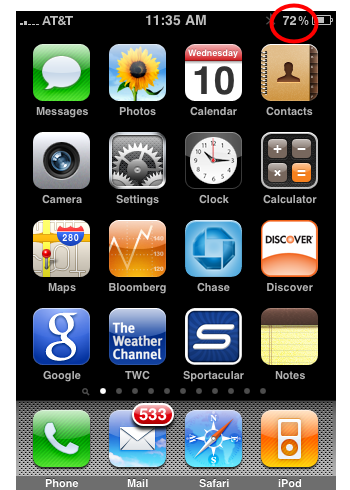
If you’re looking for a little more precision in just how much juice is left in your iPhone battery, the iPhone has a way to display battery life as a percentage next to the battery icon. To turn on this feature, follow these instructions. Note that this works for the iPhone 3GS, iPhone 4, and on.

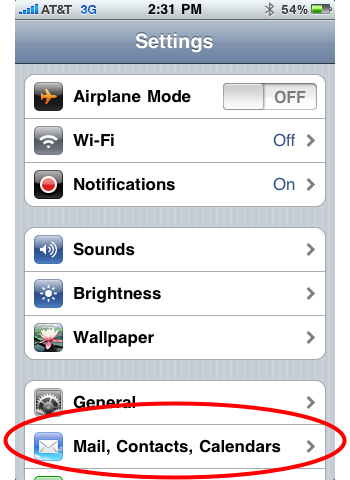
1. Tap Settings:

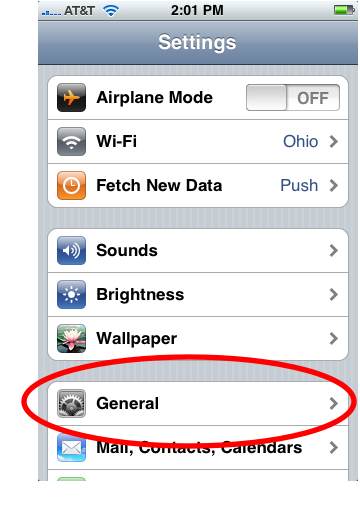
2. Tap General:

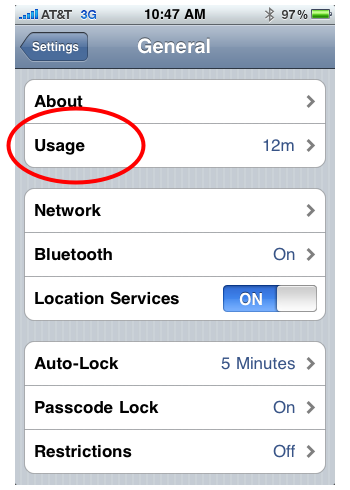
3. Tap Usage:

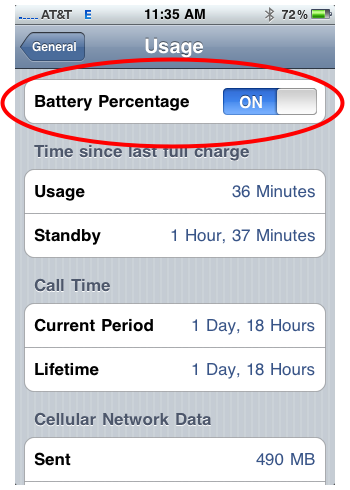
4. Slide the Battery Percentage tab to On:

Be sure to check out more of our iPhone Basics and iPhone Tips.

iPhone Basics: How to Transfer Videos to the iPhone

Movies on the iPhone

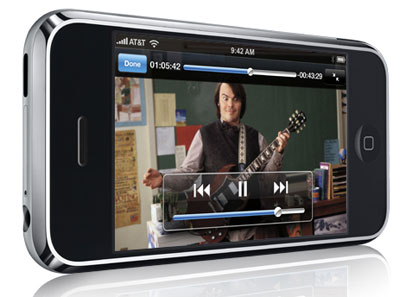
The iPhone’s bright and detailed screen is perfect for watching movies and TV shows while on the go. Videos purchased in iTunes are relatively easy to transfer to the iPhone. Videos from other, non-iTunes sources are a different matter (see the Notes section at the end of this post). The following are instructions on how to transfer movies and TV shows purchased from iTunes onto the iPhone.

How to Sync iTunes Movies and TV Shows to the iPhone

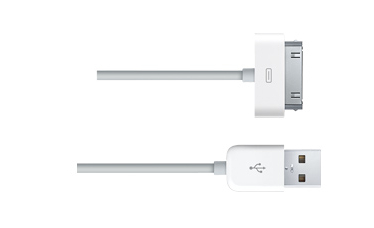
1. Connect your iPhone to the computer.

Connect the iPhone to Computer

2. In iTunes, click on your iPhone in the left sidebar.
Continue reading…

iPhone Basics: How to Attach Multiple Photos to an Email

To send multiple photos on the iPhone, you need to start in the iPhone’s Photo app, not in the Mail app like you’d assume. Below are step-by-step instructions for attaching multiple photos to an email.

1. Launch the Photo App:

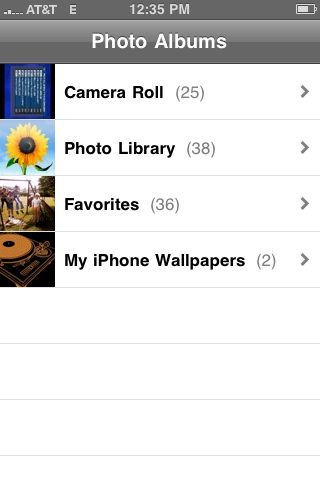
2. Tap the album where the photos are located:

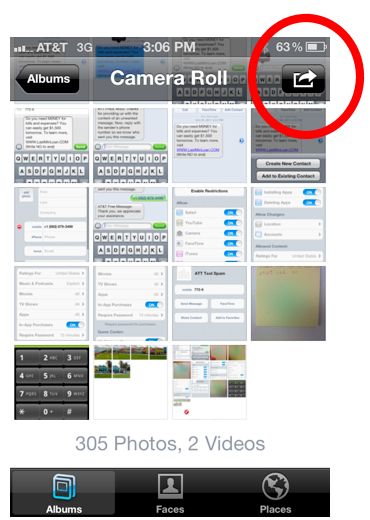
3. You’ll see a bunch of thumbnails of the pictures in the album. Tap the Share button in the top right corner:

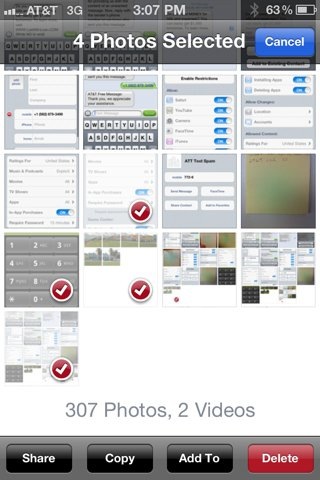
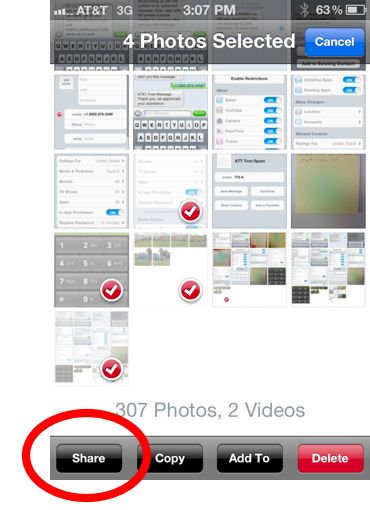
4. Tap up to 5 photos you want to share. A red check mark will appear on the selected photos:

5. Tape Share in the bottom left.

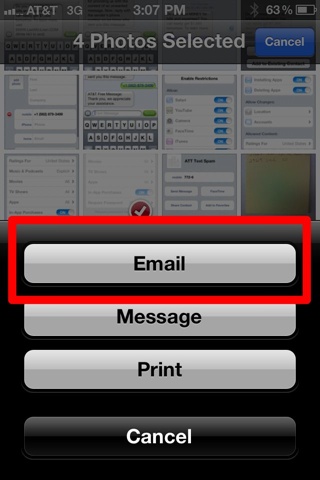
6. Tap Email:

7. A new email will pop up with your photos inserted into the email. Choose your recipients, write a subject and message if you want, and tap Send. And that’s it.

Be sure to check out more of our posts on iPhone Basics.
How to Make an Em Dash and Ellipsis With the iPhone Keyboard

The iPhone’s keyboard has a few extra characters that only become visible if you press and hold down keys. Two frequently used characters you might find useful to know about are the em dash (–) and the ellipsis (…).

Em Dash–

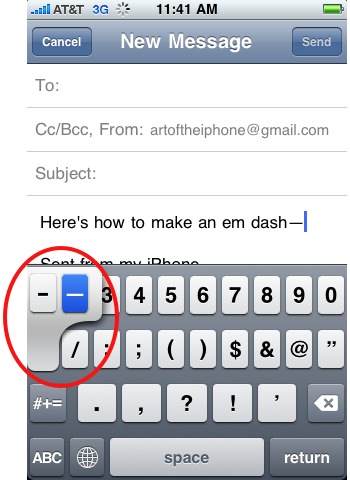
To make an em dash—often used to interrupt a sentence for parenthetical remarks like this one—hold down the hyphen key until you see an em dash appear next to the hyphen. Slide your finger over to highlight the em dash and release your finger.

Ellipsis…

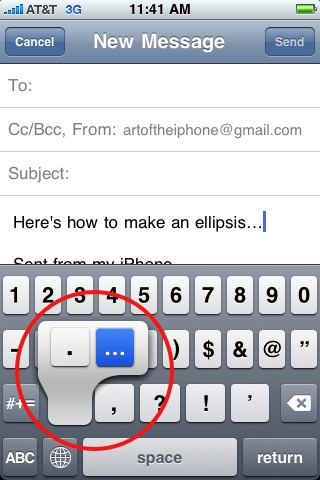
To make an ellipsis, hold down the period key until the ellipsis appears next to the period. Slide your finger to highlight and release.

Be sure to check out more of our posts on iPhone Basics.
iPhone Basics: How to Send a Text Message to Multiple People

1. Open the SMS app:

2. If you see a Messages button in the top left, tap it (otherwise, skip to next step):

3. Tap the Compose button in the top right:

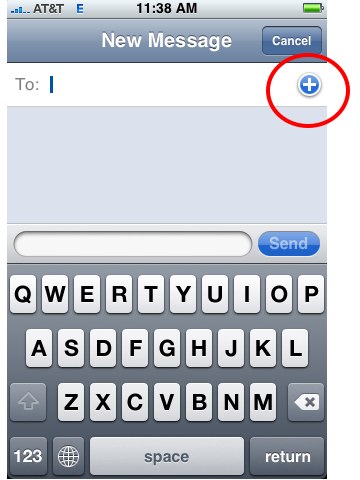
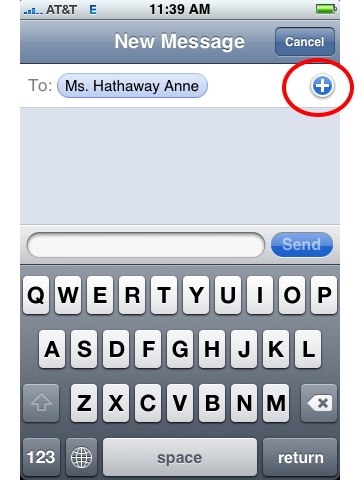
4. Tap the plus sign:

5. Select a contact:

If your contact has multiple phone numbers, you may have to choose which number to send the text message to.

6. The contact you selected should appear in the message’s To: field. To add another contact, tap plus sign again:

7. Repeat until you’ve added all the recipients you want.

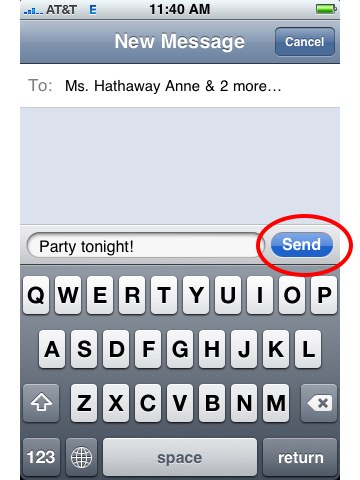
8. When finished with your message, tap Send:

And that’s it, you’ve sent the SMS text message to multiple people. To get more tips, check out our iPhone Tips and iPhone Basics post categories.

How to Set the iPhone’s Sleep Timer

If you like to listen to music or podcasts on the iPhone as you go to sleep, there is a sleep timer function that can automatically stop playing audio after a set amount of time. The function is sort of hidden within the iPhone’s Clock app. Here’s how to set the sleep timer.

How to Set the iPhone’s Sleep Timer.

1. Open the Clock app.

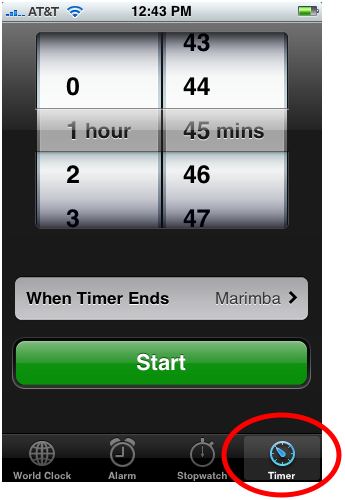
2. Tap the Timer tab in the bottom right:

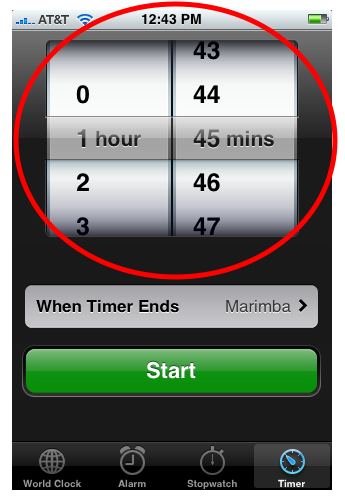
3. Set a time you want the iPhone to countdown:

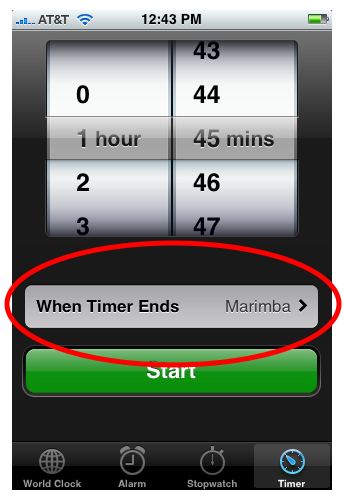
4. Tap When Timer Ends button:

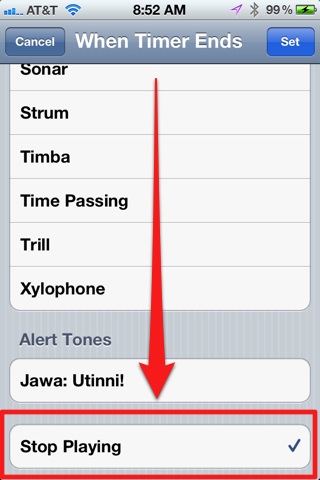
5. Scroll down to the bottom and tap the Stop Playing button:

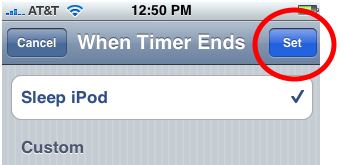
6. Tap the blue Set button in the top-right corner:

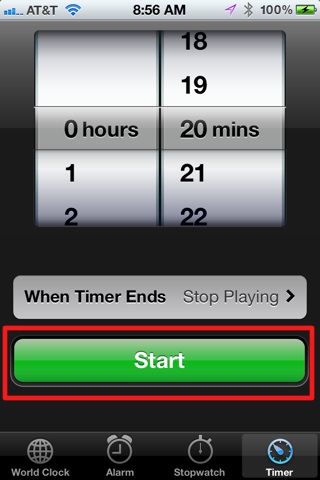
7. Tap Start to start the timer countdown:

When the timer reaches zero, it will close the iPod app, lock the iPhone, and place it in sleep mode.

Check out all of our posts on iPhone Tips.