Category: iPhone Tips

How to Use an iPhone Without a Data Plan (Voice Only)

You can save a lot of money by not using a data plan with your iPhone. But there’s only one problem: AT&T doesn’t offer a voice-only plan for the iPhone. There is a solution. It requires two things:

  1. An unlocked iPhone.
  2. A prepaid sim card from a T-Mobile store.

Step 1. Buying a Prepaid T-Mobile Sim Card:
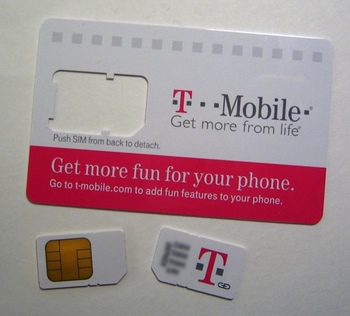
To use a voice-only plan with the iPhone 3G, 3GS, or first-gen iPhone, you’re going to need a T-Mobile sim card (iPhone 4 requires a mini-sim). Check to make sure T-Mobile has service in your area.

The easiest way to get a prepaid T-Mobile sim card is to go to a T-Mobile retail store and simply tell them what you want. Make sure to bring some form of ID. You can even tell them that you’re going to put the sim card in a unlocked iPhone, as many T-Mobile customers use unlocked iPhones (a T-Mobile cashier even once admitted to me he used an unlocked iPhone).

Cost

The cost of getting started with a prepaid T-Mobile voice-only sim card is as cheap as $22.05 (includes an activation fee) that comes with 30-60 minutes. The prepaid card (called Pay As You Go) can then be refilled as you go, no monthly fees! The current prices for T-Mobile’s minutes are:

  • $10 for 30 minutes
  • $25 for 130 minutes
  • $50 for 400 minutes
  • $100 for 1000 minutes

Text messages under the Pay As You Go plan are $0.05 to receive and $0.10 to send. There are also monthly plans and pay-by-the-day plans available as well. T-Mobile’s official prepaid plans website has more info. Here’s where you can buy a prepaid T-Mobile SIM card to stick in your iPhone. And here’s where you can activate it.

Step 2. Jailbreak and Unlock the iPhone
The process of jailbreaking and unlocking your iPhone can be easy, but finding the right information and software for the job is often difficult. Why? Because every time Apple updates the iPhone software, someone must figure out how to jailbreak and unlock it all over again. This often requires new jailbreak/unlocking software for each version. There are also many schemes and scams out there that cloud Google search results and make your task of finding the correct software more difficult. If you want to save yourself the trouble, you can purchase unlocked iPhones off of eBay, but be prepared to spend some money.

We’ll get to some tips on how to jailbreak and unlock your iPhone in a second, but first, a quick definition of the terminology:

Jailbreak: Changing the iPhone’s software so that you can put non-Apple-approved software on it and change the way the iPhone software looks and behaves.

Unlock: Changing the iPhone’s software so it can be used with a carrier other than AT&T (in the US).

Jailbreaking and Unlocking Tips

Because jailbreaking and unlocking can require different methods each time Apple updates its software, it’s important to get good instructions. iClarified.com is one of the best sites for getting step-by-step instructions.

Tips:

  • Don’t ever pay for jailbreaking or unlocking software.
  • Make sure to run through the comments on any website to confirm that the software indeed works. If the site doesn’t have comments, don’t use the software/instructions.
  • Google the terms jailbreak and/or unlock and the version of the iPhone OS to find the correct jailbreaking/unlocking software. For example, search for iPhone Jailbreak 3.1.3 and iPhone 3.1.3 unlock to unlock iPhone OS 3.1.3.
  • To find out the version of the iPhone OS, go to the iPhone Settings–>General—>About and look at the number next to Version.
  • Read up on the dangers of jailbreaking your iPhone, including possible security issues.
  • iClarified.com is a great site for step-by-step jailbreaking instructions.
  • Jailbreaking and unlocking are two separate processes. Some software does both for you, but oftentimes you must use different software for each.
  • Some jailbreaking software, like Spirit, only jailbreaks and does not unlock the iPhone for use on other carriers
  • After a successful jailbreak and unlock, do not accept Apple’s iPhone OS software updates, else your unlock will stop working.

How to Give an iPhone App as a Gift Using iTunes

The latest version of iTunes has added the ability to give apps to friends and loved ones with a new feature called Gift This App. This feature should particularly come in handy with those paid apps you want someone to try out but couldn’t quite persuade them to pony up for.

How to Gift an App

1. To gift an app, you’ll need a iTunes account with a credit card attached.

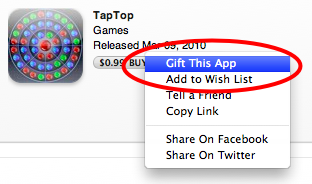
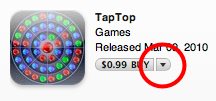
2. Find an app you want to give and click on the arrow next to price. A drop-down menu will appear. Click Gift This App.

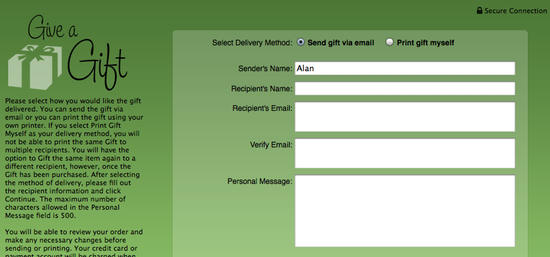
3. A form will appear that will, at the top, ask you whether you want to send the gift as an email, or if you want to print out a certificate and present it in person. For email, the recipient will receive a link they’ll click to download the app. For the printed-out certificate, the recipient will be given a redemption code they must enter into iTunes in order to receive the app. Choose one of the options, then fill out the fields in the form:

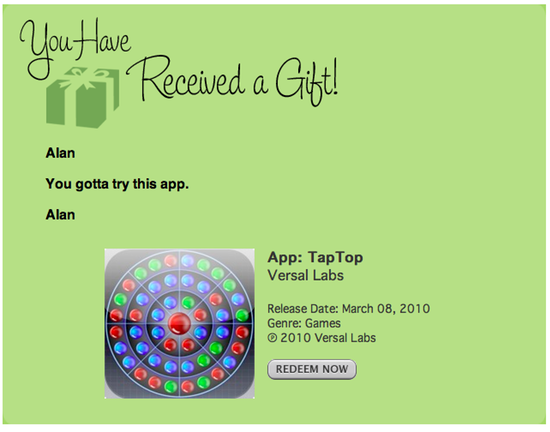
4. If given via email, the recipient will receive the gift via an email that looks like this:


Continue reading…

How To Dry Out a Wet iPhone Quickly With Rice

Via Seattle Weekly:

Guys, last night I did that thing where I dropped my phone in the toilet, and it wouldn’t even turn on afterwards. I was at Video Isle whining about how I was going to have to buy a completely new iPhone, and there was a man there who just happened to work for AT&T. I asked him if I should try to blow-dry my phone, and he said:

SAVIOR FROM AT&T: Turn it off completely, put it in a bag of rice, and leave it there for a couple hours. The rice will absorb the moisture.

ME: *Blank stare*

S.F.A.T.&T.: Just do it.

So, I went home, got out a bag of rice, and stuck my phone in there. I took it out about an hour later, tried to turn it on, and the screen kind of lamely flickered at me. But at least it was turning on, so I stuck it back in there. A couple hours later, before I was about to go to sleep, I took it out and turned it on…AND IT TOTALLY WORKED.

Good tip, as water damage voids the iPhone’s warranty.

How To Fix and Replace a Cracked & Broken iPhone Screen

If you have a broken iPhone screen, the warranty unfortunately does not cover accidental damage—it’s going to cost you money to get it fixed. To repair it, you have three options:

  1. Get it fixed at an Apple store.
  2. Do it yourself.
  3. Send or take it to a third-party repair company.

Below is a look at each option along with the costs and advantages/disadvantages of each.

Apple Store

The most convenient way to get your cracked iPhone screen fixed is to take it to an Apple store. Apple keeps special equipment in their store and can have the iPhone repaired in about 15 minutes. Be sure to make an appointment at the genius bar before heading to the store (you can do this online).

The cost of repairing your screen is $199. Why so expensive? Because not only does Apple replace the glass, they also replace the LCD screen, sensors behind the screen, and the home button.

If you paid $199 to buy your iPhone, this may seem expensive, but the price you originally paid was a subsidized price, meaning the wireless carriers paid for part of the iPhone.

The Apple store is the most expensive option, but it’s also the most convenient and safest. We recommend this option, especially if your screen has stopped working.
Do It Yourself

Another option to fix a cracked iPhone screen is to do it yourself. And it’s dirt cheap. You currently can find a repair kit on eBay for around $20. The website iFixIt sells an excellent screen repair tool kit for around $80 that comes with adhesive strips, metal spudger, spudger, 26-piece screwdriver kit, suction cup, touchscreen glass, and integrated digitizer.

It’s not a simple process to fix an iPhone screen. Apple didn’t intend for you to take the phone apart, so they’ve made it difficult. You’ll need a good set of instructions. The iFixIt site has instructions that accompany its screen repair kit. There are also videos on YouTube that walk you through the process, including an excellent 5-part series by GetterScott‘s, the first of which is shown below:

There are always dangers with the do-it-yourself approach. First, it voids the warranty on the iPhone. If your iPhone conks out and you take it to Apple to be repaired, they could, in theory, refuse to fix it (if they notice your repair work). Second, you could do even more damage to the iPhone, again voiding the warranty. Third, the damage that created the broken screen may have hurt other parts of the iPhone as well, in which case, repair may be beyond the do-it-yourself scope.

Third-Party Repair

Using a reputable third-party repair company to fix the iPhone can save money over Apple’s price, especially if it’s just the outer glass that is damaged, and not the LCD or electronics underneath. These companies can also repair other parts of the iPhone as well. A popular iPhone repair company is Milliamp.com, which charges $120 + shipping to fix the iPhone screen.

A Google search will reveal dozens of companies that offer to fix your iPhone, many for dirt cheap. It’s important to pick a reputable one. There are dangers in using a third-party company, including scam artists who will steal your iPhone or hack into your private information.

You can also search for local iPhone repair shops. The New York Times recently did an article on the burgeoning iPhone-repair cottage industry. It’s much easier to find such repair shops if you live in a large city, but those who live in smaller towns may have to go the mail route.

What About Insurance for Accidental Damage?

There are a few companies that offer insurance for the iPhone. Best Buy offers a Geek Squad Black Tie Protection Plan that costs $16 a month and covers all sorts of damage, including cracked screens. You’ll need to purchase the iPhone at Best Buy in order to sign up for the protection plan.

State Farm used to offer insurance for the iPhone for a mere $40 a year that covered accidental damage. It was called a “personal articles policy.” However, due to the number of claims they received, they’ve discontinued coverage of the iPhone. You should check with your insurance agent for similar plans.

iPhone Basics: How to Show Battery Percentage on the Home Screen

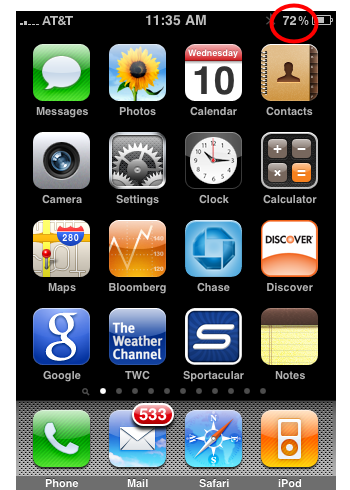
If you’re looking for a little more precision in just how much juice is left in your iPhone battery, the iPhone has a way to display battery life as a percentage next to the battery icon. To turn on this feature, follow these instructions. Note that this works for the iPhone 3GS, iPhone 4, and on.

1. Tap Settings:

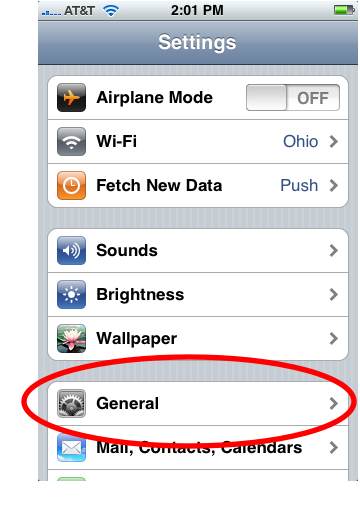
2. Tap General:

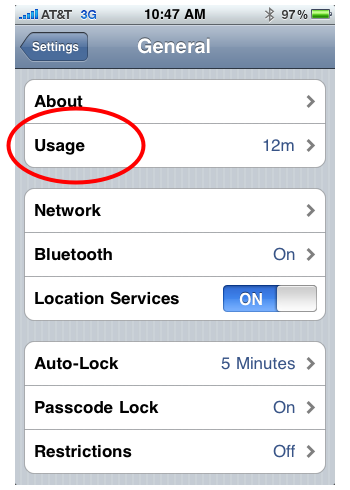
3. Tap Usage:

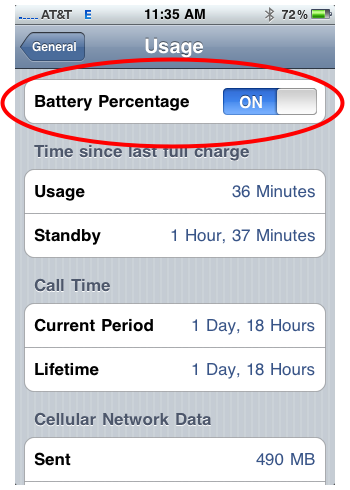
4. Slide the Battery Percentage tab to On:

Be sure to check out more of our iPhone Basics and iPhone Tips.

How to Give the iPhone as a Gift

Giving an iPhone as a Present

The iPhone makes a great gift, but one thing to keep in mind is that over the course of a two-year contract, the true cost of an iPhone is over $2,000. You’ll want to make sure you and your loved know what you’re getting into. The following is a guide on how to give the iPhone as a gift, covering two topics:

  • Giving an iPhone with phone service, and
  • Giving an iPhone only

Continue reading…

iPhone Basics: How to Transfer Videos to the iPhone

Movies on the iPhone

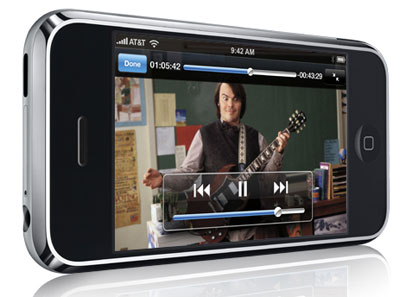
The iPhone’s bright and detailed screen is perfect for watching movies and TV shows while on the go. Videos purchased in iTunes are relatively easy to transfer to the iPhone. Videos from other, non-iTunes sources are a different matter (see the Notes section at the end of this post). The following are instructions on how to transfer movies and TV shows purchased from iTunes onto the iPhone.

How to Sync iTunes Movies and TV Shows to the iPhone

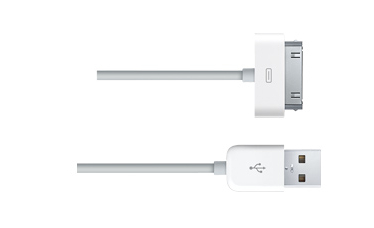
1. Connect your iPhone to the computer.

Connect the iPhone to Computer

2. In iTunes, click on your iPhone in the left sidebar.
Continue reading…

How to Change the Font of the iPhone’s Notes App

Marker Felt on iPhone

Many people dislike the default font (Maker Felt) used in the iPhone’s Notes app. Luckily, Apple recently supplied a way to select from two other fonts. There are also a few “unofficial” ways to change the fonts of the Notes app. First, here’s the official way:

How to Change the Font in Notes

1. Open the iPhone’s Settings:

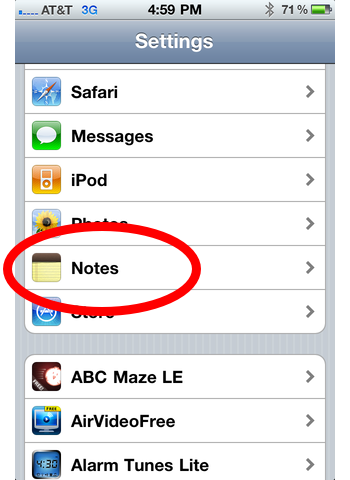
2. Scroll down and tap Notes:

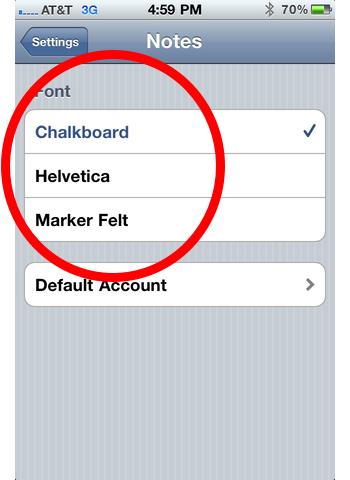
3. Select from the 3 default fonts: Marker Felt, Chalkboard, or Helvetica.

And here are two ways to squeeze out a few more fonts in the Notes app:

The Chinese Keyboard Method

1.Tap the iPhone’s Setting’s icon:

iPhone Settings icon

2. Tap General
3. Scroll down and tap Keyboard
4. Tap International Keyboards
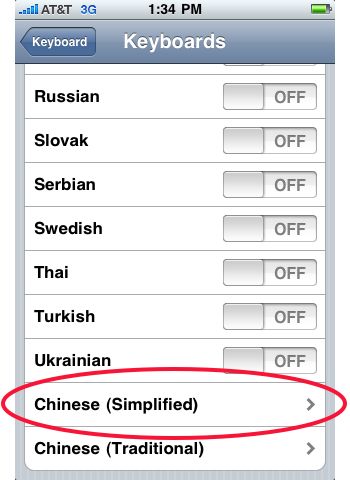
5. Scroll down all the way to the bottom and tap Chinese (Simplified):

Changing the iPhones Note App Font 1

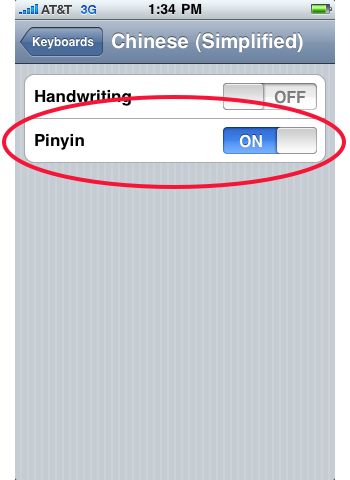
6. Switch the tab labeled Pinyin to On:

Change the iPhone Note App Font 2

You’ll only have to do steps 1-6 once. Steps 8 and 9 will have to be repeated every time you want to change the font.

7. Open the Notes app.
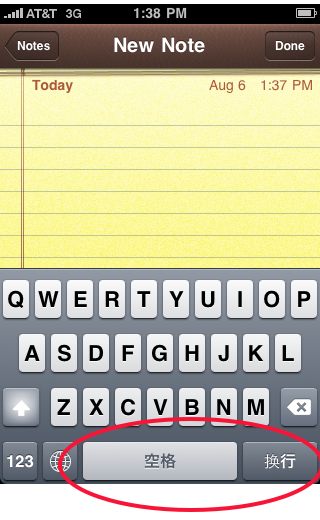
8. Create a new note, and when the keyboard pops up, hit the little globe icon until you see the Chinese keyboard. Most of the keys will be the same as the English version, but the space bar and return button will have Chinese characters on it:

Changing the iPhones Font

9. Type one letter, then switch back to the English keyboard.

Now, when you continuing typing, the note will be in Verdana font.

The Computer to iPhone Method (Mac Only)

iPhone Notes With Multiple Fonts

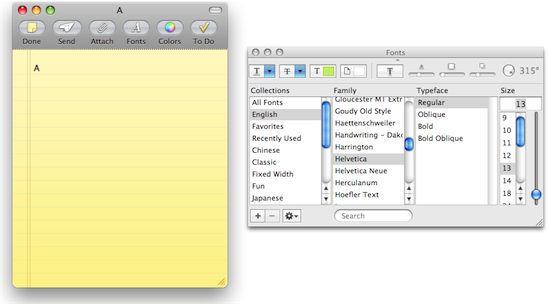
This method is for Mac users only, as it involves creating notes in the Mac Mail application. With this method, you can use dozens of fonts.

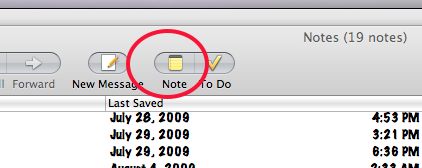
1. In the Mail program on your Mac, create a new Note:

Create New Note in Mac Mail

2. Change the font style to whatever desired font style you want on the iPhone and type a letter or two in that font:

Add a Different Font to Mac Mail Note

3. Click Done.
4. Connect your iPhone to the computer.
5. In iTunes, select your iPhone in the left sidebar.
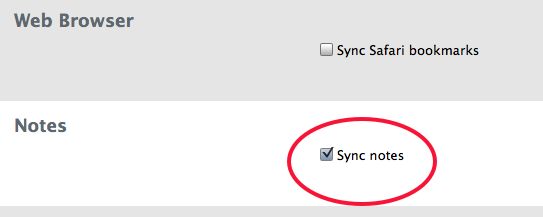
6. Under the Info tab, scroll down and make sure the checkbox for “Sync notes” is checked:

Sync Notes Checkbox

7. Hit Apply or Sync
8. On the iPhone, open the Notes app.
9. Find the note you just created on the Mac, open it, and start typing. You’ll see the text is in the same the font you used on the Mac.
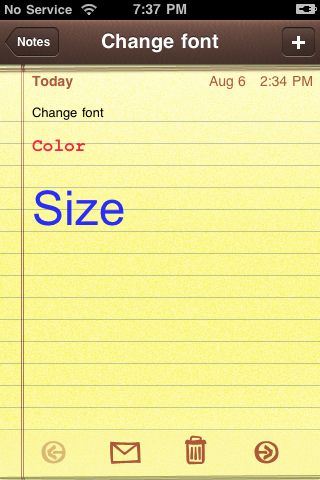
You can also use this method to change the font color and size:

Change Font Color and Size in Notes App

Note that the font change will only work in the note that you created in the Mac’s Mail application. If you try to copy and paste the text into a new note, it will revert back to Marker Felt. Now, create a 100 notes with a single character typed in Helvetica, and you’ll never have to use Marker Felt again!

Be sure to check out more of our iPhone Tips.

11 iPhone Typing Tips

1. Quick Editing (The Double Tap)

Double Tap Editing on the iPhone

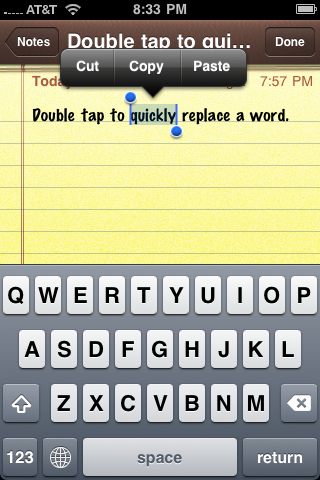
iPhone 3.0 brought a quick way to edit text on the iPhone: the double-tap method. Simply double tap a word to select it, then start typing to replace it. Even if there is only one or two incorrect letters, the double-tap method is almost always faster than the alternative method, which is using your finger to bring up the iPhone’s magnifying glass and repositioning the cursor. An exception is with very long words.

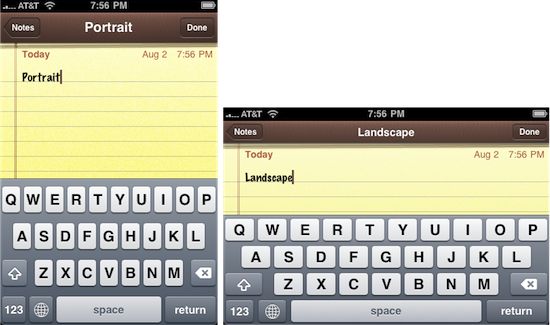
2. Landscape vs Portrait

Landscape vs Portrait on the iPhone

Typing in portrait vs landscape each has its own strengths and weaknesses. Typing in portrait is often the most convenient because it’s the default way you hold the iPhone. Portrait mode is fine for tapping out short, quick notes. But a downside is that it encourages you to type with one finger, which is slow.

Typing in landscape with both thumbs is best for long-form writing like emails, notes, journals, etc. It’s the most comfortable and quickest way to type. The trade off is that, for many people, it’s less accurate because our thumbs are fatter, thus creating more mistakes.

The size and spacing of the keyboard’s keys are different in portait vs landscape. In portrait, there is more vertical space between the keys (see pictures above), but the keys are smaller. In landscape, the keys are wider, but the vertical spacing is more cramped.

There is no best way to type on the iPhone. I much prefer landscape because of the comfort and because I don’t mind going back and editing. But everyone has their own preferences. People with small hands might find it comfortable to type with two thumbs in portrait mode. The important thing is to know the strengths and weaknesses of both methods. With practice, your speed and accuracy for both will improve over time.
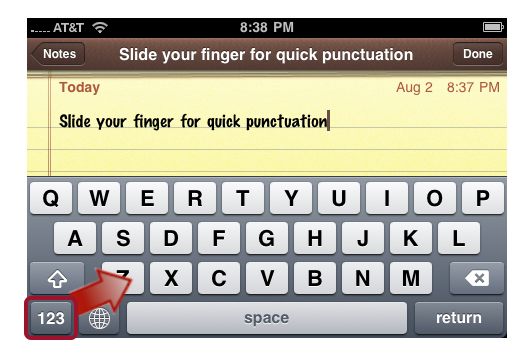
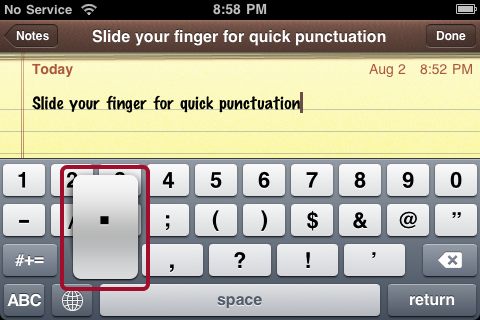
3. Slide Your Finger for Quick Punctuation and Numbers

This is one of the oldest iPhone typing tips there is, but it’s a goodie. To quickly add punctuation like a period at the end of the sentence:

1. Tap (and hold) your finger on the numbers key:

Slide For Quick Punctuation on the iPhone

2. When the screen changes, slide your finger across the screen to select a period, question mark, number, etc.

Slide for a Quick Period

3. Lift your finger, and the screen will return to the lettered keyboard.

This tip also works great for adding single-digit numbers.

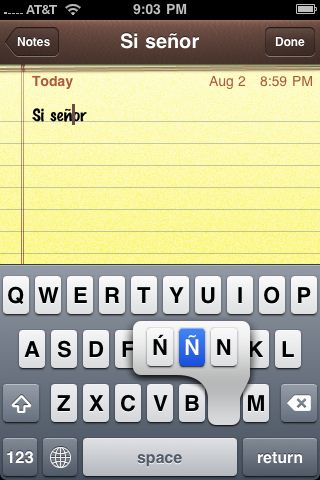
4. Type Accented Letters, Em Dashes, and Other Special Characters

iPhone Accented Letters and Extra Characters

The iPhone’s keyboard has accented letters and other special characters not immediately visible. To view and insert them into your text, press and hold a key. For example, press and hold the letter N for a few seconds, and you’ll see a few extra options pop up. Slide your finger to select the desired character and lift. The character will be inserted into the text. Try it with other keys besides letters too, like the dollar sign (you’ll see symbols for other currencies).

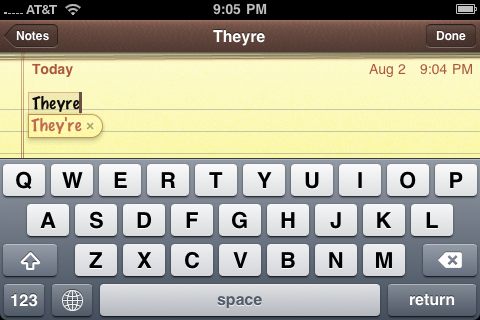
5. Quick Contractions

Quick Contractions on the iPhone

There’s no need to type out apostrophes for verb contractions like who’s (a contraction of who is) or they’re (they are). Simply type out all the letters without the apostrophe, whos or theyre, and let the iPhone do the rest.

6. Let Auto-correction Speed Up Your Typing

Auto-correction spells out a word

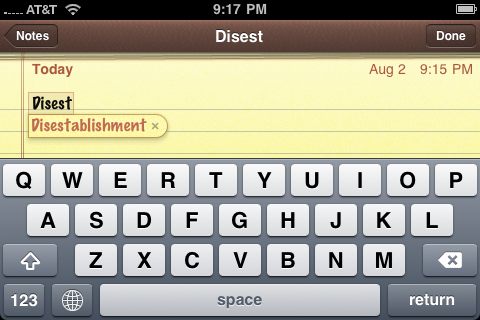
It’s not easy typing on a 3.5-inch screen, so the iPhone tries to save you some work by offering to spell out words before you finishing typing them. You’ll know when this happens because the entire word will appear after you’ve typed a few letters. To accept and insert the word, press the spacebar.

If you want to add punctuation to the end of the word, such as a comma or period, no need to hit the spacebar. Type the punctuation (even before you finish spelling the word), and the iPhone will insert the full word with the punctuation at the end.

7. Add an Extra Letter to Avoid Auto-correction

Cancel auto-correction with an extra letter

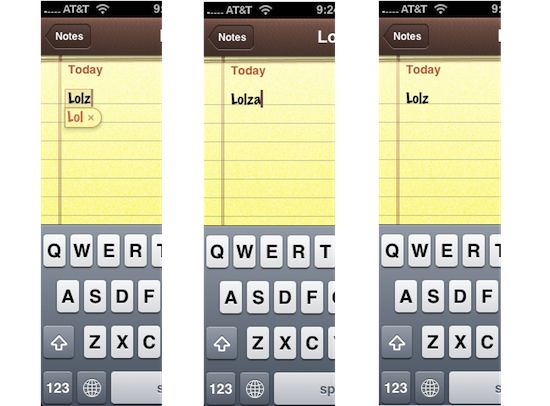
Sometimes, the iPhone will automatically correct a word you don’t want corrected. The iPhone gives you the option to cancel by tapping an X that appears next to the “corrected” word, but this has the side effect of adding the “misspelled” word to the dictionary. To avoid this, simply type an extra letter then hit the back button.

8. No Need for “.com”

No Need for Dot Com on iPhone

When typing out web addresses in the browsers address bar, there no need to type out .com. Simply type nytimes or artoftheiphone and go. Note that this only works for “.com” websites, not .net, .org, .gov, etc.

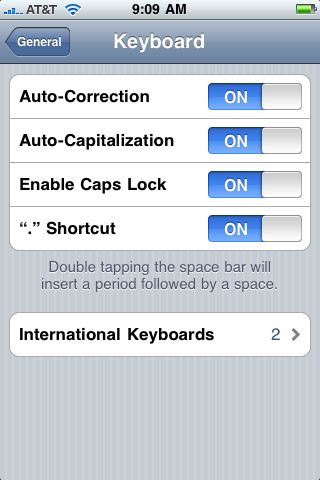
9. iPhone Keyboard Settings

Keyboard Settings in the iPhone Settings

In the iPhone’s Settings, there are a few options you can turn on or off to alter how the keyboard behaves. To access the iPhone’s keyboard settings, tap the Settings icon–>General–>Keyboard.

The features you can turn on and off are:

  • Auto-Correction
  • Auto-Capitalization
  • Enable Caps Lock
  • “.” Shortcut (double tapping the space bar)

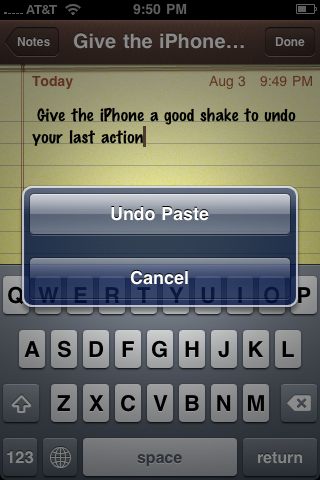
10. Shake the iPhone to Undo Your Last Action

Shake to Undo on the iPhone

If you want to undo an action such as cutting or pasting text, simply give the iPhone a good shake. A pop-up will appear asking if you want to undo your last action. You can also undo an undo, or undo your last several actions. So shake..sh..shake that iPhone!

11. Enable Emoji to Add Colorful Graphics to Your Text

Emoji icons on iPhone

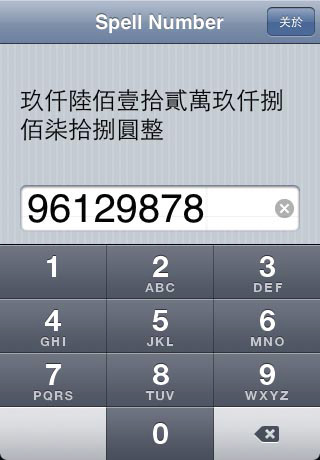
Emoji are colorful little graphics that can be inserted into text messages or other writing apps that support it. Emoji are very popular in Japan–that’s why only iPhones sold in Japan come with them enabled. But we don’t have to miss out on all the fun. Simply download a free app called Spell Number. Launch it, and type in the number 91929394.59. Then follow these steps:

  1. Tap the Settings icon
  2. Tap General
  3. Tap Keyboard
  4. Tap International Keyboards
  5. Tap Japanese
  6. Switch Emoji to On

Spell Number

To access the emoji, simply tap the globe icon on the bottom left of the iPhone’s keyboard until they appear.

Be sure to check out more of our iPhone Tips.