Art of the iPhone

Case Review: SwitchEasy RebelSerpent for iPhone 3G & 3GS

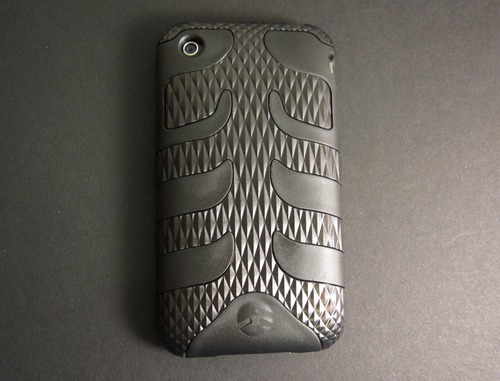
SwitchEasy RebelSerpent Case for iPhone 3G 3GS

SwitchEasy has quickly become a premiere case maker for the iPhone, and we found their RebelSerpent ($20) for the iPhone 3G/3GS to be another successful design for the company. It’s a two-part case made from a combination of a “soft” inner case that snugly fits around the iPhone with a hard polycarbonate spine that adds protection. It’s a rugged case that covers up Apple’s gloss-and-chrome design and replaces it with a monochromatic, masculine look. Overall, the case feels solid and well put together, if a bit heavy, in the hand. It’s a highly functional case with a few minor flaws, and we give it a rating of 9.3 out of 10, highly recommended.

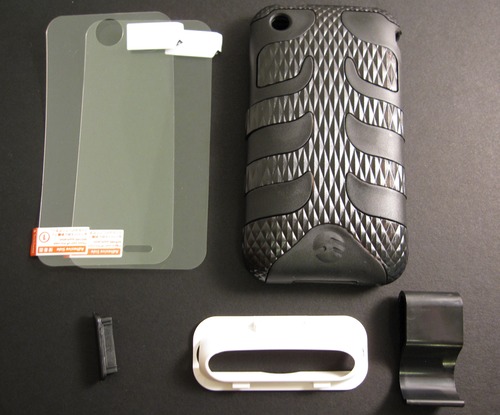
SwitchEasy Rebel Serpent Case and Accessories

The RebelSerpent is composed of two separate pieces. The inner part is a a soft and snug-fitting plastic that SwitchEasy labels Adaptive Dynamic Soft Polymer (ADSP). Don’t be fooled by the fancy marketing term though, it’s really just a semi-soft but cheap-feeling plastic. This soft inner lining tightly grips the iPhone, preventing the case from slipping off while taking it out of pockets. The soft lining also prevents the hard part of the case from scratching the iPhone, a common problem with hard-shell cases.
Continue reading…

How to Give the iPhone as a Gift

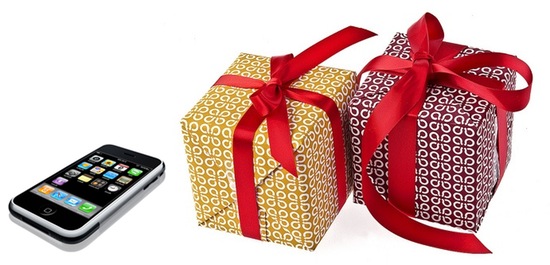
Giving an iPhone as a Present

The iPhone makes a great gift, but one thing to keep in mind is that over the course of a two-year contract, the true cost of an iPhone is over $2,000. You’ll want to make sure you and your loved know what you’re getting into. The following is a guide on how to give the iPhone as a gift, covering two topics:

  • Giving an iPhone with phone service, and
  • Giving an iPhone only

Continue reading…

Review: Grantwood Technology Tuneband for the iPhone

tuneband2

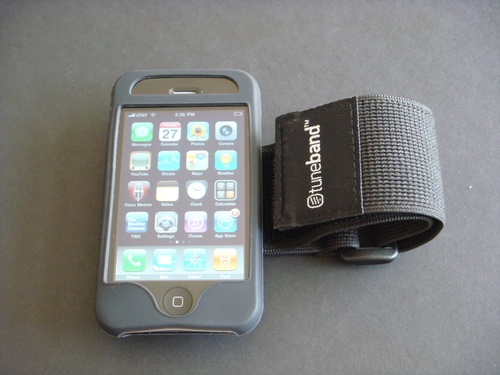
Although it pains me to say it, I think the iPhone is an imperfect running partner. It’s just too big and bulky to compete with the iPod shuffle or nano when it comes to listening to music on the run. That said, if you need to carry both a cell phone and an iPod while you exercise, the iPhone makes sense. The Grantwood Technology Tuneband (>$15) performs so well that it has made me rethink my aversion to running with my iPhone.

tuneband5

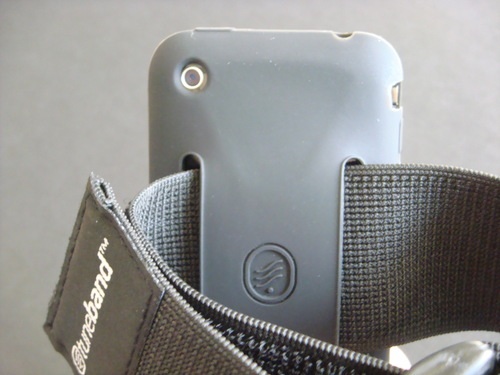
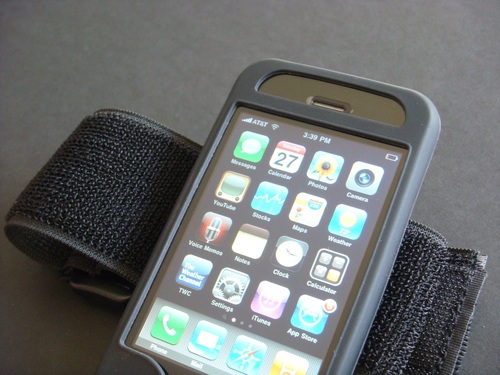
The Tuneband is an iPhone accessory for the 3G and 3GS; a separate — and cheaper — Tuneband is available for the first-gen iPhone. The two-part Tuneband features both a silicone iPhone case and a velcro armband. Unlike some iPhone armbands, the Tuneband doesn’t have an integrated vinyl screen protector. Instead, it ships with a stick-on screen protector, which is fine as long as you don’t get caught out in the rain. I actually prefer this type of protector, as the vinyl protectors can make it hard to navigate the iPhone’s touchscreen.

tuneband1

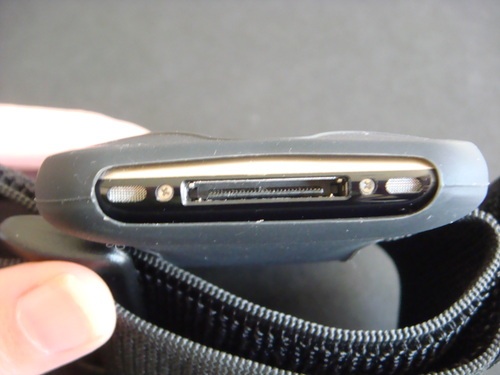
The case is stretchy and very pliable, and it includes cut-outs for the camera lens, earphone port and bottom speakers. The volume controls are left covered, but the silicone case has raised buttons so you can still get a tactile feel for the buttons.

I was hoping to keep my existing case on while I used the Tuneband, but when I did, the cut-outs didn’t line up correctly. Not a huge deal, but I hate having to constantly remove my iPhone case. As an alternative, you can always use the Tuneband case as your permanent protector so you don’t have to swap cases each time you go for a run.

tuneband10

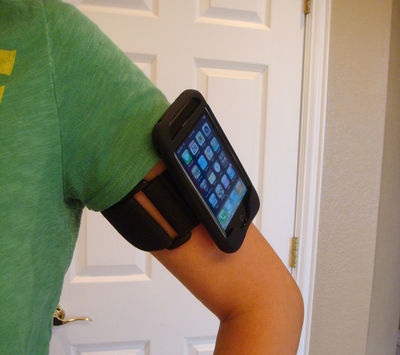
I have thin arms, and the Tuneband was almost too big. Luckily, I was able to overlap the velcro a little to get the strap to its maximum tightness setting. My husband, who has significantly thicker arms than I do, also tried on the Tuneband and had no trouble getting a comfortable fit. As long as you tighten the Tuneband appropriately, it stays in place while running. I felt the need to retighten it occasionally, but overall I was pleased with its performance. There’s no denying that the iPhone is a very big gadget to wear on your arm, but the Tuneband does a good job of making it as comfortable as possible. Just keep your expectations in check — the iPhone is never going to feel as lightweight or comfortable as the iPod shuffle.

tuneband6

On a side note, I have to give Grantwood Technology props for its stellar customer service. After I ordered the Tuneband, I received several emails updating me on the status of my order — it’s proactive service like this that makes for happy customers.

tuneband3

Conclusion

I had low expectations for the Tuneband, so I was pleasantly surprised when I grew to really like this armband. I readily admit that I have a bias against running with the iPhone, but this armband has changed my tune a little. I still think the iPhone looks ridiculously huge on my arm, but the Tuneband is comfortable and it doesn’t bounce.

I’m not about to give up my nano for running, but I’ll use the Grantwood Technology Tuneband whenever I need to run with my iPhone. We rate it an 8.0 out of 10, recommended. If your iPhone suffers a lot of abuse while exercising, an armband with a full screen protector may be a better choice.

Review: Konnet iCrado Dock for the iPhone

konnet6

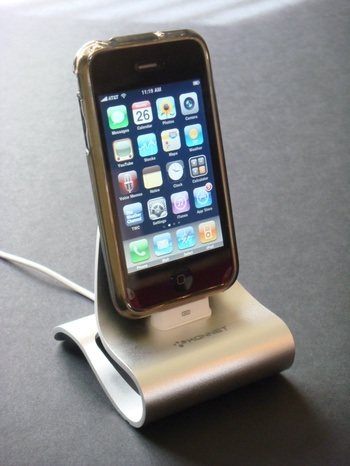
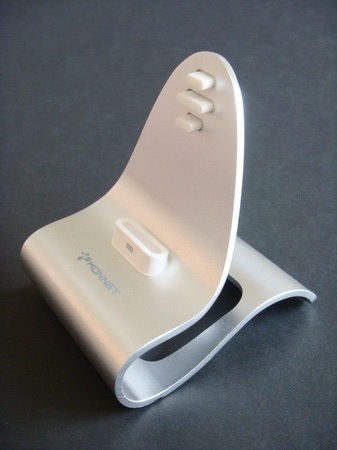
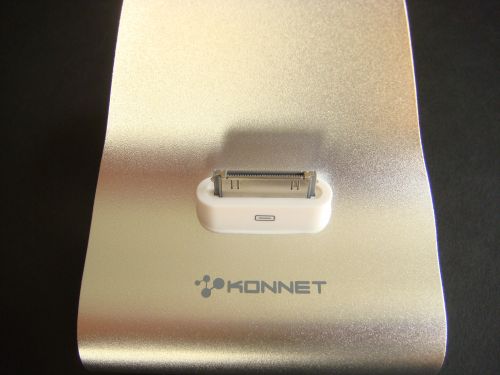
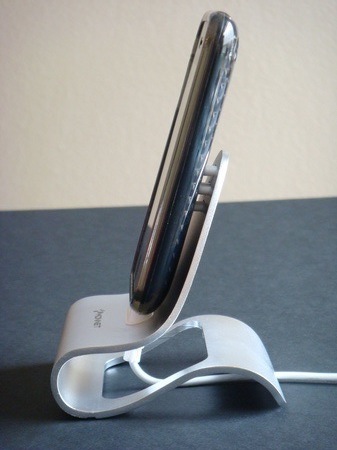
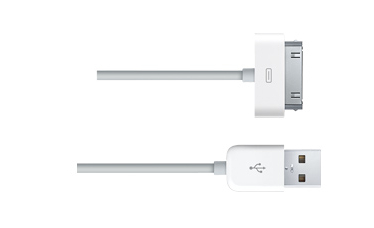
Konnet’s iCrado ($29.99) is a sleek and stylish cradle that provides a comfortable upright resting place for your iPhone while it syncs or charges. It works with any version of the iPhone (first gen, 3G, and 3GS). The iCrado is pretty bare when it comes to extra features—its sole functionality is to serve as a stand. It does not come with an iPhone-compatible USB cord, so you’ll have to provide your own (you can use the cord that comes with the iPhone, or Amazon sells for them for as cheap as $3).

konnet1

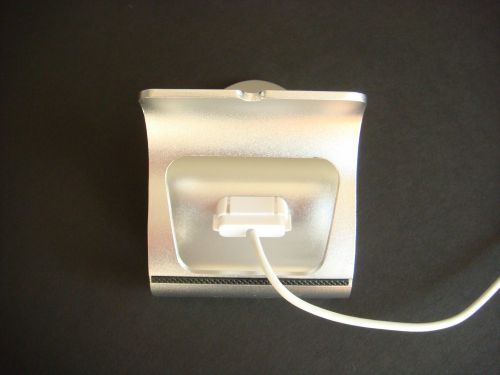
To connect the iCrado to the computer for synching, the USB cable is routed through the iCrado’s back port and secured in place with a small plastic clip. I was initially concerned about the durability of the plastic clip, but after removing the cable several times, I’m convinced it will hold up well.

konnet3

The iCrado comes in black or silver; a variety of additional colors, including orange, green and blue, are available as limited editions. Again, the dock is compatible with all iPhone models.

Out of the box, I was surprised by two things — the iCrado is lighter than I anticipated and the silver color has a glittery finish that is not apparent in the manufacturer’s product pictures. It’s not bad, but I was expecting a smoother finish. While lightweight, the iCrado still feels reasonably solid. Setting up the dock is a snap, and I had my USB cable attached within minutes.

konnet4

Once the cable is attached, the iCrado feels a little wobbly. There’s a small cutout on the back so the stand doesn’t sit on the cable, but the iCrado isn’t heavy enough to sit squarely with the cable attached. Once the iPhone is docked, however, the stand feels much sturdier. Docking the iPhone is easy, and I was happy that I didn’t have to remove my iPhone case. Unless you have a very thick iPhone case, you shouldn’t have any problems leaving it on.

There’s not much to say about the charging process, since… well, the process works the same as it does without the iCrado, especially since you’re using your own cord. I will say that my iPhone looks quite at home while sitting quietly in the dock.

konnet7

Konnet claims that the iCrado enhances speaker quality using an “Advanced Reflex” design, and music does sound significantly better than it does with the iPhone flat on a table. I don’t think this is specific to the iCrado, however; music probably sounds better on any forward-facing dock that doesn’t block the speakers.

Conclusion

Overall, the Konnet iCrado is a nice-looking iPhone cradle that works well. It’s significantly cooler and better looking than Apple’s $30 iPhone dock, which also ships without its own USB cord. But let’s face it, products like the iCrado are not “must haves.” It may be nice to have your iPhone sit upright while charging, but it’s hardly a necessity. As a result, I think the iCrado is a bit overpriced at $30 — $15 to $20 seems much more reasonable for an iPhone stand. Still, it is better looking than many competitors in its price range, so we rate it an 8 out of 10, recommended.

Review: Griffin Reveal Case for iPhone 3G & 3GS

Griffin Reveal Case

The Griffin Reveal ($25) is a hard plastic case for the iPhone 3G and 3GS that features a clear plastic back and a solid-colored rim. It’s an extremely thin and lightweight case that maintains the original look and feel of the iPhone more than any case we’ve seen so far. However, huge flaws in how the case handles the iPhone’s sleep and volume buttons as well as durability issues prevent us from recommending it. We rate it a 5.5 out of 10, not recommended.

Griffin Reveal On iPhone 3GS

Right out of the box, the Reveal did not start off on a good note. There was a hairline crack near the case’s camera hole as well as scratches on the clear plastic. The case didn’t appear to be repackaged, so we’re a bit at a loss what caused it to be shipped in this condition.
Continue reading…

iPhone Basics: How to Transfer Videos to the iPhone

Movies on the iPhone

The iPhone’s bright and detailed screen is perfect for watching movies and TV shows while on the go. Videos purchased in iTunes are relatively easy to transfer to the iPhone. Videos from other, non-iTunes sources are a different matter (see the Notes section at the end of this post). The following are instructions on how to transfer movies and TV shows purchased from iTunes onto the iPhone.

How to Sync iTunes Movies and TV Shows to the iPhone

1. Connect your iPhone to the computer.

Connect the iPhone to Computer

2. In iTunes, click on your iPhone in the left sidebar.
Continue reading…

Review: Griffin Simplifi Dock for iPhone

Griffin Simplifi Dock for iPhone and iPod

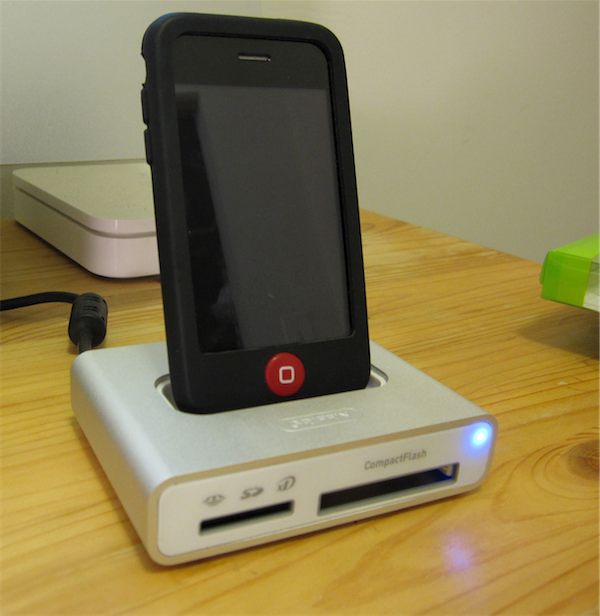
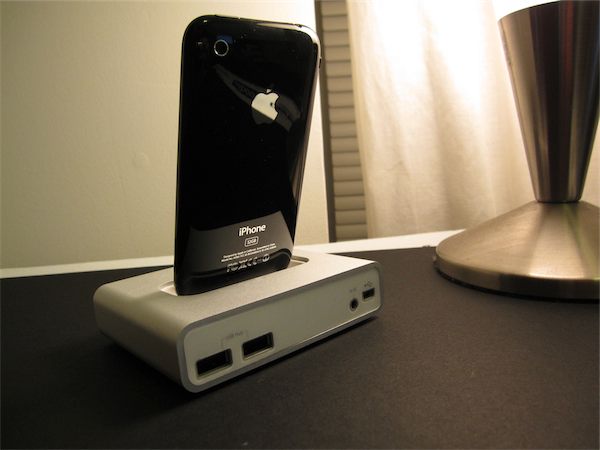
The Griffin Simplifi Dock ($45) is a versatile dock that can be used to charge and sync all generations of the iPhone as well as several generations of iPods—it even can fit an iPhone with all but the thickest cases. The Simplifi includes 2 card readers with read/write support for 6 types of digital media cards and comes with 2 powered USB ports on the back. Overall, we found the dock worked perfectly with the iPhone and can recommend it for iPhone users looking for something different from the default Apple dock, or for those who need a card reader or extra USB port.

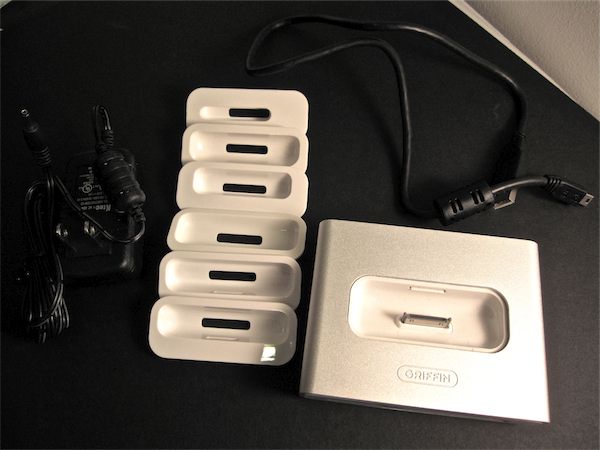
The Griffin Simplifi comes with 6 white plastic adapters that allow various iterations of the iPhone and iPod to have a tight, secure fit while sitting in the dock. If you use an iPhone case, the iPhone won’t fit snug into any of the adapters. However, the Griffin Simplifi functions as a universal dock if you don’t use any of the adapters, leaving plenty of room for an iPhone with a case. A side effect of using no adapter is that the iPhone fits very loosely in the dock, and the docking process is a much less guided, and therefore, much less smooth, process.

The dock is a combination of aluminum casing and white plastic. Beauty is in the eye of the beholder, but we found it generally good looking. The fact that it breaks from the all-white plastic of Apple’s docks will appeal to those who like to “think different” while still maintaining some Mac aesthetic. Owners of a Mac Pro or the original Apple Cinema display, in particular, will find that the dock’s aluminum casing matches their equipment well.

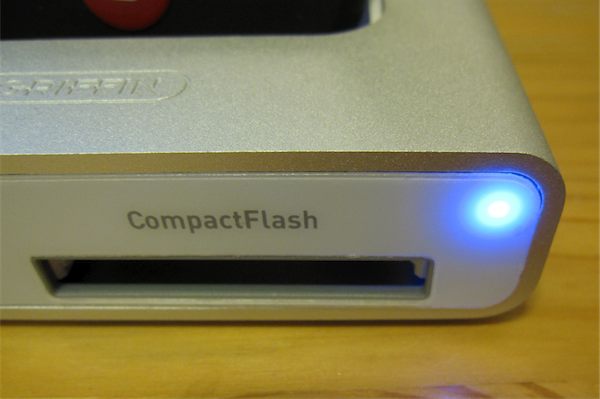
Griffin Simplifi Blue LED

Some might find the glowing blue LED power indicator on the front as a drawback.

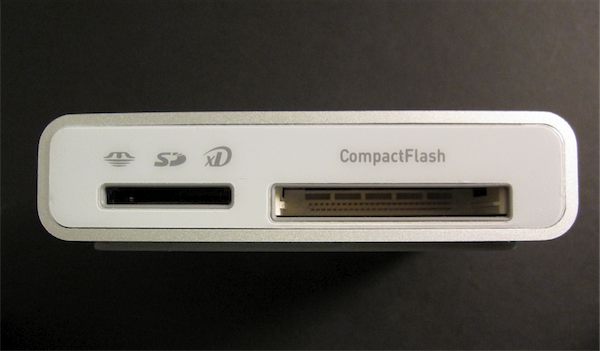
Griffin Simplifi for iPhone Card Slots

There are two memory card ports on the front that have read/write support for 6 types of memory cards: Memory Stick, Memory Stick Pro, SD, SDHC, XD, and compact flash. Although not quite up to par with, say, a 60-in-1 card reader, the 6 supported formats should cover the basics for most.

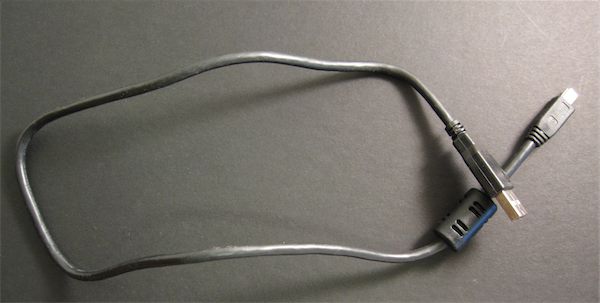
Griffin Simplifi Short Mini USb Cord

The dock uses a mini-USB cord to connect to your computer (the end that plugs into your computer is normal USB, the end that goes into the dock is mini-USB). The cord is amazingly only 2-feet long, which is a problem if you plan on docking your iPhone anywhere but right next to your computer.

Griffin Simplifi iPhone USB hub

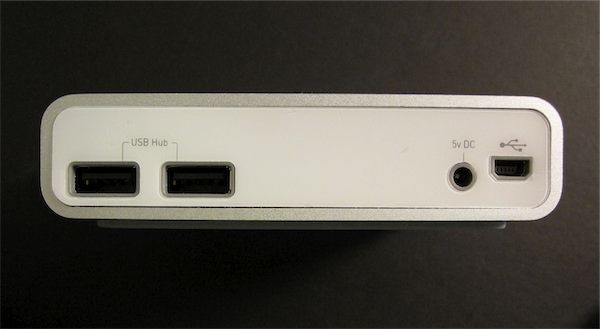
On the back of the Simplifi are 2 powered USB ports. Because you use up one of your computer’s USB ports to plug it in, the dock adds a net gain of 1 USB port to your computer. While that doesn’t exactly qualify it as a USB hub, it’s still a nice feature in an iPhone dock.

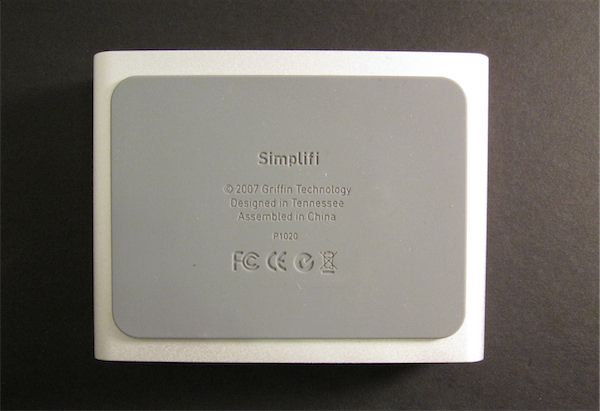
Griffin Simplifi Rubber Bottom

The Simplifi also comes with an AC adapter (wall plug), but strangely enough, you can’t recharge your iPhone when the wall plug is used. The wall plug only powers the USB ports on the back. You could conceivably plug your iPhone into one of the USB ports to charge, but this defeats the purpose of having a dock. If your goal is to have a dock you can plug into the wall and charge your iPhone (without connecting it to a computer), you will want to look elsewhere. (Just to be clear, the dock does charge your iPhone when the dock is plugged into a USB port on your computer.)

Griffin Simplifi Back

Griffin Simplifi With Adapters

Conclusion

The Griffin Simplifi is a versatile dock for your iPhone or iPod that adds a net gain of an extra USB port as well as a card reader. Its silver aluminum breaks from Apple’s all-white-plastic docks, making it perfect for those who like a little something different, while still keeping with the Mac aesthetic.

Links:

Official website for the Griffin Simplifi

Review: Buster the Chicago Bus Tracker

Chicago CTA Buster for iPhone

Buster: the Chicago Bus Tracker ($0.99, iTunes link) is an amazing little app that lets you know when a bus is going to arrive at a bus stop. As a Chicagoan, I can tell you this drastically changes the experience of using buses in the city, and could be game changing for all mass transit if they implement similar networked GPS technology.

Buster Nearby Bus Stops Map

Before the city put GPS locators on CTA buses, it was a hassle taking the bus. You’d never know if it was arriving in 5 minutes or 45 minutes. So there you’d stand on the sidewalk, freezing in the Chicago cold or burning in the heat, waiting for a bus as hundreds of cars drive by gawking at you.

Not any more. Simply select the bus stop, and the app will tell you when the next bus is arriving so you can dash and catch it, or do something else while you wait. After using it for the past two months, I can tell you it’s accurate down to a minute or so.

Buster Nearby Bus Stops

If you’re not sure of a stop’s location, the app uses the iPhone’s GPS to list the nearest bus stops, which is extremely useful if you’re in a strange part of town. You can even save a list of your favorites for quick access. The app also distinguishes between north/south and east/west traveling buses.

Buster List of Bus Stops

The app can be a money saver for Chicagoans who, like me, pay a single monthly fee for unlimited rides on the city’s trains and buses. Buses should be a more convenient travel option for city dwellers because their routes blanket most of the city (trains travel to only a portion of the city). But buses could be big time wasters, as often it could take an hour just to go 5 blocks (counting wait time). Most people are forced to take more expensive taxi rides simply for the convenience. Now I feel much more comfortable taking the bus, as my time isn’t wasted and I don’t have to suffer the elements as much.

How to Change the Font of the iPhone’s Notes App

Marker Felt on iPhone

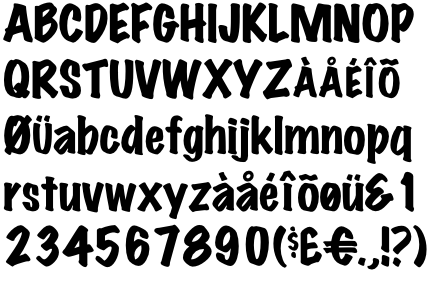
Many people dislike the default font (Maker Felt) used in the iPhone’s Notes app. Luckily, Apple recently supplied a way to select from two other fonts. There are also a few “unofficial” ways to change the fonts of the Notes app. First, here’s the official way:

How to Change the Font in Notes

1. Open the iPhone’s Settings:

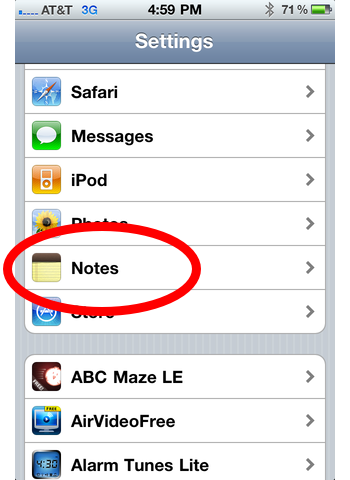
2. Scroll down and tap Notes:

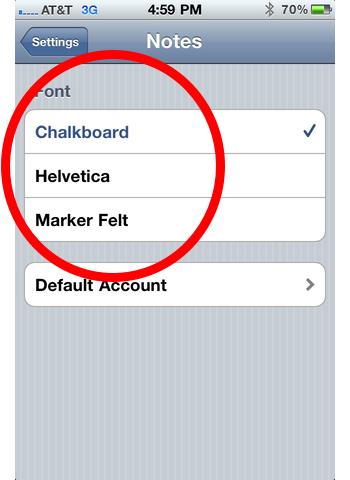
3. Select from the 3 default fonts: Marker Felt, Chalkboard, or Helvetica.

And here are two ways to squeeze out a few more fonts in the Notes app:

The Chinese Keyboard Method

1.Tap the iPhone’s Setting’s icon:

iPhone Settings icon

2. Tap General
3. Scroll down and tap Keyboard
4. Tap International Keyboards
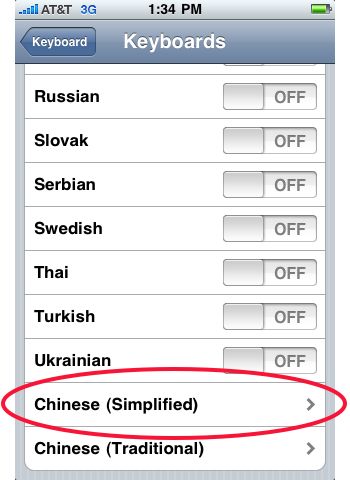
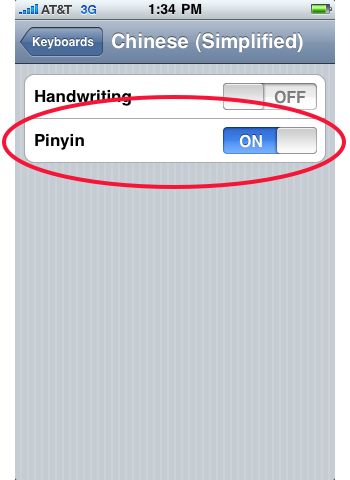
5. Scroll down all the way to the bottom and tap Chinese (Simplified):

Changing the iPhones Note App Font 1

6. Switch the tab labeled Pinyin to On:

Change the iPhone Note App Font 2

You’ll only have to do steps 1-6 once. Steps 8 and 9 will have to be repeated every time you want to change the font.

7. Open the Notes app.
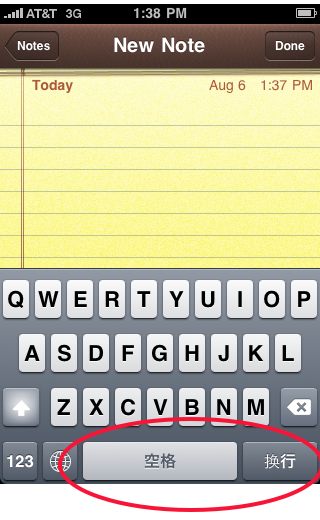
8. Create a new note, and when the keyboard pops up, hit the little globe icon until you see the Chinese keyboard. Most of the keys will be the same as the English version, but the space bar and return button will have Chinese characters on it:

Changing the iPhones Font

9. Type one letter, then switch back to the English keyboard.

Now, when you continuing typing, the note will be in Verdana font.

The Computer to iPhone Method (Mac Only)

iPhone Notes With Multiple Fonts

This method is for Mac users only, as it involves creating notes in the Mac Mail application. With this method, you can use dozens of fonts.

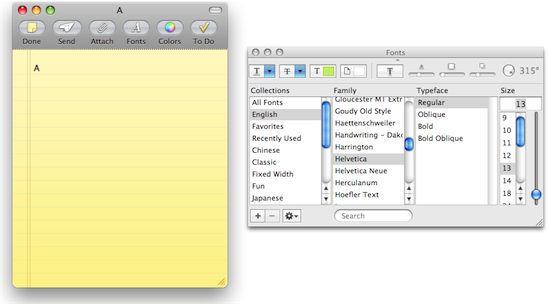
1. In the Mail program on your Mac, create a new Note:

Create New Note in Mac Mail

2. Change the font style to whatever desired font style you want on the iPhone and type a letter or two in that font:

Add a Different Font to Mac Mail Note

3. Click Done.
4. Connect your iPhone to the computer.
5. In iTunes, select your iPhone in the left sidebar.
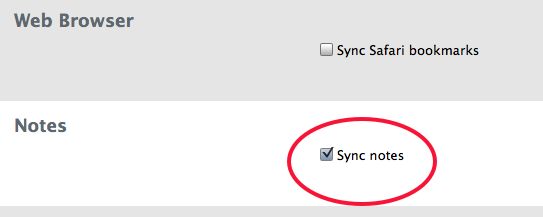
6. Under the Info tab, scroll down and make sure the checkbox for “Sync notes” is checked:

Sync Notes Checkbox

7. Hit Apply or Sync
8. On the iPhone, open the Notes app.
9. Find the note you just created on the Mac, open it, and start typing. You’ll see the text is in the same the font you used on the Mac.

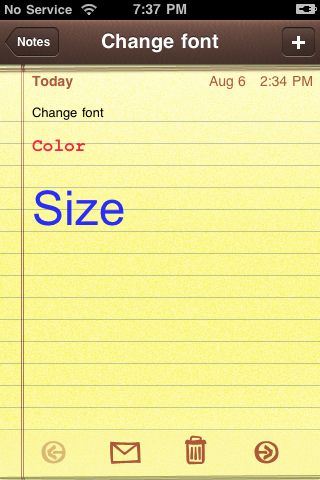
You can also use this method to change the font color and size:

Change Font Color and Size in Notes App

Note that the font change will only work in the note that you created in the Mac’s Mail application. If you try to copy and paste the text into a new note, it will revert back to Marker Felt. Now, create a 100 notes with a single character typed in Helvetica, and you’ll never have to use Marker Felt again!

Be sure to check out more of our iPhone Tips.

11 iPhone Typing Tips

1. Quick Editing (The Double Tap)
Double Tap Editing on the iPhone

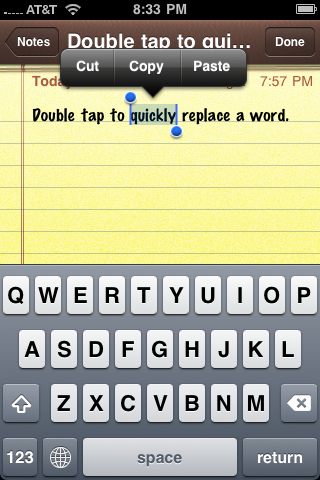
iPhone 3.0 brought a quick way to edit text on the iPhone: the double-tap method. Simply double tap a word to select it, then start typing to replace it. Even if there is only one or two incorrect letters, the double-tap method is almost always faster than the alternative method, which is using your finger to bring up the iPhone’s magnifying glass and repositioning the cursor. An exception is with very long words.

2. Landscape vs Portrait
Landscape vs Portrait on the iPhone

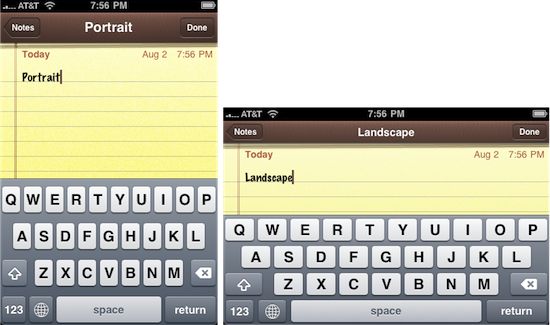
Typing in portrait vs landscape each has its own strengths and weaknesses. Typing in portrait is often the most convenient because it’s the default way you hold the iPhone. Portrait mode is fine for tapping out short, quick notes. But a downside is that it encourages you to type with one finger, which is slow.

Typing in landscape with both thumbs is best for long-form writing like emails, notes, journals, etc. It’s the most comfortable and quickest way to type. The trade off is that, for many people, it’s less accurate because our thumbs are fatter, thus creating more mistakes.

The size and spacing of the keyboard’s keys are different in portait vs landscape. In portrait, there is more vertical space between the keys (see pictures above), but the keys are smaller. In landscape, the keys are wider, but the vertical spacing is more cramped.

There is no best way to type on the iPhone. I much prefer landscape because of the comfort and because I don’t mind going back and editing. But everyone has their own preferences. People with small hands might find it comfortable to type with two thumbs in portrait mode. The important thing is to know the strengths and weaknesses of both methods. With practice, your speed and accuracy for both will improve over time.

3. Slide Your Finger for Quick Punctuation and Numbers

This is one of the oldest iPhone typing tips there is, but it’s a goodie. To quickly add punctuation like a period at the end of the sentence:

1. Tap (and hold) your finger on the numbers key:
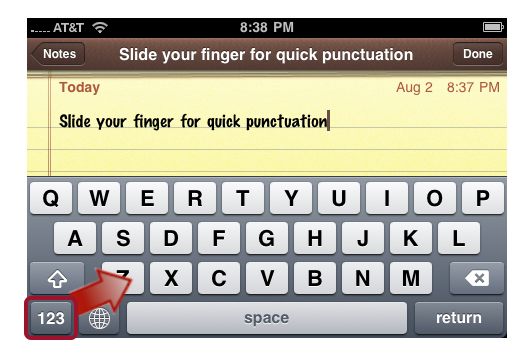
Slide For Quick Punctuation on the iPhone

2. When the screen changes, slide your finger across the screen to select a period, question mark, number, etc.
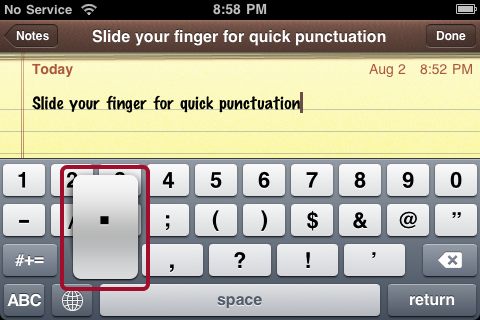
Slide for a Quick Period

3. Lift your finger, and the screen will return to the lettered keyboard.

This tip also works great for adding single-digit numbers.

4. Type Accented Letters, Em Dashes, and Other Special Characters
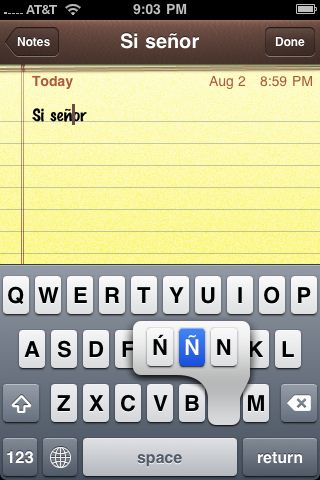
iPhone Accented Letters and Extra Characters

The iPhone’s keyboard has accented letters and other special characters not immediately visible. To view and insert them into your text, press and hold a key. For example, press and hold the letter N for a few seconds, and you’ll see a few extra options pop up. Slide your finger to select the desired character and lift. The character will be inserted into the text. Try it with other keys besides letters too, like the dollar sign (you’ll see symbols for other currencies).

5. Quick Contractions
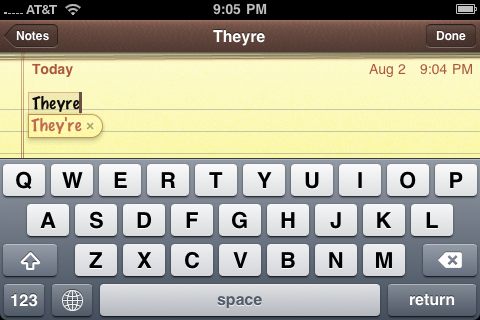
Quick Contractions on the iPhone

There’s no need to type out apostrophes for verb contractions like who’s (a contraction of who is) or they’re (they are). Simply type out all the letters without the apostrophe, whos or theyre, and let the iPhone do the rest.

6. Let Auto-correction Speed Up Your Typing
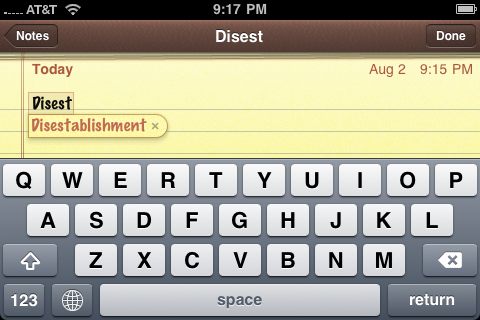
Auto-correction spells out a word

It’s not easy typing on a 3.5-inch screen, so the iPhone tries to save you some work by offering to spell out words before you finishing typing them. You’ll know when this happens because the entire word will appear after you’ve typed a few letters. To accept and insert the word, press the spacebar.

If you want to add punctuation to the end of the word, such as a comma or period, no need to hit the spacebar. Type the punctuation (even before you finish spelling the word), and the iPhone will insert the full word with the punctuation at the end.

7. Add an Extra Letter to Avoid Auto-correction
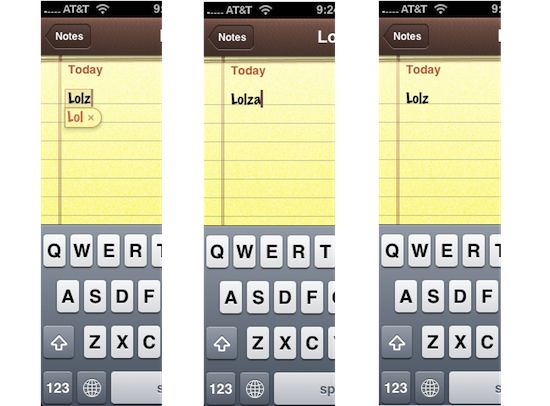
Cancel auto-correction with an extra letter

Sometimes, the iPhone will automatically correct a word you don’t want corrected. The iPhone gives you the option to cancel by tapping an X that appears next to the “corrected” word, but this has the side effect of adding the “misspelled” word to the dictionary. To avoid this, simply type an extra letter then hit the back button.

8. No Need for “.com”

No Need for Dot Com on iPhone

When typing out web addresses in the browsers address bar, there no need to type out .com. Simply type nytimes or artoftheiphone and go. Note that this only works for “.com” websites, not .net, .org, .gov, etc.

9. iPhone Keyboard Settings
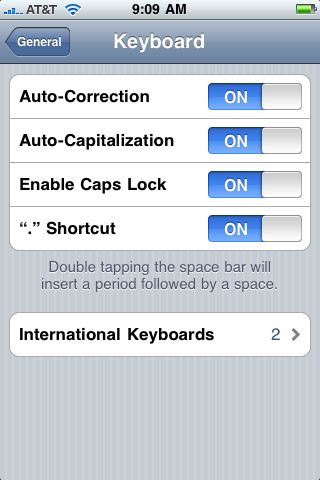
Keyboard Settings in the iPhone Settings

In the iPhone’s Settings, there are a few options you can turn on or off to alter how the keyboard behaves. To access the iPhone’s keyboard settings, tap the Settings icon–>General–>Keyboard.

The features you can turn on and off are:

  • Auto-Correction
  • Auto-Capitalization
  • Enable Caps Lock
  • “.” Shortcut (double tapping the space bar)

10. Shake the iPhone to Undo Your Last Action
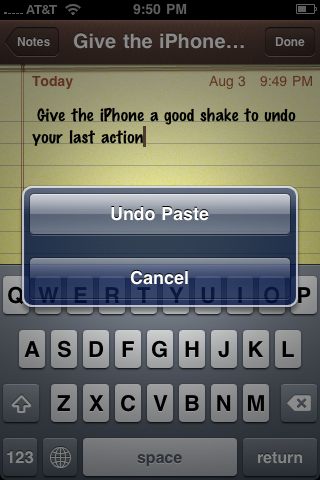
Shake to Undo on the iPhone

If you want to undo an action such as cutting or pasting text, simply give the iPhone a good shake. A pop-up will appear asking if you want to undo your last action. You can also undo an undo, or undo your last several actions. So shake..sh..shake that iPhone!

11. Enable Emoji to Add Colorful Graphics to Your Text
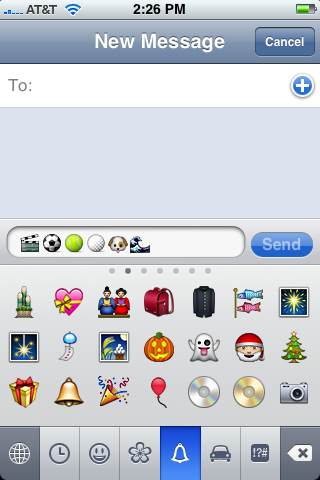
Emoji icons on iPhone

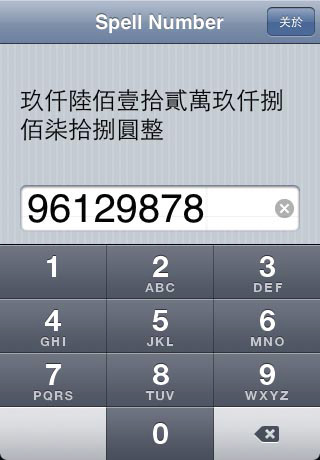
Emoji are colorful little graphics that can be inserted into text messages or other writing apps that support it. Emoji are very popular in Japan–that’s why only iPhones sold in Japan come with them enabled. But we don’t have to miss out on all the fun. Simply download a free app called Spell Number. Launch it, and type in the number 91929394.59. Then follow these steps:

  1. Tap the Settings icon
  2. Tap General
  3. Tap Keyboard
  4. Tap International Keyboards
  5. Tap Japanese
  6. Switch Emoji to On

Spell Number

To access the emoji, simply tap the globe icon on the bottom left of the iPhone’s keyboard until they appear.

Be sure to check out more of our iPhone Tips.