Category: iPhone Basics

Basics: What Does the iPhone Ringer Switch Mute (And Not Mute)?

The iPhone’s ringer switch seems like it should be a simple thing. You move the iPhone’s ringer switch to the “mute” position, and all sound is muted, right? Wrong. Just ask the gentleman who infamously brought the New York Philharmonic to a standstill because his iPhone’s ringtone started playing even though he had the ringer switch set on mute. How could that happen? Because the ringer switch only mutes some sounds but not others. What exactly does the ringer switch mute and not mute? It’s complicated, but let’s start with what it doesn’t mute.

What the Ringer Switch Doesn’t Mute

  • Alarms from the Clock app (example, setting an alarm to go off at 6 am).
  • Timers from the Clock app (example, setting a 15-minute countdown timer).
  • Audio from the iPhone’s Music app (example, playing the Beatle’s “Hey Jude”).
  • Audio from the iPhone’s Video app (example, playing an episode of Lost).
  • Some audio from third-party apps like streaming radio, video, and music (examples, playing a radio station via the TuneIn Radio app or a video in the YouTube app).
  • Tones when tapped in the iPhone’s various settings (for example, when changing your ringtone or text-message alert tone) and in the Clock app (for example, when selecting what sound the iPhone will make when the timer runs down to zero).
  • Tones when changing the volume of Ringer and Alerts in Settings–>Sounds
  • A sound alert when sent from the Find My iPhone service.

Basically, Apple’s rationale for the ringer switch not muting these sounds is that if a user does something and expects the iPhone to make a sound, like tapping the play button for a song or setting an alarm to wake them up, the iPhone should make that sound regardless of the ringer switch’s position. Apple has this advice for developers in their developer guidelines:

The Ring/Silent (or Silent) switch does not silence sounds that result from user actions that are solely and explicitly intended to produce sound.

So what exactly does the ringer switch mute then? Basically, everything else.

What the Ringer Switch Does Mute:

  • Phone-call ringtones
  • Text-message alert tones
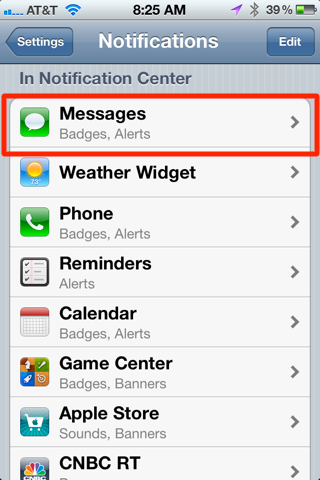
  • Notification alert tones (from iPhone apps and third-party apps)
  • Calendar alerts
  • Reminders
  • Camera sounds (snapping a photo)
  • Game music

There’s been much debate about whether this is the best way for the ringer switch to behave. Some feel there is no perfect solution and that Apple has reached the right balance. Others feel that the ringer switch should simply mute all sound and the burden of error should fall on the user (eg, my alarm didn’t wake me up because I had my phone on mute…my bad!). I’m on the side that Apple has made the correct compromises.

Notes and Interesting Facts:

  • By law, iPhones in Japan must make a sound when a picture is taken, even if the ringer switch is on mute. This is because men snapping photos up women’s skirts and down their shirts have become a big problem in Japan.
  • The iPad’s switch is not called a “ringer” switch. Apple simply refers to it as the “side” switch. The iPad’s side switch can either mute alert sounds or function as an orientation lock, depending on what the user selects in the iPad’s settings.
  • The iPhone has separate volume levels for ringtones and for general audio (music, videos, etc.). You can find and change the separate ringtone/alert volume in Settings–>Sounds
  • Using the volume buttons, you cannot decrease the ringer volume to zero (0), it will only go to 1. To completely silence tones, you must use the ringer switch.
  • The ringer switch does not effect sound through headphones. For example, even if the ringer switch was set to mute, you will still hear your phone ring through your headphones.

Basics: How to Delete Individual or Multiple Text Messages on the iPhone

It’s now possible to delete individual text messages on the iPhone (previously to iOS 5, you had to delete whole conversations). Below are step-by-step instructions on how to delete individual or multiple text messages at the same time on the iPhone.

1. Open the Messages app:

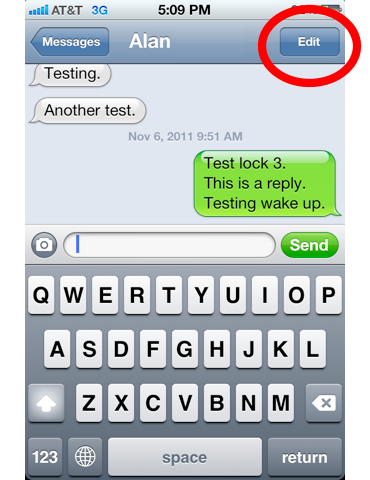
2. Tap Edit in the top right corner:

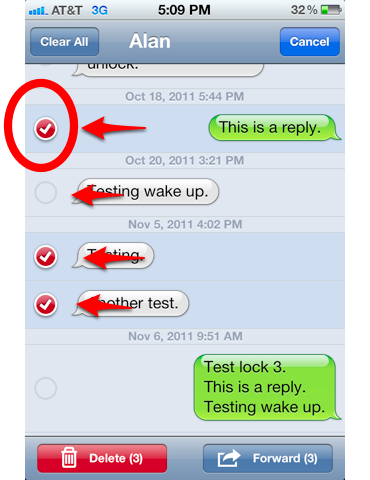
3. Tap the circles next to messages you want to delete. A red circle with a white checkmark will appear next to messages selected for deletion:

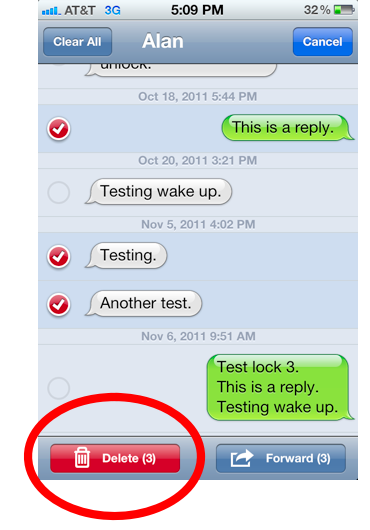
4. Tap Delete:

Notes:

  • You can also delete entire conversations at once. Here’s how: If you’re in a specific conversation, tap Messages in the top left corner to take you to the conversations view. Now tap Edit in the top left corner. Tap the red and white circle that appears next to the various conversations, the tap Delete.
  • You can also forward specific text messages to other contacts as well. In a conversation, hit Edit in the top right corner, tap the circle next to the message you want to forward, tap Forward in the bottom right, choose a contact and hit Send.

Basics: How to Set Up Wireless Wi-Fi Syncing for iPhone and iPad

Ready to never plug your iPhone into your computer again to sync? Here’s how. You’ll need an iPhone/iPad running iOS 5 or newer and iTunes 10.5 or newer.

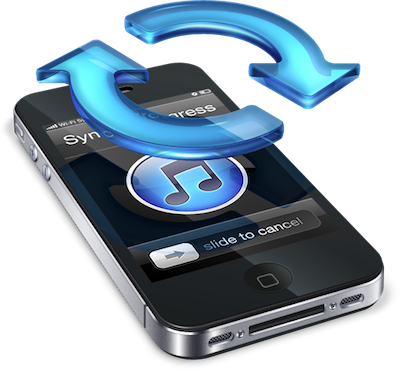
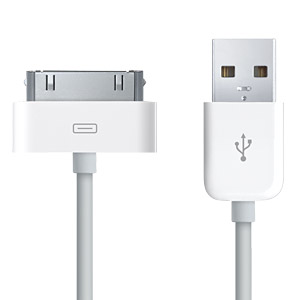
1. For one last time, plug your iPhone into iTunes:

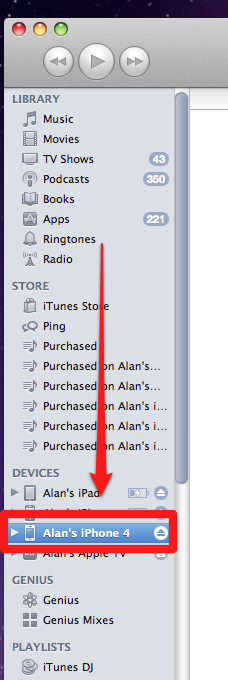
2. Click on your iPhone/iPad in the left sidebar:

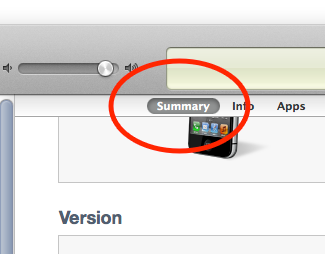
3. Select the Summary tab at the top of iTunes:

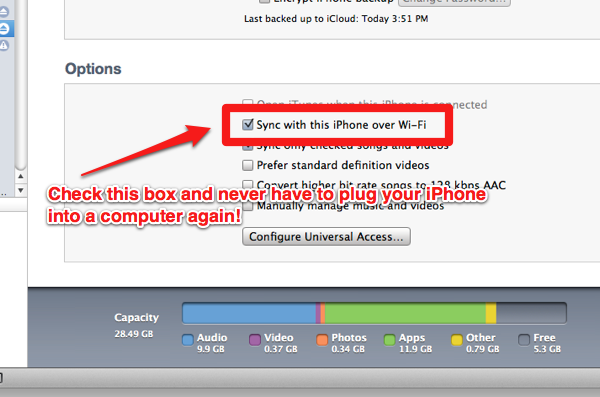
4. Check the box that says Sync with this iPhone (iPad) over Wi-Fi:

Now unplug your iPhone/iPad, then look at the left sidebar in iTunes. It will still show your device connected to iTunes even though it’s not plugged in! Pretty cool. From here, there are two ways to sync.

5. How to automatically sync:

Important: iTunes needs to be open on your computer for automatic synching to work. Simply plug in your iPhone/iPad into a power source and it will automatically begin to sync.

6. How to manually sync (steps 7-11):

A manual sync is the only true wireless sync, as it does not require the iPhone/iPad to be plugged into a power source. It does, however, require you to be on the same Wi-Fi network as the computer with iTunes.

7. Open Settings:

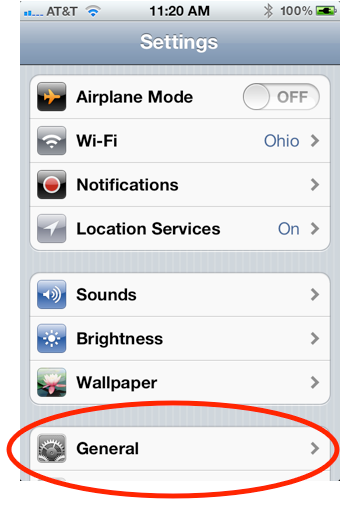
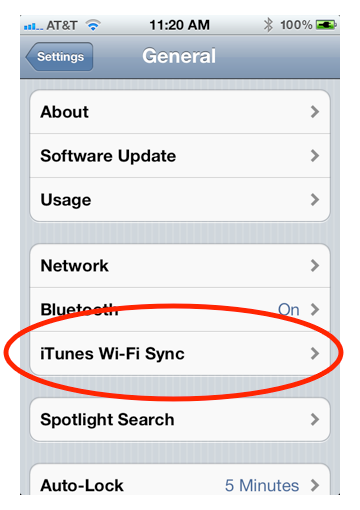
8. Tap General:

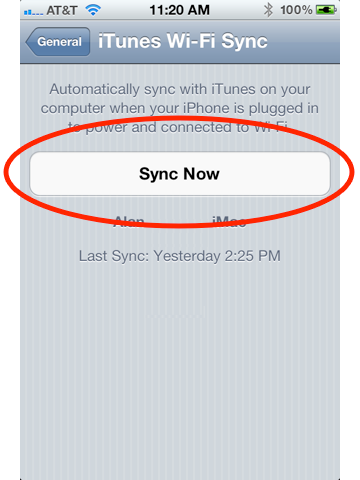
9. Tap iTunes Wi-Fi Sync:

10. Tap Sync Now:

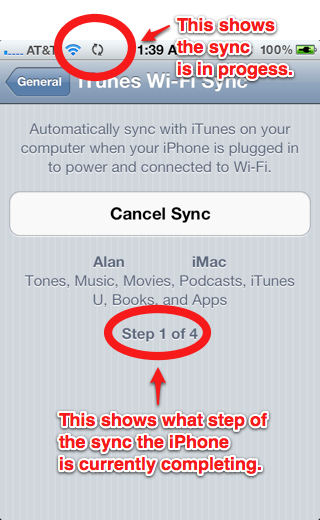
11. Wait for sync to finish:

Notes and Troubleshooting:

  • Syncing with Wi-Fi is slower than syncing with a USB cable.
  • If, while synching your iPhone/iPad over Wi-Fi, you connect the iPhone/iPad to your computer via a USB cable, the sync will continue uninterrupted via the cable. However, if you start syncing using a cable, then disconnect the cable, syncing will stop and will not continue over Wi-Fi.
  • Having problems getting Wi-Fi syncing to work? Check out Apple’s official troubleshooting document for Wi-Fi Syncing.
  • Still can’t get automatic Wi-Fi sync to work? Try out my alternate solution.

How to Prevent Text Messages and Notifications From Appearing on the iPhone’s Lock Screen

Text messages and other notifications appearing on the iPhone’s lock screen could cause privacy problems for some. Such alerts automatically wake up the iPhone’s screen and display the messages for anyone walking by to see. However, there is a way to prevent notifications from appearing on the screen when the iPhone is locked. Check out our instructions below.

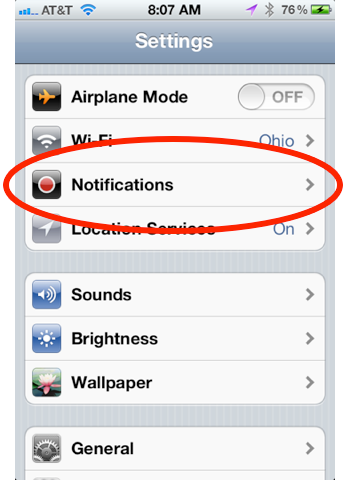
1. Open the Settings app:

2. Tap Notifications:

3. Tap the app whose lock-screen notifications you want to turn off:

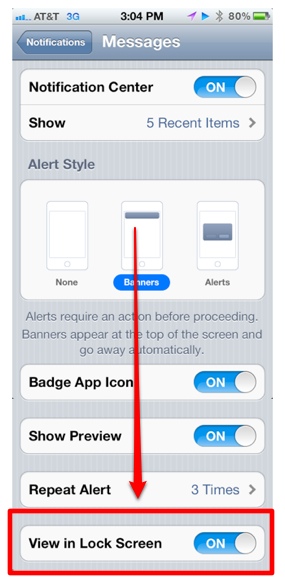
4. Scroll down until you see View in Lock Screen:

5. Slide the tab to Off:

And that’s it. If you want to test it out, lock your iPhone and send yourself a text message from another source other than your iPhone. For example, you can google the terms “Send free text message” and use one of the free website services.

Notes:

For text messages on the iPhone, there is a settings option called Show Preview that will show the text of the message along with the sender’s name on the lock screen. Switching this option to off will no longer show the text of the notification, but the notification and sender’s name (if it’s a text message) will still be visible.

Basics: How to Make a FaceTime Call on the iPhone

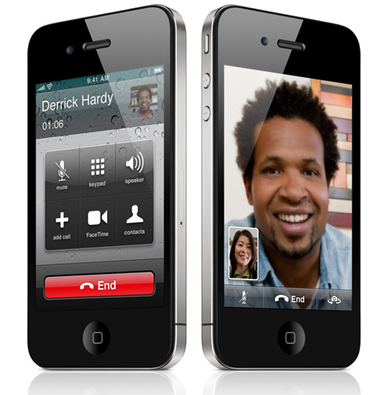
FaceTime is Apple’s video chat service that is built into the iPhone 4, iPad 2, and iPod touch 4th gen devices as well as now being available on Macs. But to use FaceTime requires a few conditions. To start off, if this is your first time using FaceTime on the iPhone, you must make sure the feature is activated (instructions).

You also:

  • Must be connected to a Wi-Fi network.
  • And the person you’re are calling also must be connected to Wi-Fi and have a FaceTime-compatible device.

Now, you’re ready to make a FaceTime call. Here’s how:

How to Make a FaceTime Call

1. Open the Phone app:
Continue reading…

Basics: How to Turn On Find My iPhone

>

Find My iPhone is now a free feature for anyone with an iPhone 4 or newer, and it’s something you’ll want to have turned on, as it can come in extremely handy—not only does Find My iPhone show the location of your iPhone should it be lost or stolen, it can remotely lock the iPhone, wipe its memory, or have the iPhone emit a beeping sound in case it’s lost between couch cushions. To use Find My iPhone, you’ll need to activate it on the iPhone first. Here’s how.

How to Activate Find My iPhone

1. On the iPhone, tap Settings:

2. Tap Mail, Contacts, and Calendars:

3. Tap Add Account:

4. Tap MobileMe:

5. Log in with your Apple account ID and password, which is the same ID you use to buy apps and music in iTunes. Note that your ID needs to be an email address to use Find My iPhone (if it’s not, go here for instructions on updating your ID to an email address). If you don’t have an Apple ID or account, tap Create Free Apple ID:

6. Tap MobileMe (you may need to verify your account first via an email Apple sends you):

7. Slide Find My iPhone to On:

8. Tap Allow:

That’s it. Once turned on, you can now use Find My iPhone’s features on the web, or via an official app on the iPad, iPod, and iPhone.

How to Use Find My iPhone Using a Browser:

1. Go to iCloud.com and log in:

2. Your iPhone’s location will show on Google Maps:

3. To access more features (remote wipe, lock the phone, or make the iPhone beep), click the arrow in the top right corner:

Now you can rest easy always knowing where your iPhone is.

Be sure to check more of our iPhone Tips.

How to Search for Text Within a Web Page on the iPhone & iPad

The ability to search for a specific bit of text within a web page has long been a sorely missing feature on the iPhone and iPad. Thankfully, Apple added the feature in the iOS 4.2 update. Too bad the iOS browser gives no indication on how to use the feature. But we’ve got you covered:

How to Search for Text Within a Web Page

1. On the webpage you want to search, tap the “Google” Search Bar in the top right corner:

2. Enter the text you want to search for, but do not tap the Search button:

3. Look below the drop-down list, you’ll see text that reads On This Page (X matches):

4. Quickly swipe upwards on the screen:

5. At the bottom of the list that appears on the screen, tap the text Find “Your Text”:

6. Any text that matches your phrase will be highlighted in yellow:

7. Tap Next to travel to matching text. Tap Done when finished:

And that’s it! Not too obvious, huh? Be sure to check out more of our posts on iPhone Basics.

iPhone Basics: How to Turn On Call Forwarding

The iPhone makes it a snap to activate call forwarding. You simply activate it in the iPhone’s Settings. Just follow these instructions (note that the time you talk on a forwarded call will count against your iPhone’s minutes, even if it’s on another phone):

1. Open Settings:

2. Scroll down and tap Phone:

3. Tap Call Forwarding:

4. Swipe Call Forwarding to On:

5. Tap Forward To:

6. Enter a 10-digit phone number:

7. Tap the Call Forward button in the top left of the screen.

8. And that it’s. You’ll have to wait a second for the iPhone to contact and activate AT&T’s call forwarding services for your account (requires that you have a cell signal). When it’s activated, you will see a special call forwarding icon appear in the iPhone’s top task bar:

Note: You’ll only have to enter in the forwarding phone number once, and from then on, just slide call forwarding on or off to activate it for that number. You can, of course, change the number.

Be sure to check out more of our posts on iPhone Basics.